
Repair: Erres HiFi Sound Project 3537 (Vol. 1)

Before I started this Erres, I was loyal to Akai, with eventually three Akai generations of cassette decks behind me, it was time for a broader perspective. So in July 2019 I bought this 'Erres HiFi Sound Project 3537' cassette recorder.
By the way, Erres has been a brand name of the company RS Stokvis & Zn, you may already be able to see/hear where the name Erres originated. In 1966 the brand name became part of Philips. This recorder from the 1970s is therefore also made by Philips.
Although I buy most machines that are defective and repair them myself, this time I decided to leave the tinkering behind and go straight for a refurbished device.
This was not the best choice in the long run and was still able to dive into the device itself to perform a real overhaul....
In the end I can't blame the previous owner, they are old devices and they just have their defects, chances are that he still did well with him and after sale and transport broke down with me.
I am going to tinker with an electrical device, but do not immediately need voltage for this repair, so replacing the belts can be done without risk of electrocution.
July 11, 2019

De Erres comes from a local retro shop where I regularly come for my lust for HiFi and mediums.
Actually, the Erres 3537 came with the accompanying amplifier (Erres 4000 or Erres TA-12000 which I don't remember exactly), I already have enough amplifiers. After some negotiation I was able to buy the tape deck separately for half the original combined price.
Prior to:
The problem actually started after I started recording my first tape on this device, the recording itself seemed to go well but when listening back it quickly became clear that the speed was not as stable as expected. Strangely enough, I hadn't noticed it while playing other tapes normally.
My first suspicion with poorly playing tape decks is always the belt (or belts) that provide the drive. I decided to open it up, I couldn't find a manual anywhere and had to make do with experiences gained with other cassette decks. Although opening the warranty would expire, I did not expect a difficult job and I dared to take the risk...

Here's a close-up of the belt. On the left you see small tears, a sign that the belt is past its date. Probably the culprit of my failed recording!

Here the running gear, the belt of the flywheel can be seen hidden behind a complicated construction. To get this belt off I have to disassemble the entire running gear. But before I can do that I have to remove the circuit board first, otherwise I can't even get to the screws.
In short, the whole device has to be taken apart.....

So I looked on Ebay for belts. For € 18,90 I was richer this Belt Set 'für' Erres
I was eventually able to replace the large belt for the flywheel drive, the small belt is for the 'tick counter'. For this I have to disassemble the device even further, I didn't feel like it. But after replacing the big belt and reassembling the unit, it turned out to be even worse than before!
I didn't understand what had gone wrong. I had no screws left. The belt had been replaced and matched in size with the old one (which I have checked). I played with the engine speed a bit but that didn't help and was not the cause.
After working all day, I put the device aside to fix up my other devices first. We are now almost two months later. With renewed hope, I'm going to look for what went wrong, and show you how much work it is to replace these belts.
Continued repair:
So here he is again. Although I couldn't find a manual, I did find a note on the internet from a hobbyist with instructions for replacing the belts, it seems (as I had already experienced) to replace the belts indeed not an easy job.
September 7, 2019


Shopping list:
- Phillips screwdriver (PH2)
- Screwdriver flat (2.0mm)
- pinch
- Ty-raps
- Paper clip (distorted)
- Compressed air
- Wet wipes
- 96% Alcohol (Ketonatus)
- Cotton swabs
- Tray for screws

Not a requirement, but this beautiful late summer weather is the motivation to pick up this job again today. I should also mention that my faithful reading lamp has died, so I have less light than usual at the workbench. Not all photos will therefore be as sharp or clear, apologies for this inconvenience!
To start with, I have to disassemble the housing and bottom plate, I also remove the front so that I can clean it. In the photo above I had already partially started disassembly. The housing comes loose with four screws on the sides.
The front is secured with screws at both the top and bottom. The front is also held back by the buttons on it. The rotary knobs are fixed with friction, you can pull these loose from the front with appropriate force, but first turn all knobs all the way to the left or 0 (the reason for this will be discussed later). toggle switches are placed in the middle position to prevent damage.
The bottom plate is secured with seven screws, four of which are the feet of the device.
Now that these parts have been removed I can start with the running gear.

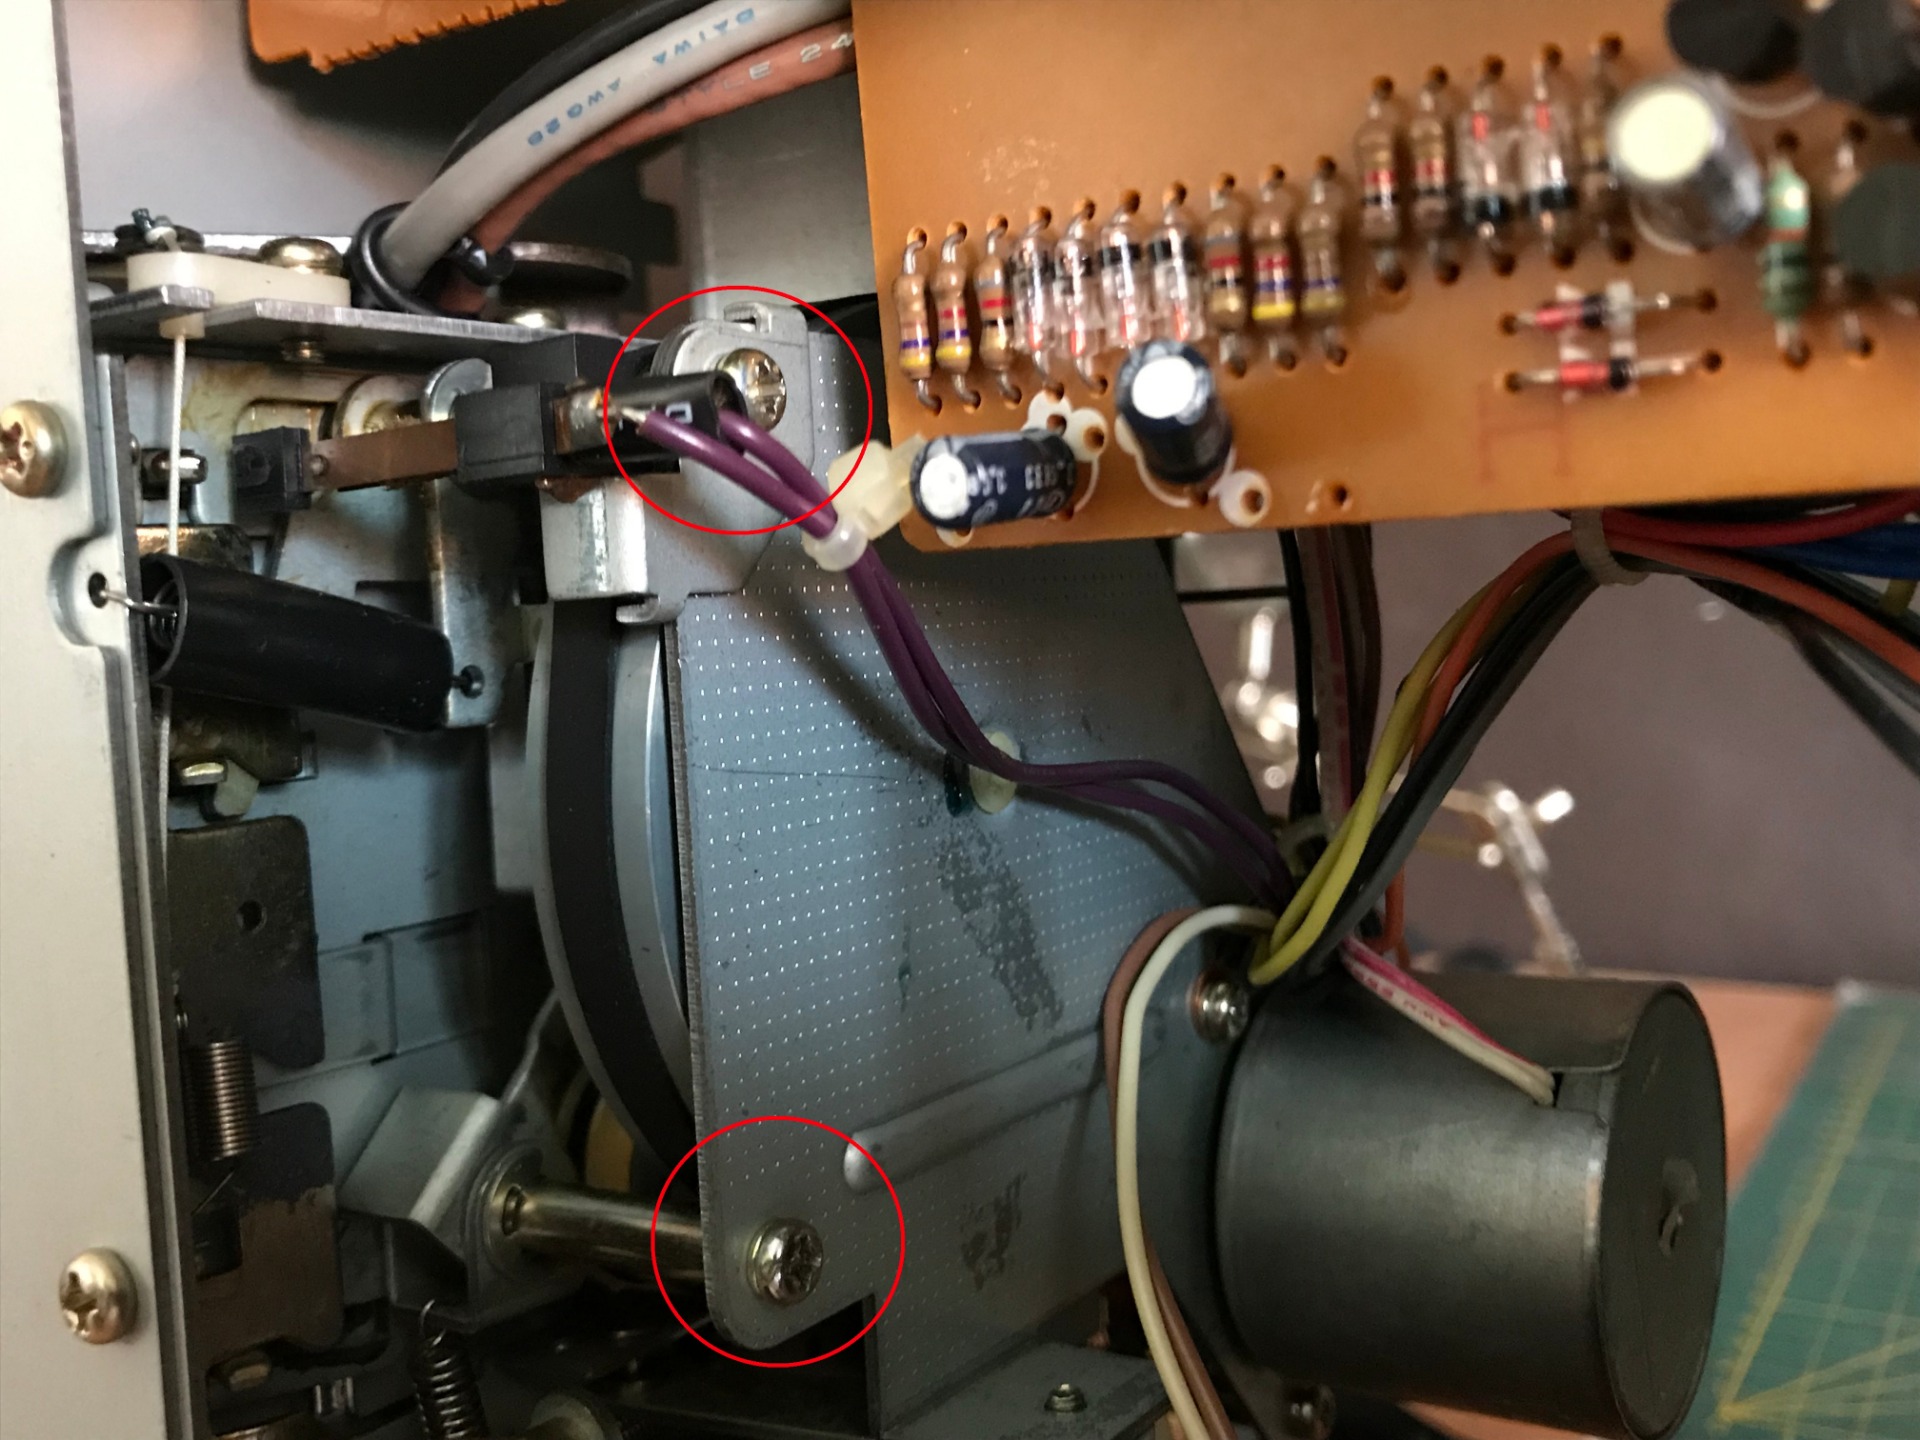
You can see that the running gear is attached to the top with two brackets as well as two screws at the bottom, you can click on the photos. As soon as these are released, the running gear is not yet freed, but you are already well on your way.

I cannot loosen the screws on the underside of the running gear without also loosening the back of the machine itself. This is not indicated in the instruction.
We'll dive seven screws deeper into the machine when removing the back, luckily the screws are almost all the same so less chance to confuse them. Wait a minute!

Before I can take off the back, I have to take these three plastic studs into account, you can remove them with your nail or flat screwdriver. The back can be taken off and I can finally loosen the screws of the running gear.
Below is a summary of the steps that I now have to perform to get the running gear loose:
Yet I achieve little with this, the cables are so short that I cannot remove the running gear from the device, but I do have more freedom of movement now.

When disassembling the brackets at the top, a copper guide is also included, this guide is intended to keep the drive belt in place. when I replaced the old belt earlier, I had to readjust it, because the new belt was slightly wider than the old one and should not touch the guide during normal operation.

Here is a complete overview of parts that I have released. Anyone who has read my other repair pages knows that I don't always use the screw tray to put all the screws in... It's rather to keep them apart, since most screws are the same I don't really have the tray required.

So! now that the machine is half apart I should be able to reach everything without having to disassemble it further...

In the meantime it has cleared up outside, the sun even dares to show itself. Time to take a short break to go shopping!
And so in a flash this break is over, shopping is done and I can focus on the repair again.
Although the device is now disassembled, I haven't mentioned the cause of the problem yet, I secretly found it when I loosened the bottom plate!

We're looking at the belt here, when I replaced it I accidentally put the new one over one of the fasteners, because of this it slips a lot and can't maintain a stable speed.
Although the running gear does not actually have to be removed from the machine for this, I still want to try to replace the other small belt as well.
so as you can see it was my own mistake to mount the belt incorrectly, but on the other hand it is nice to know that this is the only cause.

To make some extra leeway I cut off one of the Ty-raps. I'll replace it when I put everything back together.

If I'm going to loosen the back plate of the running gear I have to keep these screws (left) separate, they are longer and have a small spring washer that pinches the screw to the frame.
The screw on the right is one of many that I take out of the unit, they are all equal to each other. Actually they are not screws but bolts, there are even no screws in the device at all. This is a small reference to the build quality of the deck.

By loosening the back plate of the running gear, I can easily adjust the belt. Time to replace the small belt!
Now that both belts have been replaced I can put the device back together again, this is also not without some effort.

First I fasten the running gear again, when putting back the brackets I have to bend the copper guide again so that it does not touch the belt.

putting this screw back is the hardest part, everything has to be right the first time and you don't have much space to keep everything in place, so I couldn't manage without opening a dictionary full of inappropriate words...
Also don't forget the three screws on the bottom!


I now reassemble the device, but before I can reattach the back of the device I first have to put this small bracket in place, it clamps the DIN connection against the frame.

Now that everything is back together, it's time to test it!
I had already played with the speed of the motor before, the music is now played way too fast. After adjusting the motor, there is still fluctuation in the speed itself (they call this 'wow'). I had also adjusted the adjusting screw of the flywheel, the flywheel is clamped too hard and slowed down, loosen it a bit and everything seems to be good again.
As a final check I place a tape with an intro melody, on the computer I play this melody simultaneously, so I can hear whether the speed is stable and whether it is running too fast or slow. You can of course also do this with a song that you know well.

Such a shame again, the device is almost completely assembled until I find two small plastic studs, these apparently came loose during the repair, for a moment I feared that I could take the device apart again, but luckily I have to see these studs from the back press it back in. I immediately put the studs that go on top of that back in.
Finally, I clean the device, with a damp cloth I wipe the many fingerprints from the front, the bottom plate is dusty, so I wipe that too. Then I blow the circuit board free of dirt and dust with compressed air (it has been open for two months).
The parts where the tape runs along also need to be cleaned, I do this with 96% alcohol and a cotton swab.


The Capstan was so dirty that alcohol and cotton swabs alone were no longer enough, I finally managed to get these clean by scratching with my nails, any other form of sanding is not recommended, you damage the Capstan and so does the Pinch Roller, and straps! If you don't have nails, stop biting your nails... Or find another method to get rid of this kind of mess, perhaps a more aggressive means?

I would come back to the rotary knobs, you had to set them all the way to 0 before you remove them, this makes it easier to put them back without being 'out of time'. Otherwise there is a chance that you will have a deviation in display and setting. Before I put these buttons back, I turn the axes until they are really all the way to the left, so you know for sure that 0 is really 0.

And so the proud 'Erres HiFi Sound Project 3537' is back where it belongs, of course I couldn't resist putting a tape in it right away!
Replacing belts, re-adjusting the device and polishing everything, so this device can (hopefully) take it again in the coming years!
September 7, 2019
Related pages:
Erres 3537 (Vol. 2) Repair
Compact Cassette Information
Compact Cassette Repair
New old tapes! blog
Compact Cassette Gallery