
Repair:Marantz SD1000
The Marantz SD1000 is a 1979 cassette deck, one from the middle class. Initially bought as a snack to tinker with. This considering I am waiting for parts for my other outstanding repairs. Nevertheless, I seem to have more work on it than expected. A simple cleaning ultimately leads to a complete repair of the deck.
03 November 2019

For a deck from '79 there are remarkably few signs of use, no scratches or pits! However, it can be seen that it has been used. There is a thin layer of nicotine stuck on it and you can clearly see which keys are often used because of a layer of caked dirt on the keys.

The left part contains the deck itself with plastic piano keys, tick counter and connections for a microphone and headphones.

On the right side we find the large VU meters on an aluminum background. with the small plastic buttons underneath you can choose from Type I or Type II cassettes, Bias and Dolby noise reduction. The way they refer to the type of tape is striking. Normal/Special. Below it you will find two rotary knobs with which you adjust the volume for recordings. Finally, on the far right is the Power button. Again striking considering that this button is on the left of all other devices in my collection.... During testing I regularly want to switch on the device on the left.

At the back we find the necessary connections, Tulip inputs and outputs accompanied by a DIN connection. At the top right, the fuse can be taken out, the voltage can be adjusted below, on the far right is the connection for a power cord (Type C7) I personally prefer this type of removable power cord. It is also a sign of quality.
Before we start, a short video where I test the device. He only works with some minor cures. It makes some noise when playing (and I'm not talking about the music), as well as having some drops and wow. It also does not turn off automatically when rewinding. The sound quality itself is crap because I play it through a cheap speaker.
You may notice that I am somewhat nonchalant with the device. In the background people were hammering diligently against the wall, causing my recordings to fail several times. I was already a bit tired of this attempt... Anyway, let's get started on the repair.
Don't forget the tool list!
- Phillips screwdriver (PH2)
- Locking pliers large, small and fine
- Tissue
- Tray for screws
- (Ball bearing) grease + Cotton swab
- Fine (sewing machine) oil + pipette
- Contactspray
- 96% Alcohol (Ketonatus) + Cotton Swab

For those who haven't understood it yet, I'm going to tinker with a device that works on 230 Volts. The device does not have to be switched on when I start working with it, as a precaution remove the cord from the socket and best also from the device. Note that the device has also been switched off for a while before you start, there are parts in it that remain electrically charged for a while. You should not run the risk of shock or worse when following this repair. Nevertheless, everything is at your own risk and I am not liable for any shock or damage...

Let's take a look at his inner beauty. After I have loosened three screws on the top and four screws on the sides, I notice that it is still held on the sides by six (three per side) plastic studs. By bending the housing outwards I can get it loose. Don't bend it too far, otherwise you risk deforming the housing.

Typical of the 1970s are the many hand-soldered wires. With modern devices, the wires are attached with plugs or are completely incorporated into the printed circuit boards.
Still, I think this deck still looks remarkably good on the inside, not a dust to be found!

The inside view is mainly to see how the running gear is. The straps are still intact and do not appear to be deformed. The saleswoman stated when purchasing that the belts would have been replaced. But from experience I can tell that this is not always the truth. Still, I dare to use these belts, provided that everything actually still wants to run properly.

There is a sticker on the engine with the production date of the engine itself. March 26, 1979. It runs on 12 Volt DC and there is a type number described. Most interesting is a built-in speed control that you can recognize by the hole in the housing above the sticker.

Let's zoom in on the flywheel for a moment. Apparently I'm not the first to tinker with the device! The previous handy Harry turned the flywheel adjusting screw 'lurp' (weathered), thanks Harry....
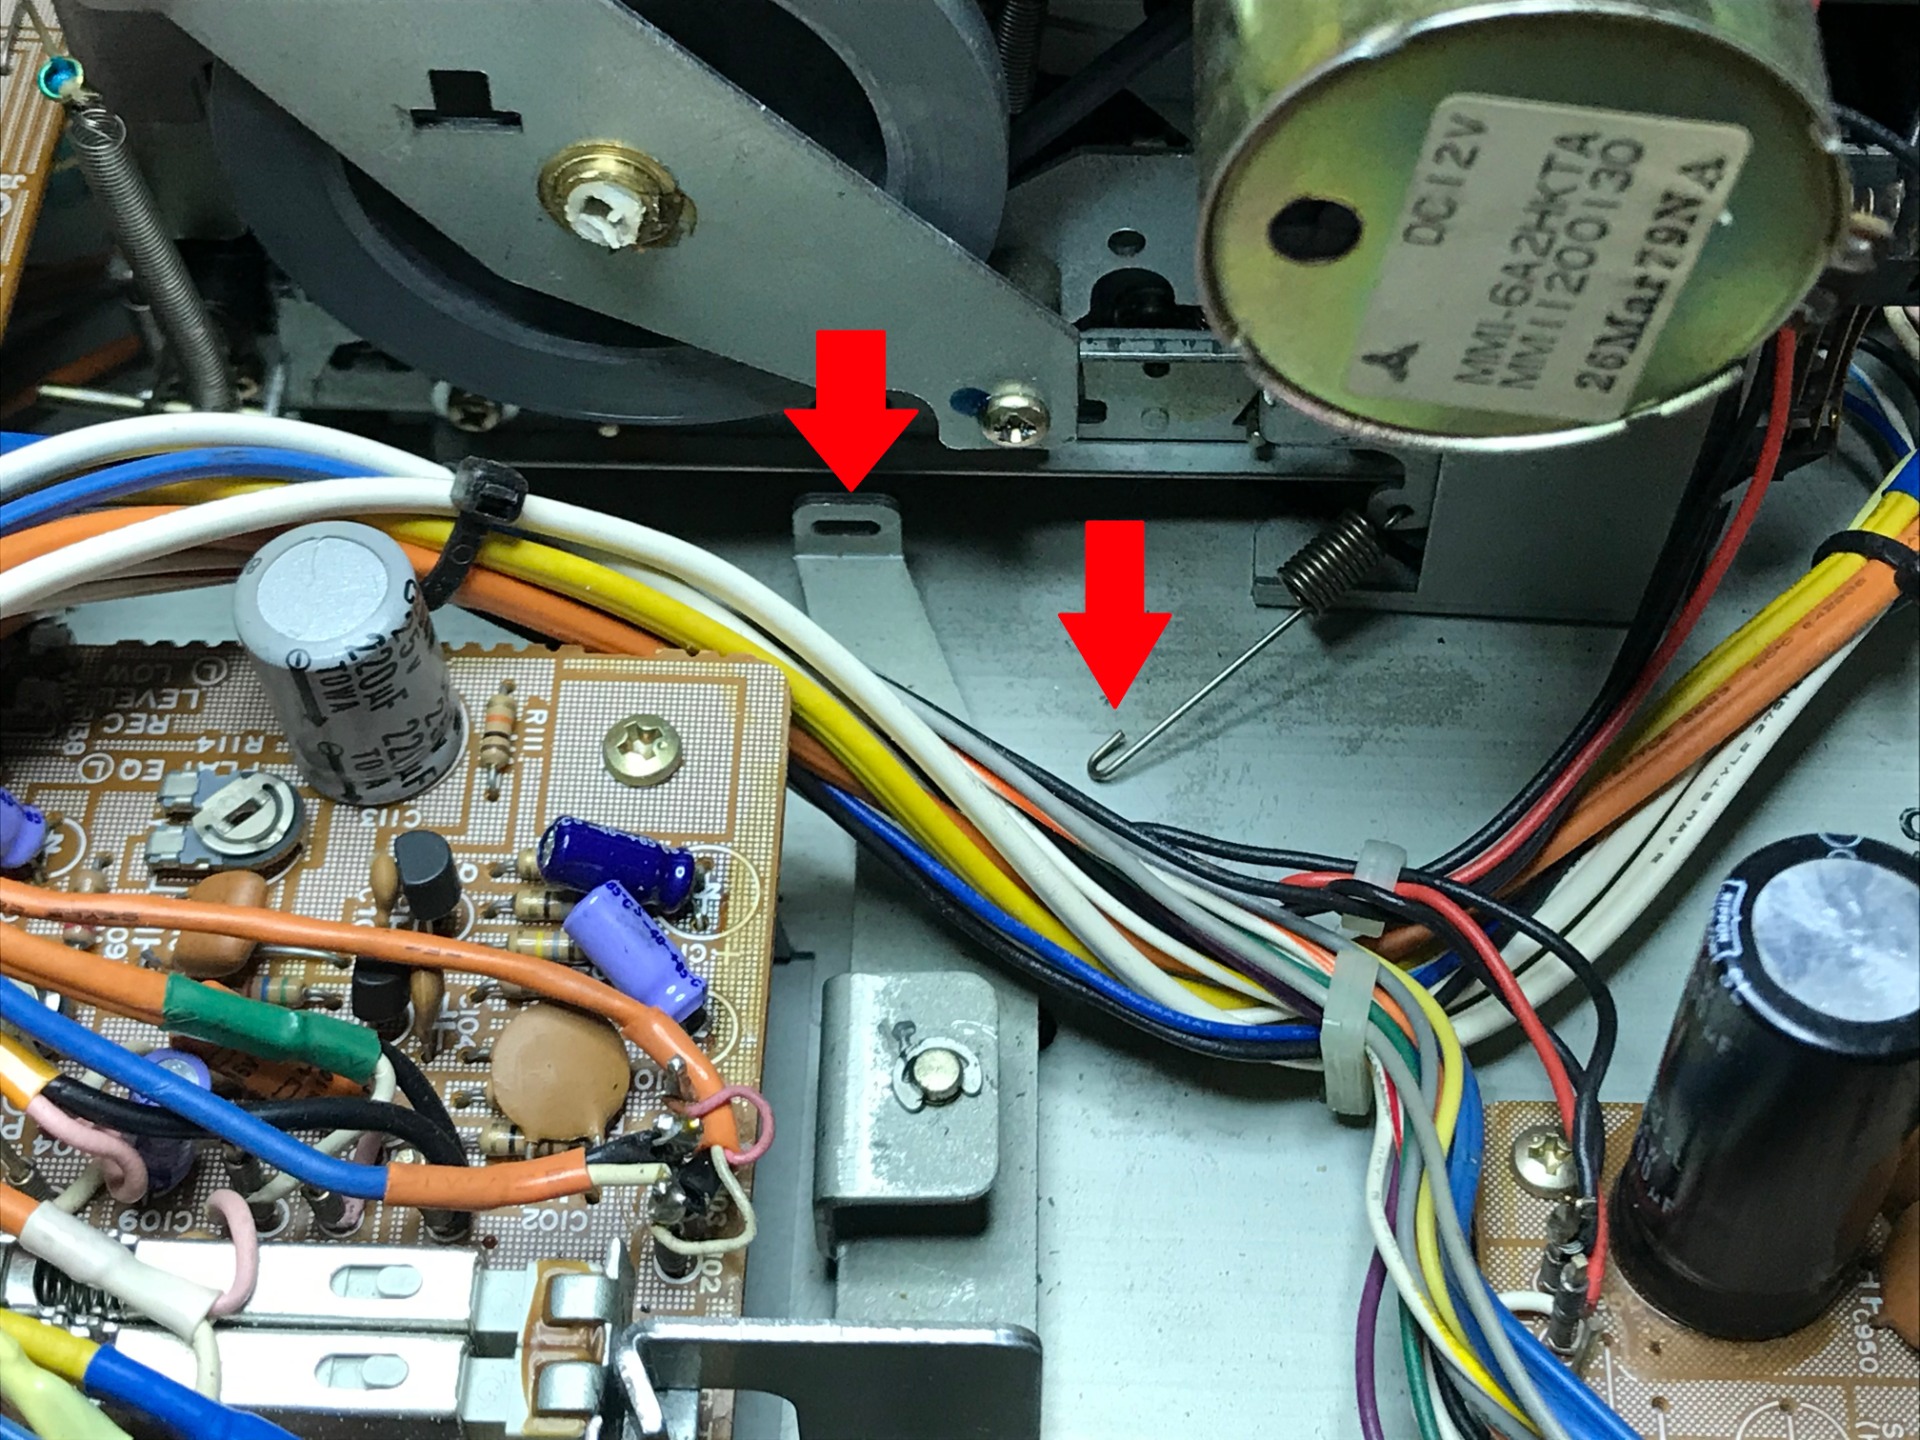

The same hobbyist has left more traces. The loose spring serves to activate the recording function. Perhaps the previous owner was afraid to accidentally press the record button and loosened it as a precaution, although I suspect he simply forgot to fasten it after a service.

During playback, the device also makes a lot of noise, by listening and watching carefully I can determine the cause. This metal O-ring rattles back and forth as it spins. Chances are that the flywheel is too loose, in which case I would have to tighten the broken set screw. On the other hand, this can influence the speed again, because with the adjusting screw you also determine your speed by means of friction on the flywheel. I'll see what happens if I tighten it up a bit.

Before I can reach the adjusting screw, the back wall of the device has to come off. I start with these plugs that are in between the Tulip connections. You can usually get them off with your fingernails but they are so tight that I need locking pliers.

There are three small screws on the underside of the back, they also need to be loosened. In the meantime, I'll give you a view of the side, because this device has a hidden trick!


By loosening the screws one turn, I can fold down the entire back wall! The Marantz designers get bonus points from me here!

The adjusting screw is too weathered and can no longer be operated in the normal way, in the end I manage it with locking pliers but I didn't take a picture of it. The ring that used to rattle so much now no longer makes noise, but at the same time the music now sounds awful and too slow, the flywheel is braked too much by the screw. Finally I manage to solve the problem by dripping some fine oil on the ring, the oil dampens the rattling of the ring. Problem solved! I manage to put the adjusting screw back into its old position with difficulty.

Finally, I apply some grease to the gearing inside. The old grease has dried up. A small dot is enough, I let the running gear run for a while to spread the grease.

Now that I'm done with the inside, it's time for the outside. The rotary knobs are fixed with friction, so you can pull them off in no time. This also has to be done before I can take the front off.

The front comes off by loosening two screws on top and three on the bottom. Now I can more easily access the deck itself.

The window in front of the deck comes off easily with the two screws on the front. I do notice that I am missing a ring, the rings ensure that you do not scratch the plate when tightening the screws. Smart, but it's too late for the left.

The metal ornament in the deck is bent and clicked into place, I can't loosen it without the risk of breaking something. Fortunately, I'm already good at it.

With a large locking pliers and a tissue for protection I bend the frame straight again.

I can't get it straight anymore but it looks better than before.
Furthermore, the door opens too slowly, which can be seen in the video I showed earlier.


To increase the speed of opening I can do several things, there are two springs in it that are kept under tension, by bending the one shown in the photo slightly I can increase the tension. This makes the door open a little faster.

I use contact spray to clean all connections that have to do with sound.

Time for the big cleaning! Starting with the rotary knobs. They are not really that dirty, a thin layer of nicotine and some caked-on dirt. I remove this with a cheap all-purpose cleaner in combination with a viscose cloth.

The piano keys are also stuck with friction and come off easily without screws. These too are full of fingerprints, dirt and nicotine. I treat them the same as the rotary knobs.


I think the buttons are missing something. I made the groove black with a special marker. Personally, it looks like they are meant for that. After all, the record button is also red, why should I leave the other blank?

I also mark the rotary knobs, so it is just a bit clearer how they are adjusted.

Of course not to forget, I still clean the heads with 96% alcohol (Ketonatus).

Before I put it back together, I take a quick look at the stain on the housing. often the soot is caused by heat, but in this case I suspect it is nicotine. The stain is at the level of the deck itself and therefore comes into contact with the outside air. Had it been above the transformer it would indeed have been soot. Cleaning is of little use, it has eaten into the housing, I would have to sand this off. Too much effort. You can't see it from the outside, do you?

I wasn't lying when I said this was a snack. It's reassembled and looks a lot fresher now! It also works almost as good as new. By almost I mean everything works except rewind. The belt that takes care of the rewinding is slipping, a sign that the belt still needs to be replaced. This means that I will of course replace all belts. But that will be discussed next time. Some more photos for now.


With the Marantz SD1000 in the collection, the counter is at three. The Erres 3537 (middle deck) does not work properly (despite an earlier repair). The Pioneer CT-F1000 at the bottom is still waiting for parts.
By the way, you can now clearly see that different parts of the Marantz are mirrored, can you see which ones?

So for now, the Marantz has the honor of playing as the main deck. As soon as the Erres and Pioneer are fully operational again, I will see what I do with these. It's a nice deck and I could sell it for a profit if I really wanted to. But for now it will remain in my possession for a while.
Nov 3, 2019
21 november 2019
Because the forward and reverse did not work properly, I ordered new belts afterwards. Here's the addition to the repair with the replacement of the belts:


With the new belts I also immediately ordered a special (dis)assembly tool, this should make it easier to replace belts that you normally cannot reach. Wipes are also included, dipped in alcohol. Handy for cleaning the wheels on which the new belts will be fitted.


We start with the belt for the flywheel, for this we need to loosen the bracket that sits over it. The screw at the bottom right is too weathered to loosen and is stuck. luckily I can bend the bar to the side far enough to take the strap off.

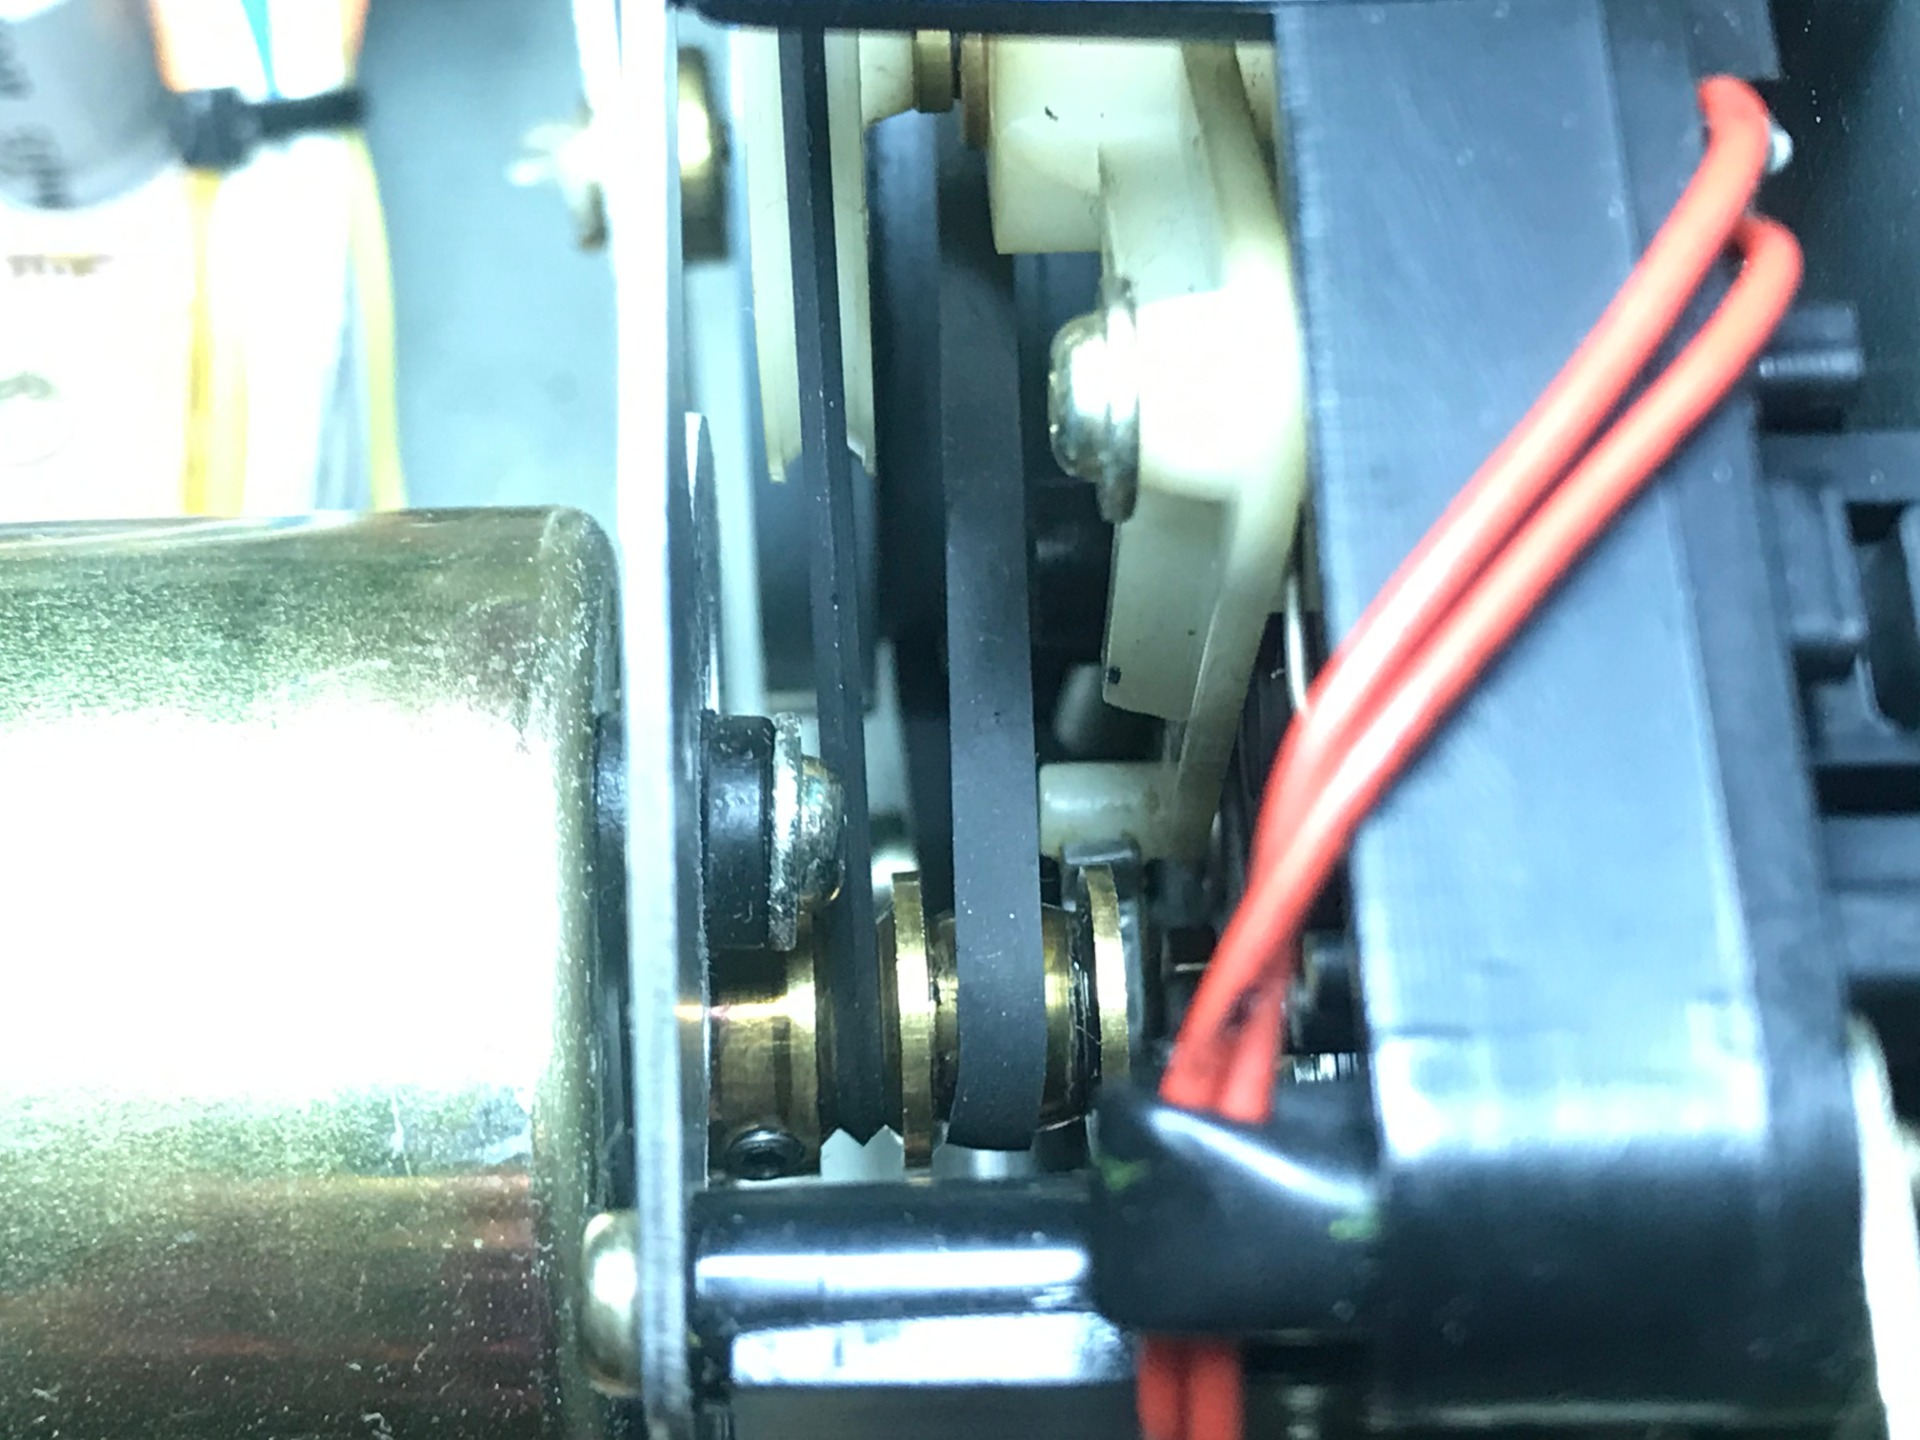

The belt (the thick one) runs from the engine to the flywheel, it is not difficult to loosen, especially with the help of the tool. After removing the belt there appears to be a lot of junk on the shaft of the motor, I clean it with 96% Alcohol (Ketonatus)


We continue with the drive belt for playback, it runs from the motor to a shaft that drives the whole. It is important that the flywheel belt is already removed, otherwise it cannot come off.

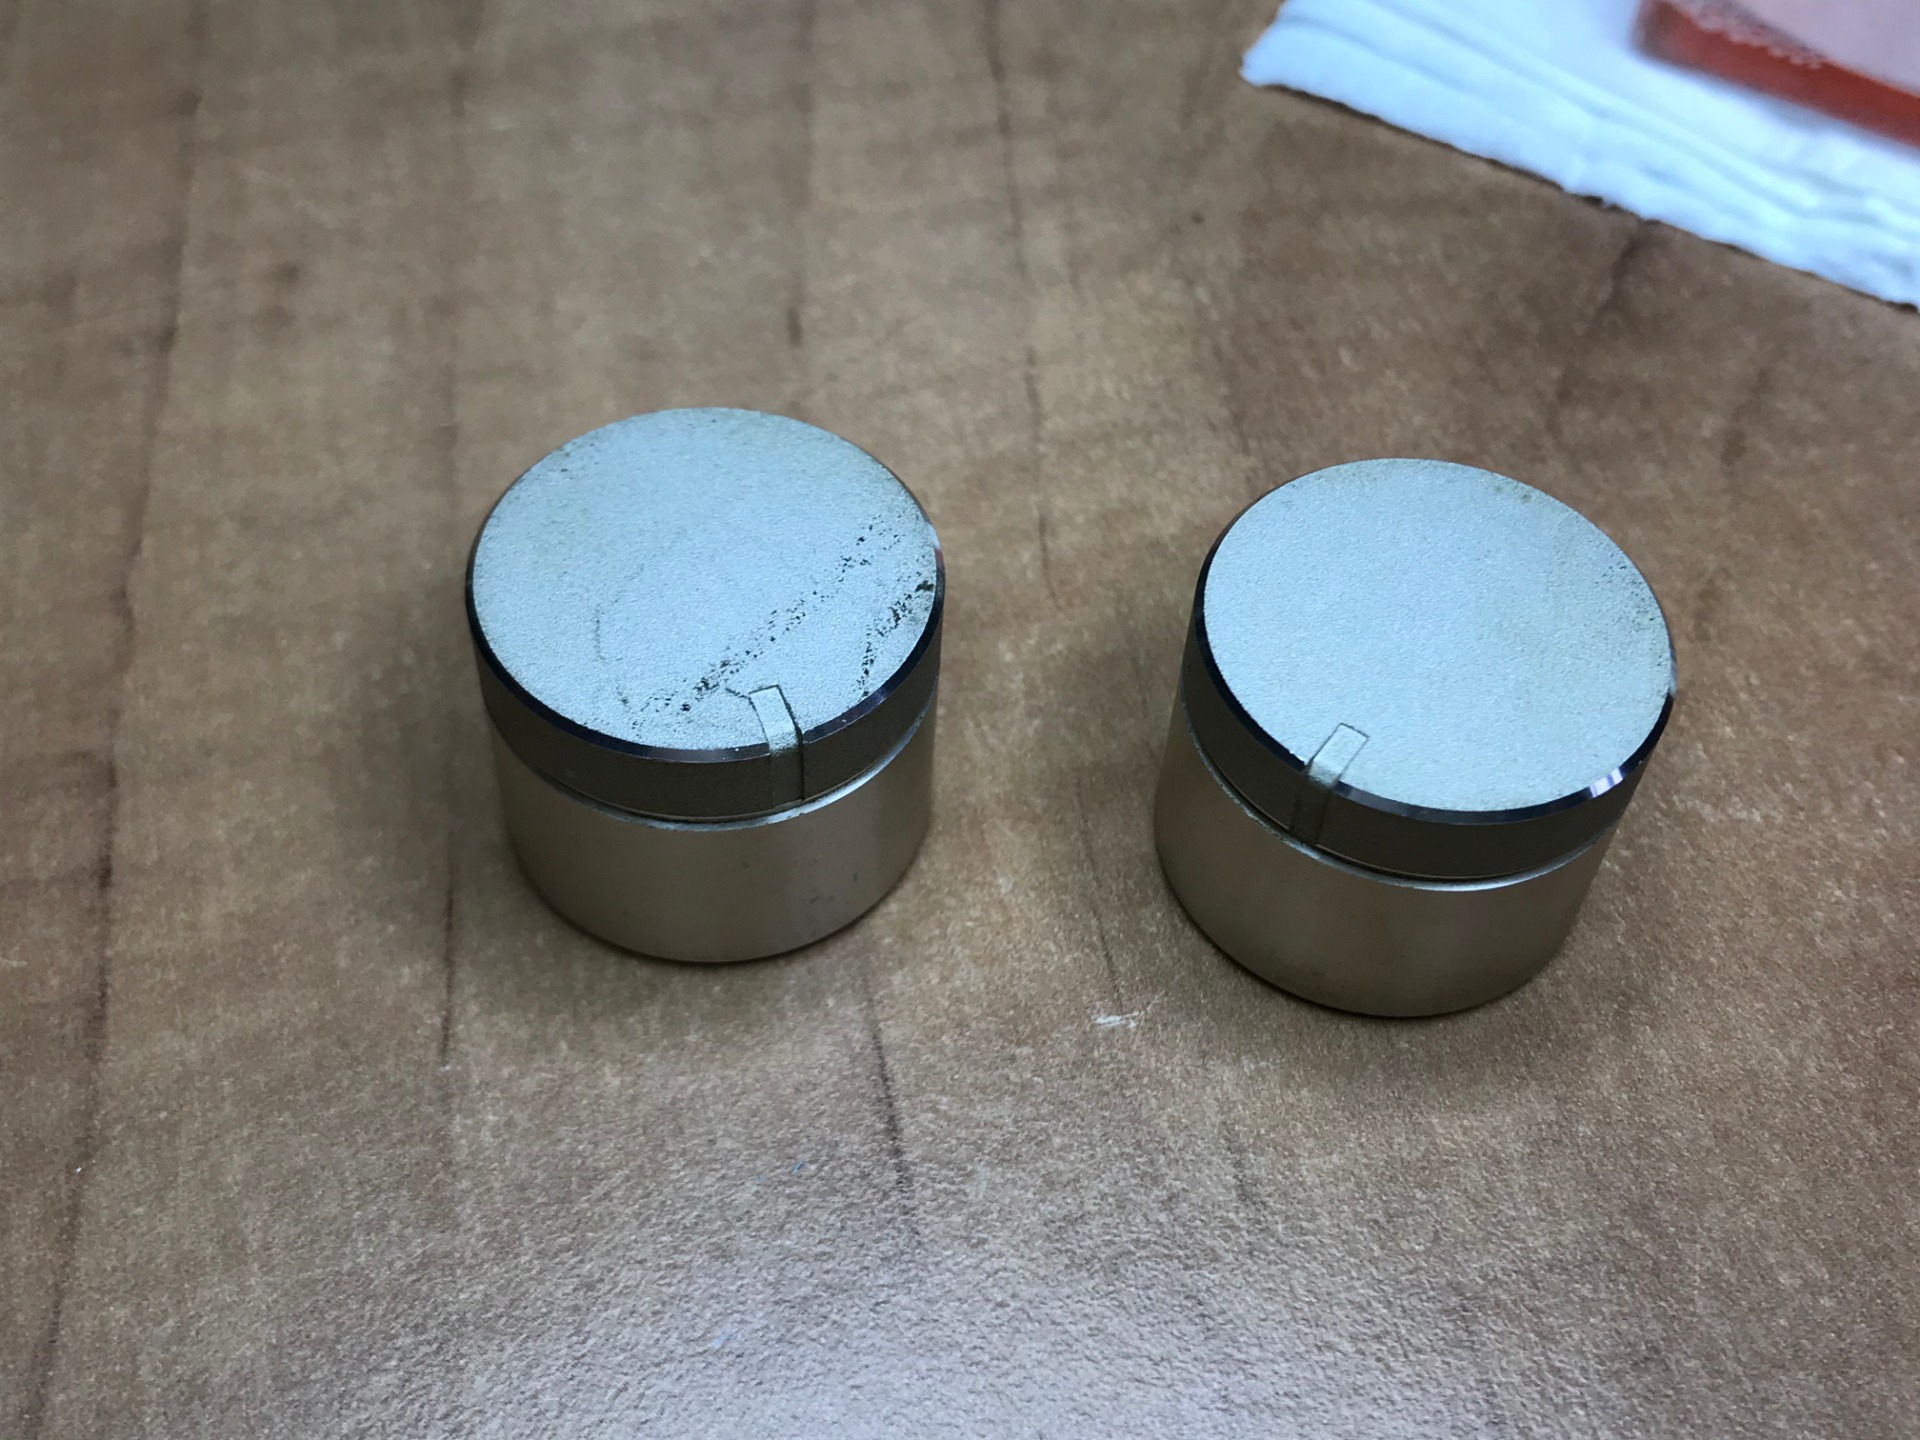
On the left you see the new belt, on the right the old one. He is clearly distorted which can lead to 'wow' and 'flutter'. Something you can hear in your music.


This wheel was also dirty, and I wiped it off with the wipes that came with the new belts. After this, placing the new drive belt is a simple job.
I have already replaced the flywheel belt in the background, but had to loosen it again to be able to mount the drive belt. After that, he can also go back in place. Do not forget to screw the bracket back on. This determines the friction on the flywheel.

So far everything has been easy, but we still have one belt to go. The tick counter. It is the least important of the three but the most difficult to replace.....

First of all you have to remove the door at the front, first you remove the glass with the two screws that are on the front. After this, you loosen four screws on the sides, after which the entire door comes loose and falls apart like one puzzle...

Handy to thoroughly clean the door, less convenient to reassemble.

The belt is hidden behind the left shaft that drives the tape. The panel has to come out for this. So I start by loosening the two screws holding it.

Now the entire front has to come off, there are three screws at the bottom that hold it in place.

There are also two more on the top, when the screws are off you remove the buttons for the recording volume. The front can then be removed.

Now we are going to detach the drive itself from the deck. Start with the two screws that secure to the top of the running gear (one on each side).
Also at the bottom two screws have to be loosened, make sure that after this the running gear can move freely, so stop it when loosening.


Although the running gear is still attached, we can push it back far enough to remove the panel from above. Be careful not to bend the running gear too far back, otherwise the metal will deform!

There it is, the replacement is now done in no time.

After replacing the belt, we put the panel back and fasten the running gear both above and below, make sure that the buttons are still easy to press, because they have little room to move and can get stuck after tightening the running gear yourself.
Also replace the front of the cassette deck and screw it down both at the top and bottom.

Before the door can be put back, you have to check that the holders are in the same position as shown here.

Put the door back together, when putting it back you have to make sure that the door is properly put together, otherwise the screws will not come out properly. Then replace the window as well.

Check whether the straps are properly seated and play a test tape if necessary. To do this, place the cover back on the machine before you put voltage on it. If it plays too fast or too slow, remove the voltage again and adjust the potentiometer on the back of the motor with a flat screwdriver.

To determine the speed, it is useful to play a known song on the tape and play it on the computer at the same time. This way you can hear if there is a difference in playback speed. Adjust the potentiometer until the music is played properly.

Almost every deck that has stood still for a while has to run for a while to make everything work optimally again. I put an empty tape in it (without tape) and let it play for an hour on fast forward, fast rewind and play. In this way all movable elements are equally discussed. After this I place a tape of which I can dream the songs. This way I can hear if there is still fluctuation in the speed. After these tests, the Marantz SD1000 is completely ready for use again and this repair is coming to an end.
24 november 2019
Related pages:
Compact Cassette Information
Erres 3537 Cassette Recorder Repair (vol. 2)
Erres 3537 Cassette Recorder Repair (vol. 1)
Compact Cassette Repair
New old tapre! blog
Compact Cassette Gallery