
My Experience with Reel to reel Recorders

This blog is about my experiences with tape recorders, I've had a few to fiddle and work with and learned a lot from them, I think it would be nice to share some experiences.
To start with, there have been many different (good) brands on the market, including: Technics, Pioneer, Teac and more. But Akai has my preference in this.
My first tape recorder is an Akai (seen above) and I have continued that tradition. They are not top models but are solid and reliable, parts are still reasonably available and the entry costs are not excessive.
Still, a tape recorder is an expensive and complicated medium to work with.
Tape and empty reels are often not cheap.
You can score them at thrift stores or flea markets, but are often of poor quality or worse, the tape sometimes even breaks when you try to use them.
In the end I was able to buy new tapes for a reasonable amount via a second-hand website.
Here's a brand new 40 year old tape


And here's one that is ten years older, this is a used one.
Most tapes you come across are 'Ferro' (iron oxide) tapes, there are better grades but you won't find them quickly unless you consult the internet for this. Over the years it can happen that the coating comes off, causing the tape quality to deteriorate quickly. They literally call this "Shedding".
Finally, some are to the point where they fall apart in your hands or break continuously during play.
Of course, age is the biggest culprit, damp attics and basements the second.
Badly wound tapes can suffer from slip, this does not directly damage your tape, but it does affect the playback quality. This is because the reel has to be pulled tight continuously and therefore plays stuttering. Tapes also become sticky (possibly due to moisture). You can hear this through your music and it sounds like someone is scratching their nails over a chalkboard. Sometimes the reel if put to a complete stop because of this.
I have a good example of this sound with a cassette tape:
There are techniques to get a reel back to normal, but consider it lost. If you have a tape that gets even slightly tacky, you can be guaranteed it will get worse! So digitize important tapes the first time you play them. The techniques that can make a stuttering reel work temporarily are complicated. One of these techniques is called 'Baking' (literally baking) you bake as much moisture as possible over a long period of time, this is a time-consuming process and is rarely a permanent (or at best working) solution. So don't do this yourself and go to someone who has knowledge of these techniques (I'm not going to risk it either, it's too much effort).

See my former pride here! I scored this indestructible Akai for €30 at a local flea market! Somewhere in 2013.
Setting up a tape is quite a puzzle, you have to pass the tape through different parts by hand and rewind it on the other reel, the latter is a trick that you have to learn to do right.

View of the heads without the hood. the tape runs through three heads, from left to right: The Erase, Record, and Playhead. You should clean these regularly to maintain good quality and not to wear out your tapes excessively.
This is what you get when you play bad tapes, you have to clean your heads after every use. The same also happens with new tapes, but often only once during 'play in'. The sound quality lowers sharply with dirty heads.
I use 96% Alcohol and cotton swabs, and check the other parts the tape comes in contact with as well.
It may not be easy to see, but the previous owner was a smoker. I cleaned the front plate a few years ago, there was adhesive tape residue on it. The buttons were simply dirty with caked-on dirt.
I've checked the inside (seen below), the reels are still good, the mechanism is OK, the rubber wheels have not dried out. Even the 'tick counter' at the bottom left works well. There is nothing to complain about. I have been very lucky with this device.

There is one hidden defect that I indicate here with the red arrow. Many Akai machines share this problem. It contains cast aluminum elements, which can crack after about 40 years. This one has small cracks.
If they break, the device becomes inoperable. The only solution I've found so far is to make them from hardwood! Which doesn't seem to be easy.

I ended up recording and playing many tapes with it. It has always been a centerpiece in the collection, but after 6 years I said goodbye to it.


Some bonus photos from the manual.

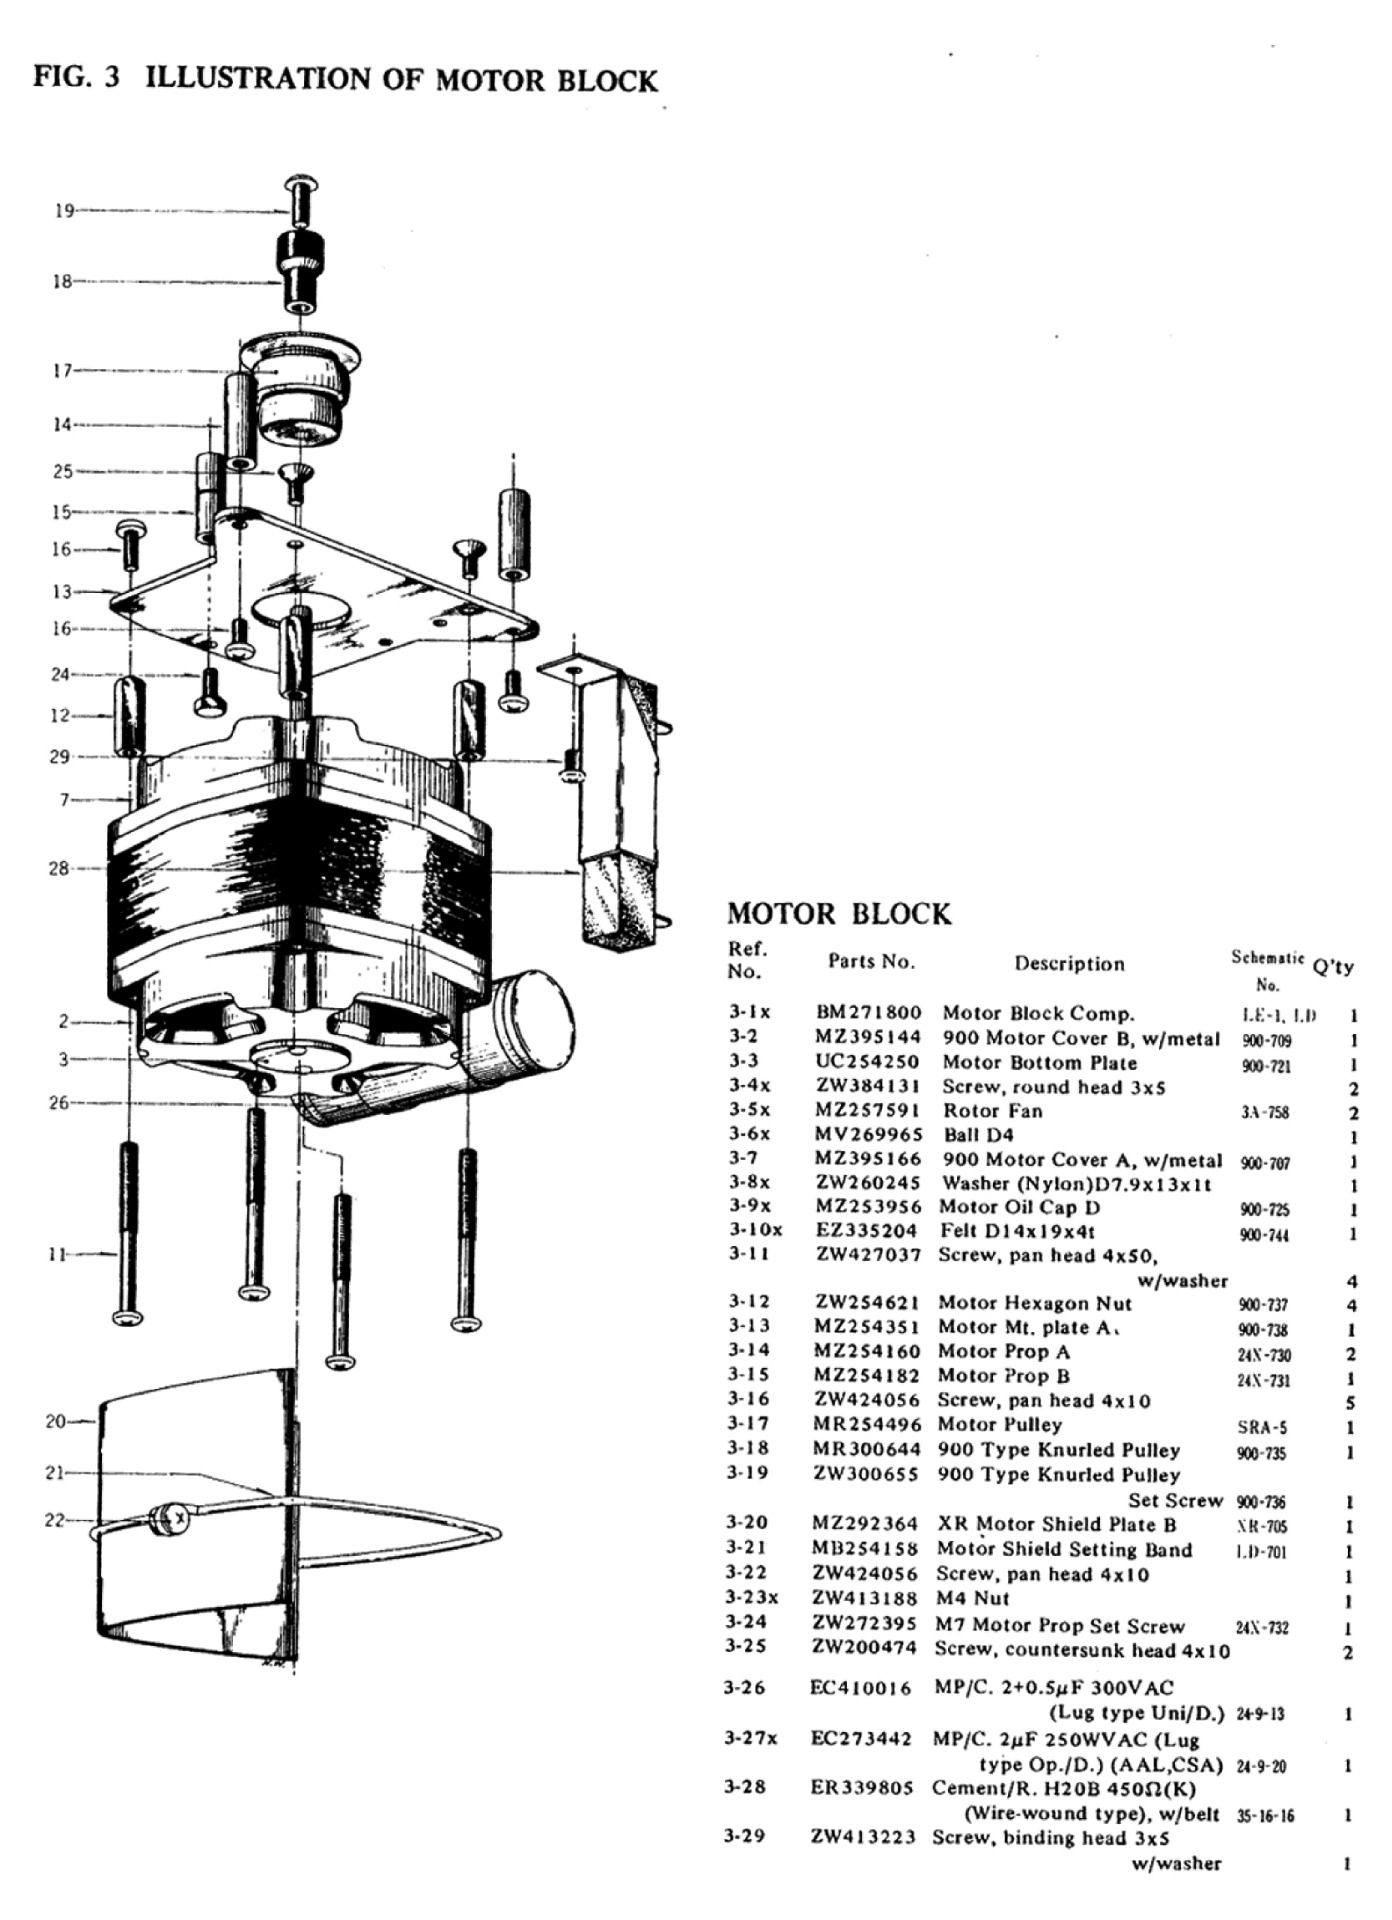
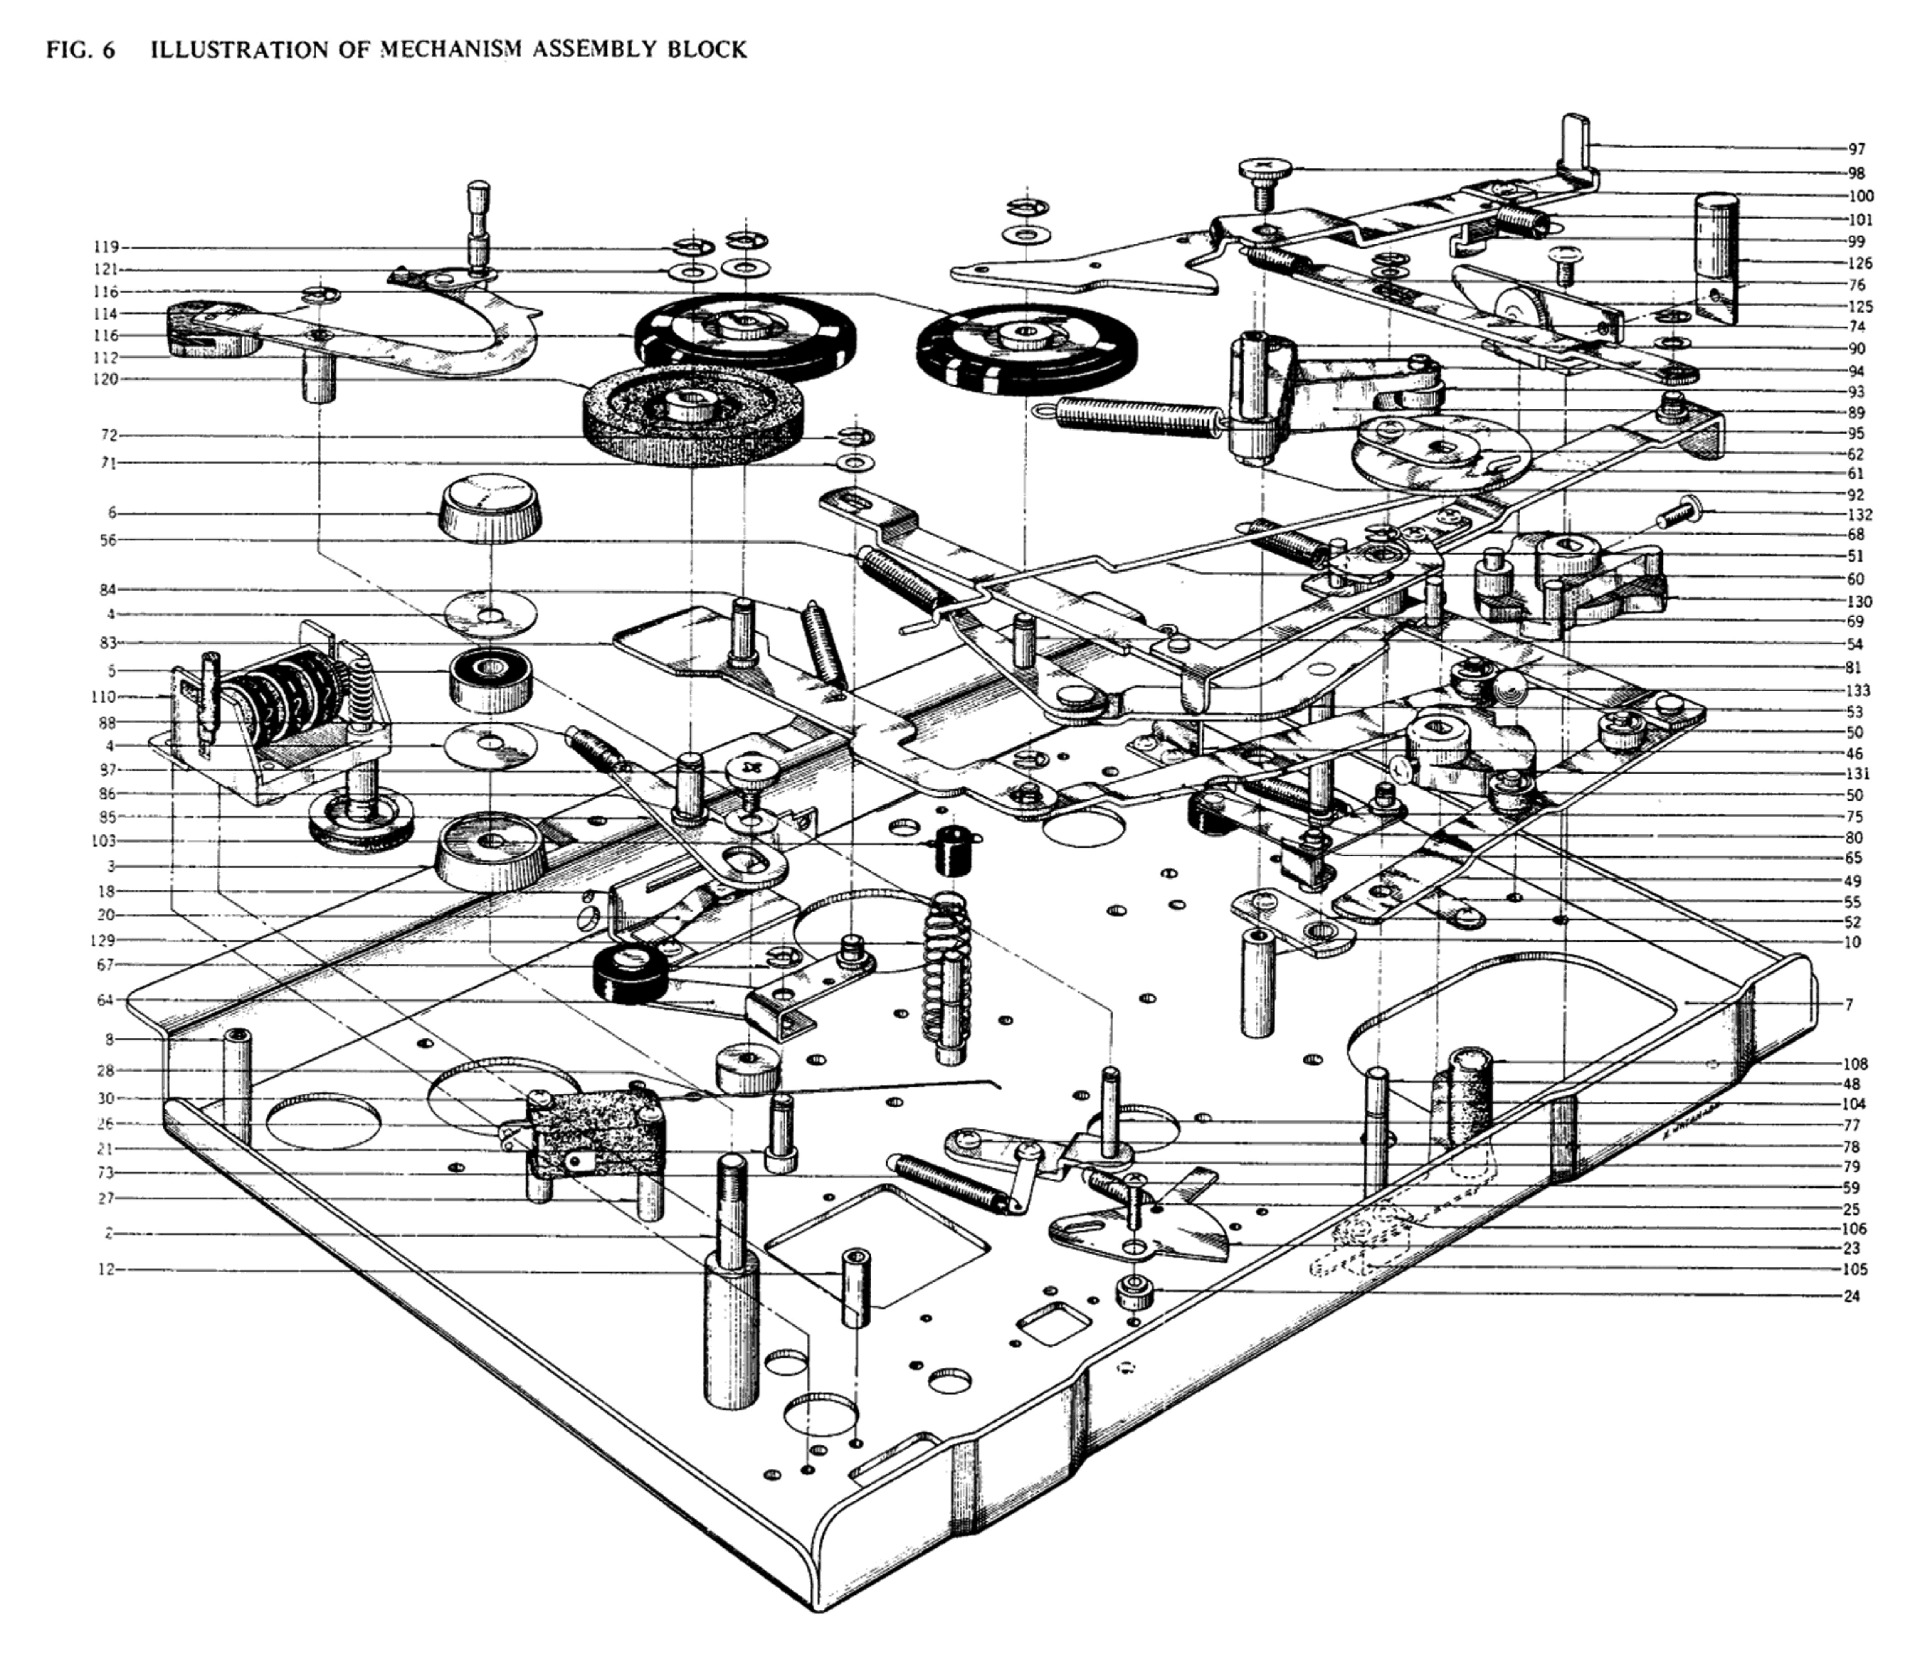
'Exploded Views' as they call these views are fantastic to see.
I would almost want to print them and put these in a frame on my walls as a piece of art!
With the Akai 4000DS MKII, traded in we arrive at this model:

See the modern version here! Three different speeds, two motors and the ability to automatically play the B side. The sound quality has also improved a bit.
I got it from an acquaintance after it had gone 'broken', in the end it turned out to be something simple, I was allowed to keep it but decided to give my old one to them.
A large portion of the video below is without sound due to copyright reasons, the last part does contain sound.
I cleaned it, regreased parts and gave it a new faceplate.
It doesn't even need new belts! the machine works perfectly, only the VU meter acted strangely in the video.
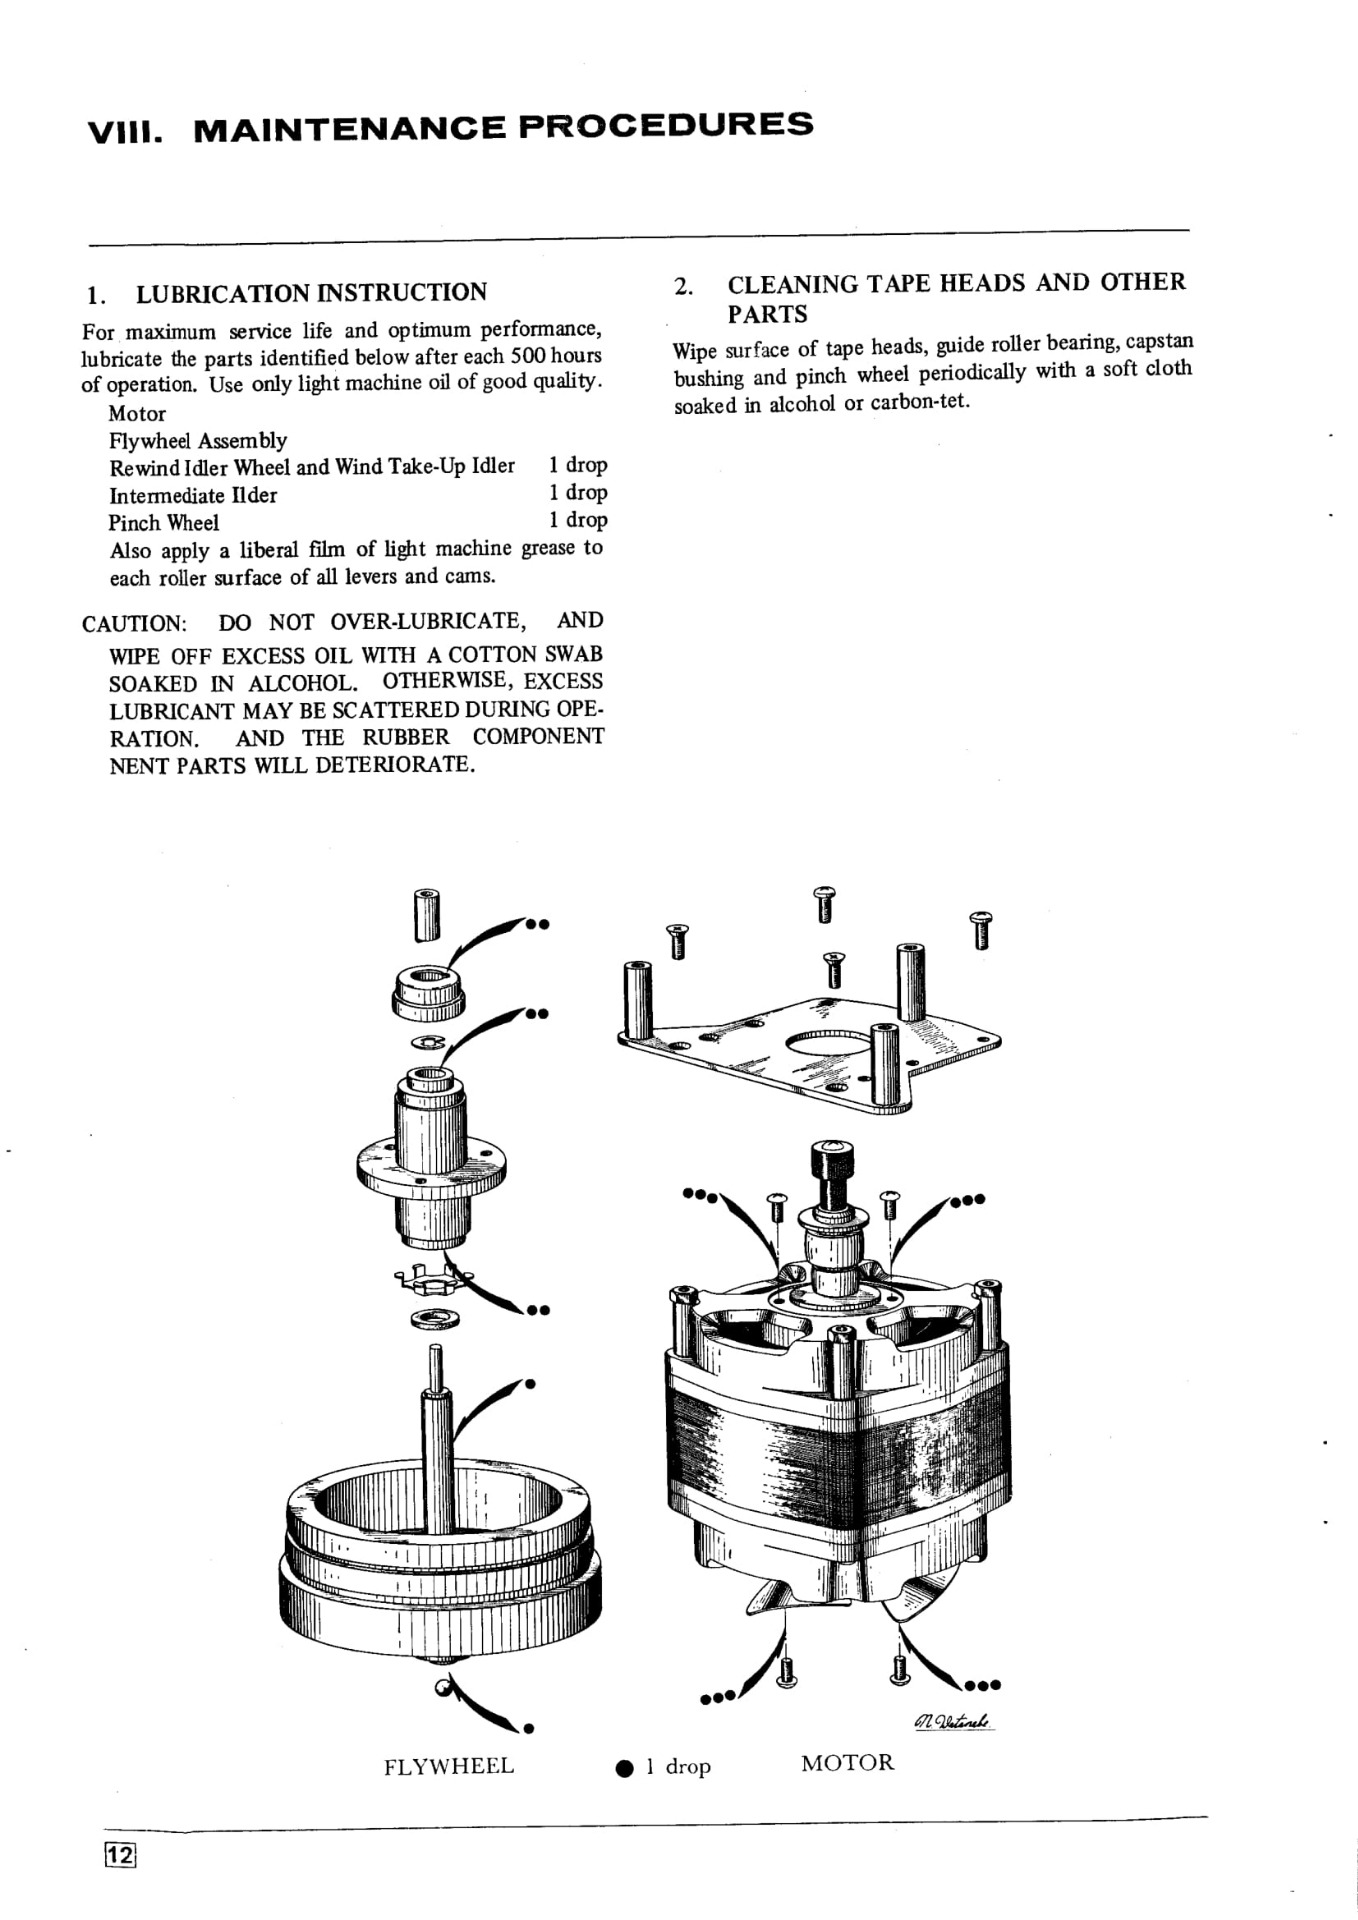
Below some diagrams, no more exploded views, but clear illustrated.
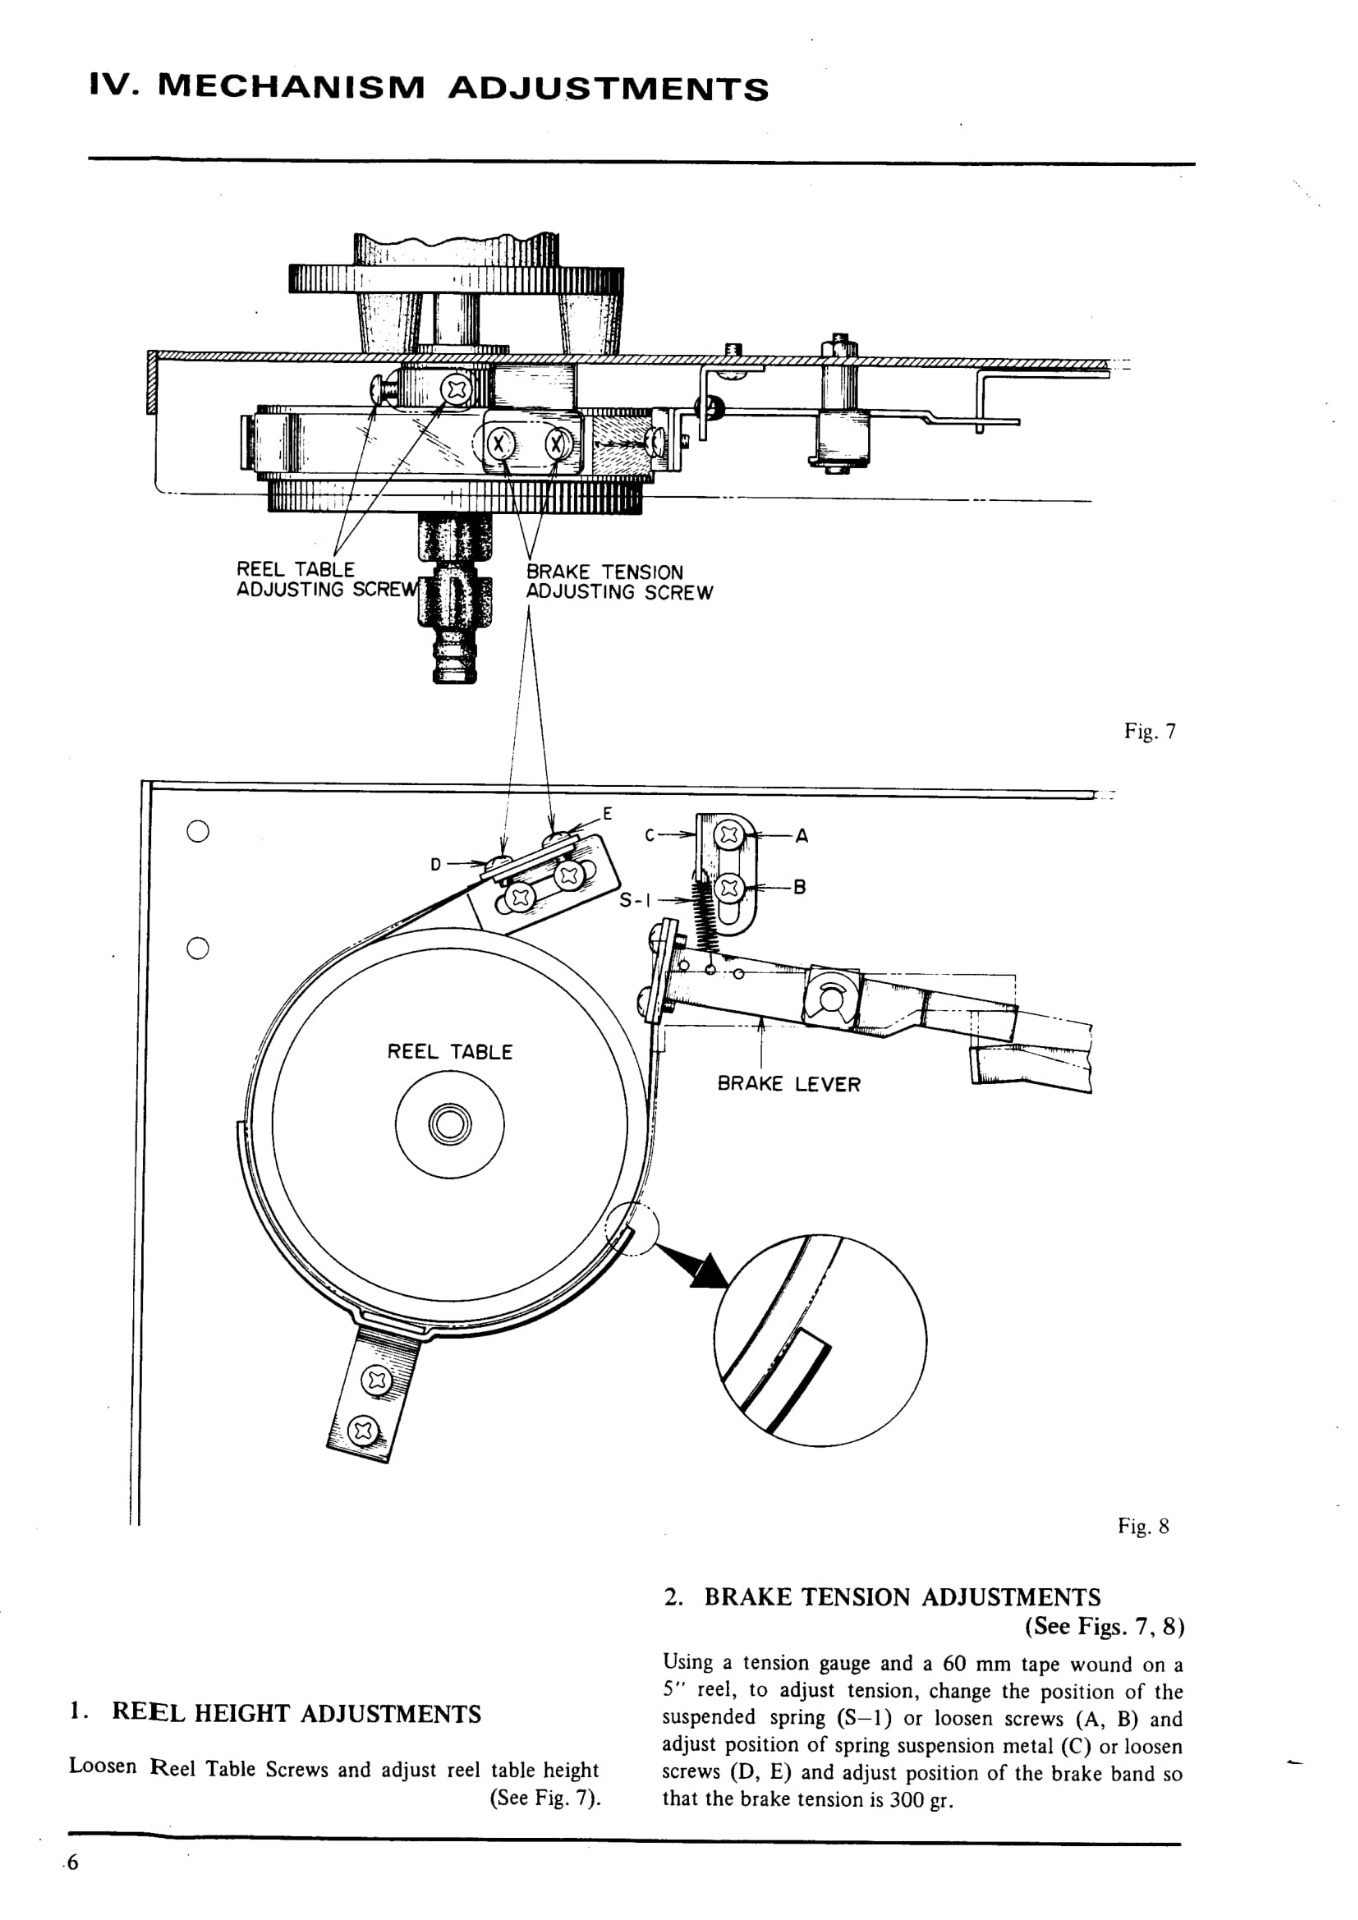
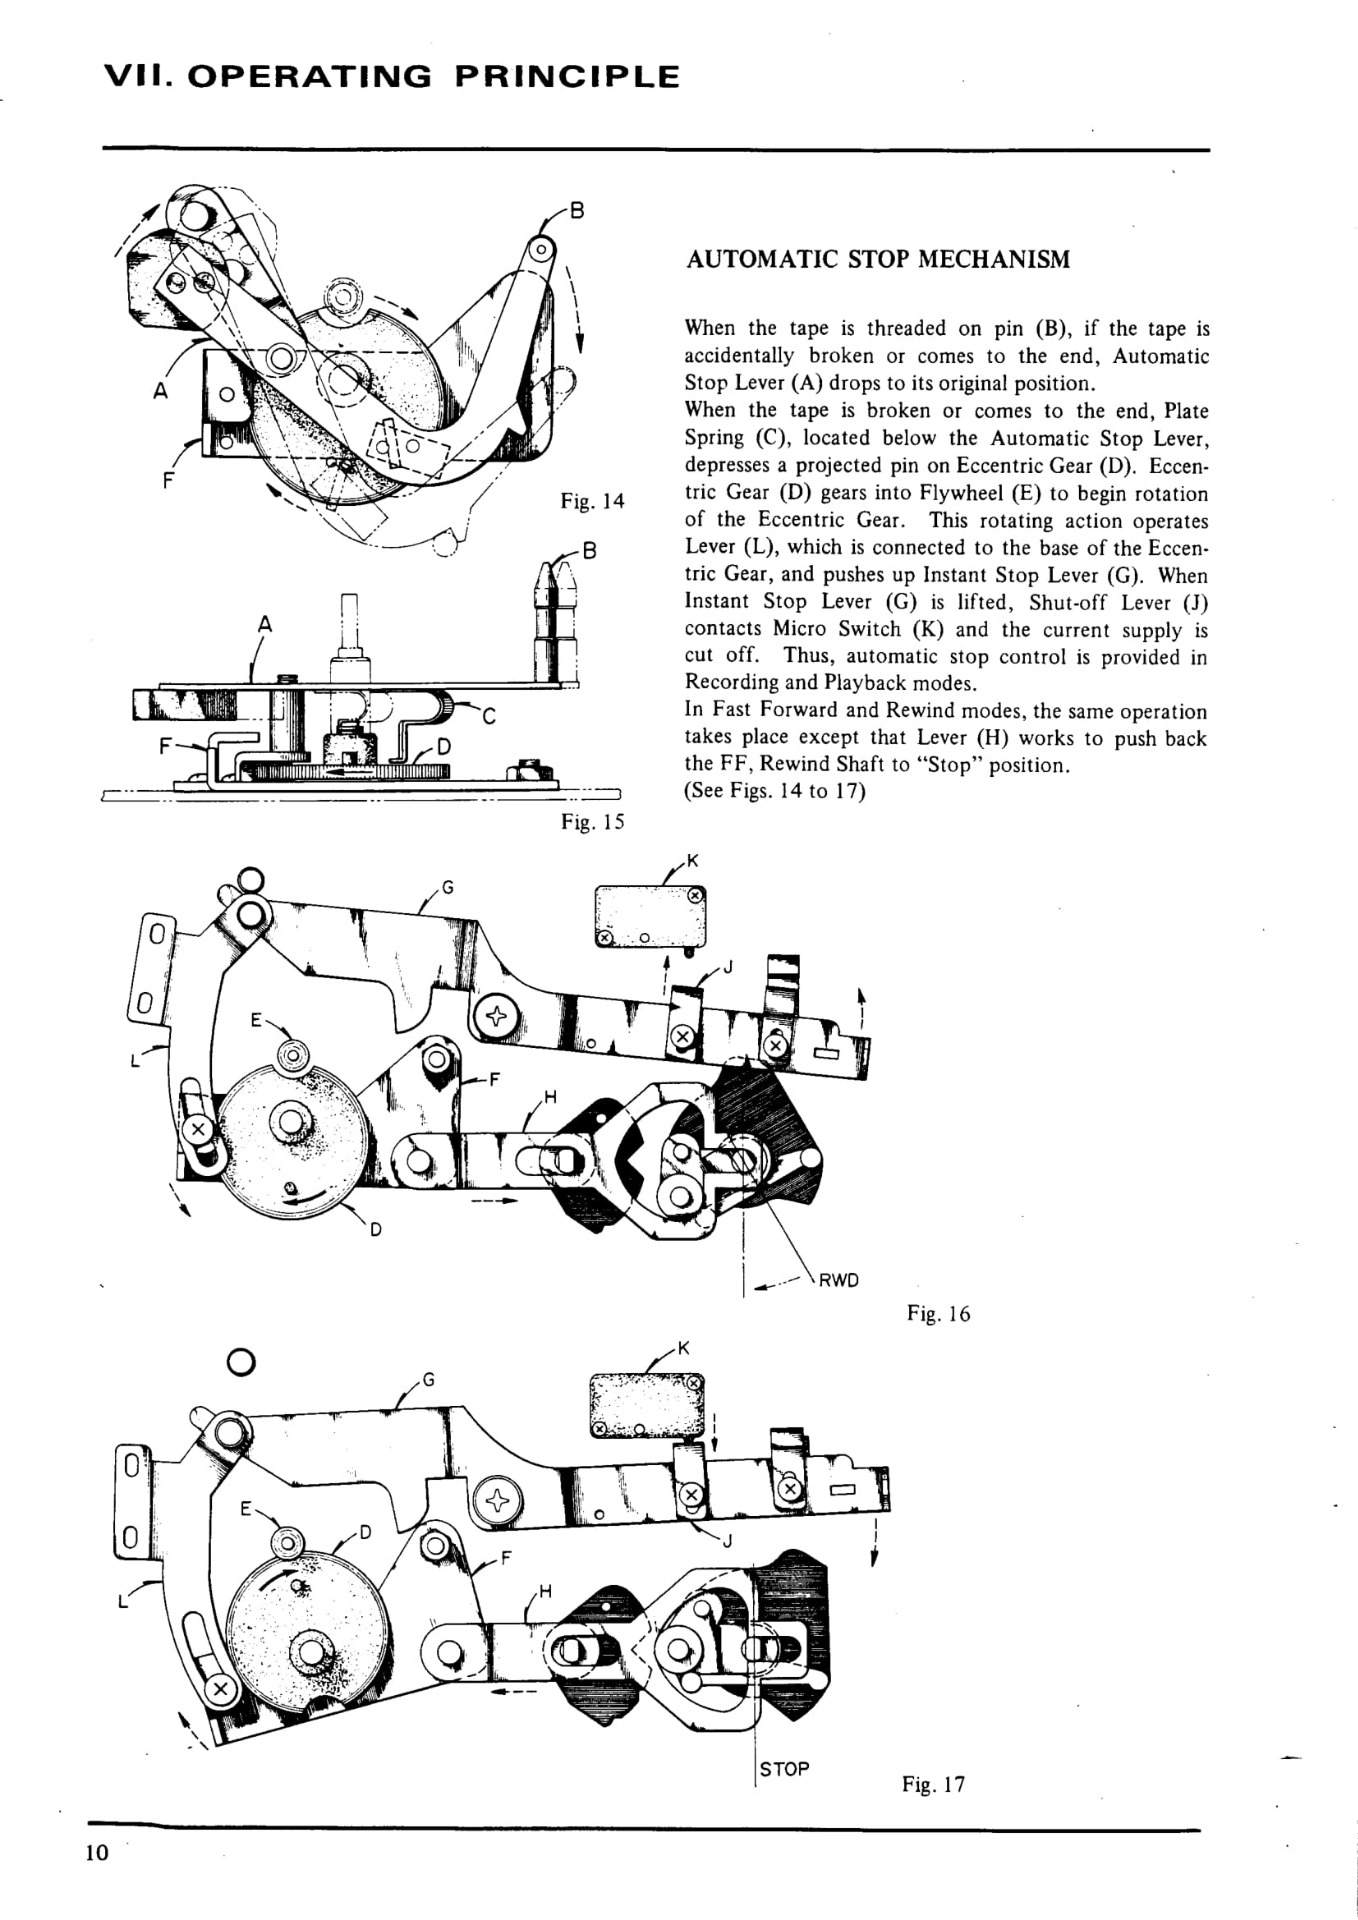
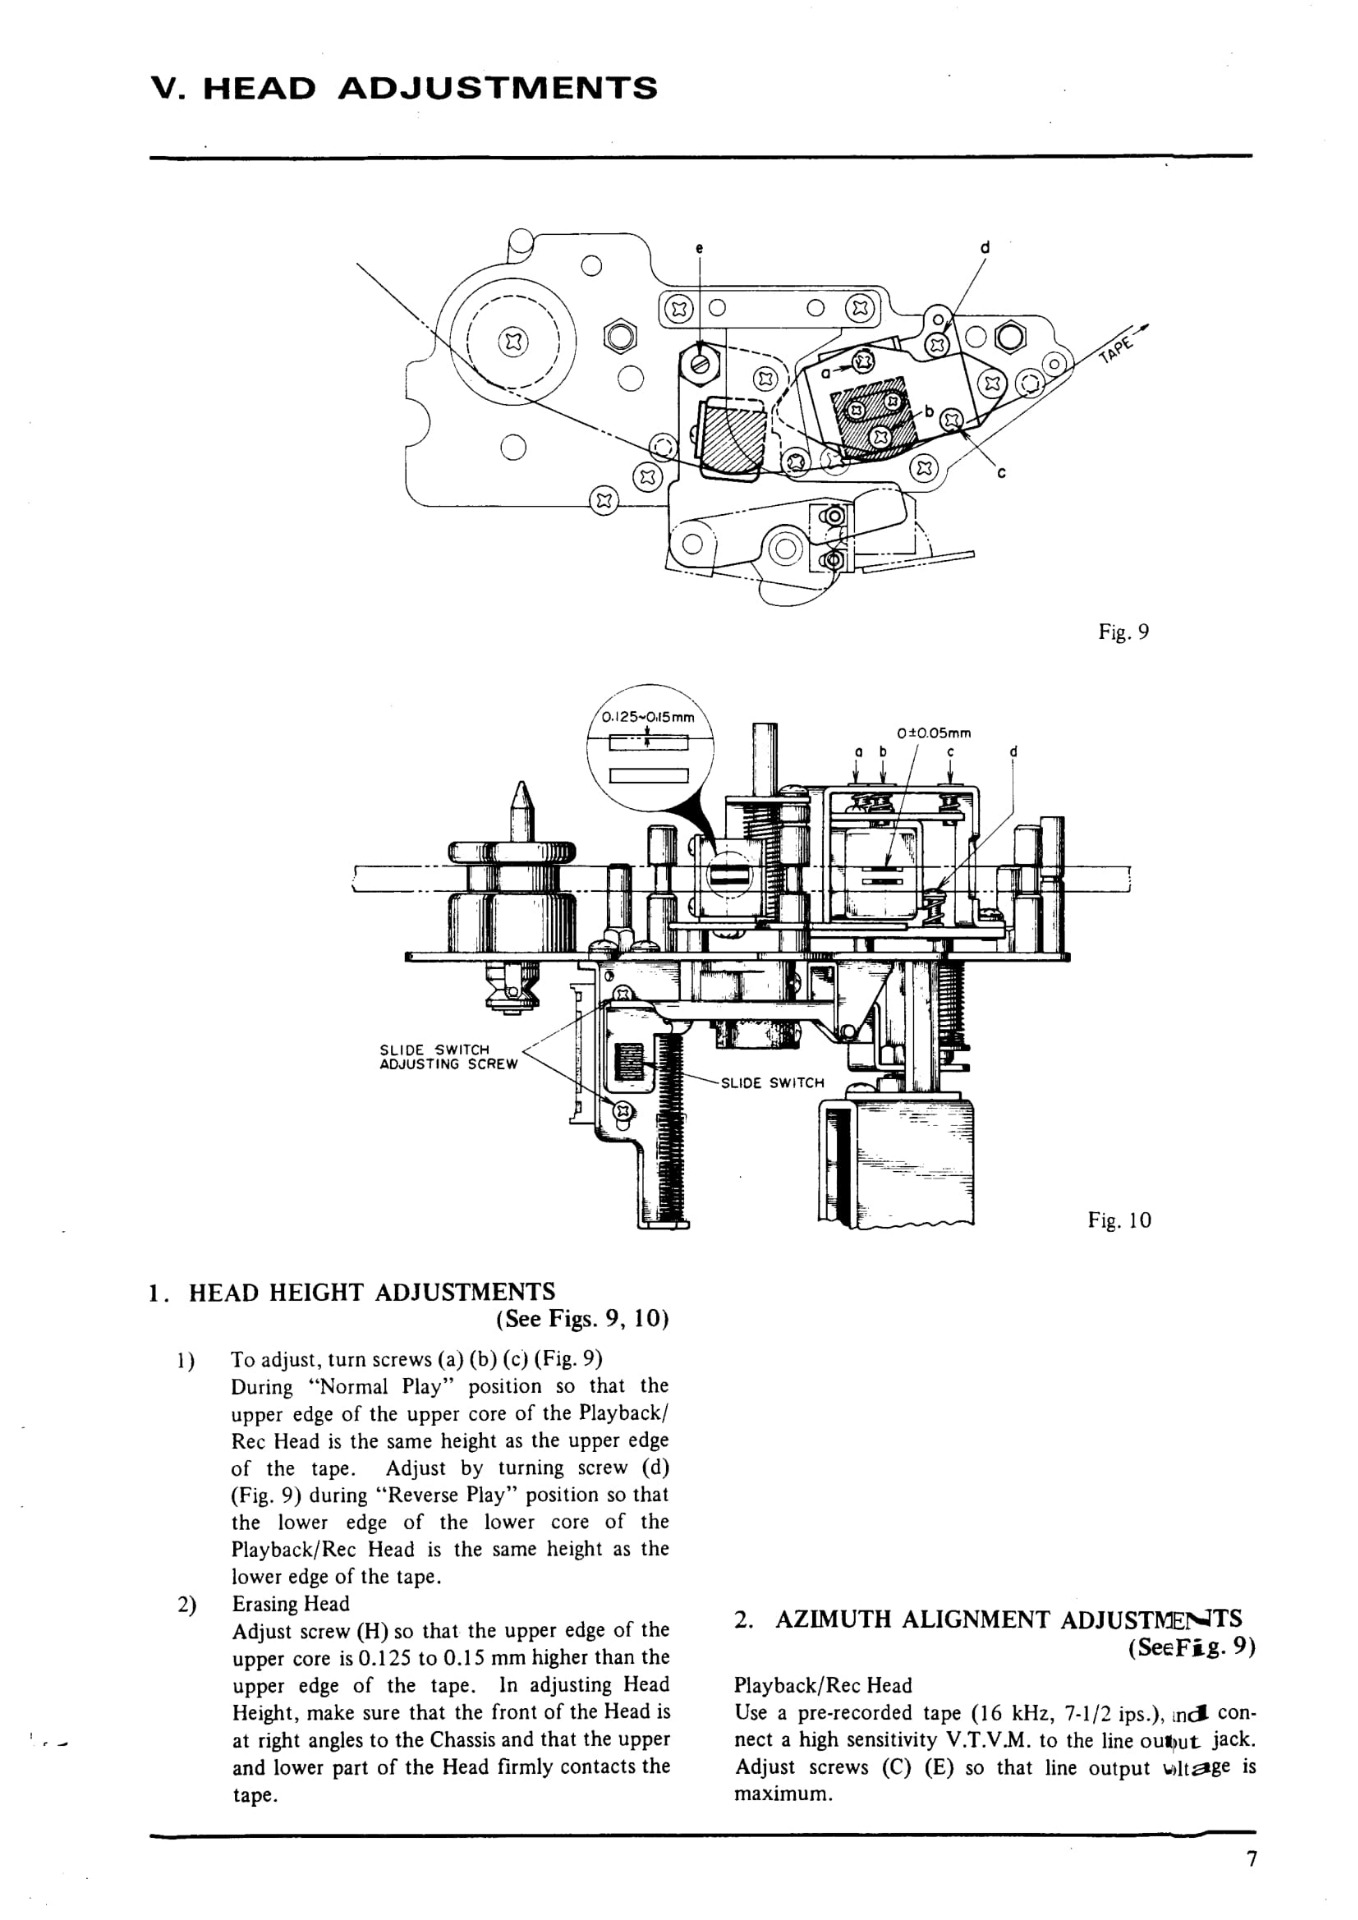
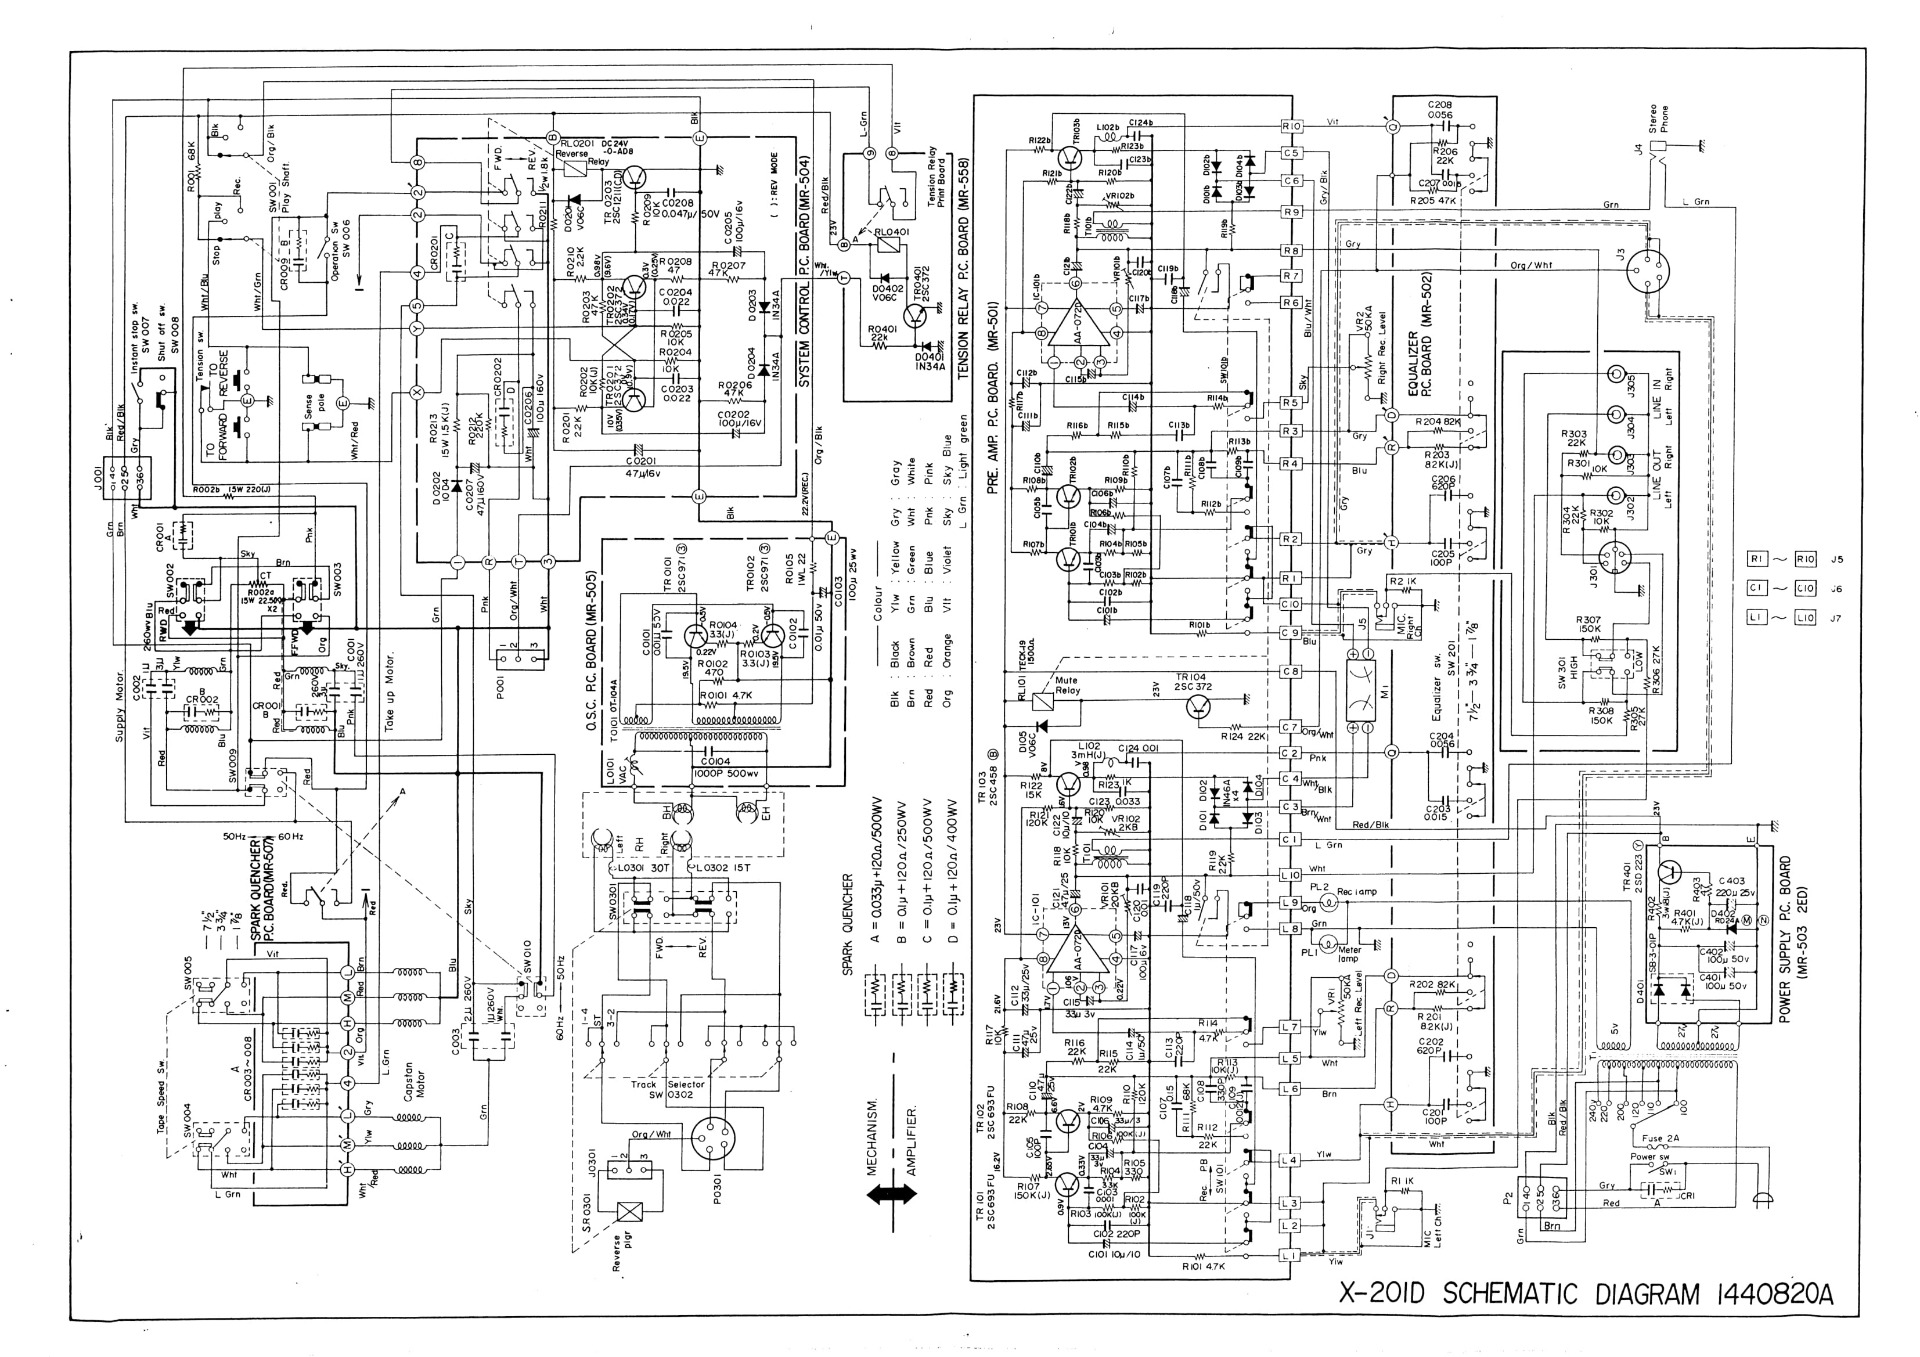
The electrical schematic is also something to look at. They are essential in replacing electrical parts.

The Akai X-201D aside, I also have this beautiful Akai 1710W!

Here's the whole device, it still looks good for its age of over 50 years old. Polishing it once wouldn't hurt.
I got this from another acquaintance together with an 8-Track recorder. It's not working at the moment and I'll have to sit down for it again, because it's a tape recorder on vacuum tubes.

Here's an impression (taken from the internet) of what it looks like in all its glory. Its sound quality doesn't seem to be bad. Recording music from the device is not recommended. This model also has a built-in amplifier and speakers!
The speakers are in the side, with the metal plates you can direct the sound.


I've taken it apart for inspection before, but didn't have much time and lacked experience back then, so it's in storage for now. Still, I am confident that I will get to it one day, I have already read a lot about the model on the internet, parts are also still available.

When I put the voltage on I see the tubes glow, this is good news!
I also hear the loudspeakers creak a bit, which means that they also work.
The engine does not start, I do not remember the further state of the mechanism and the belts.
It's also very dusty inside, I'll have to give it a good clean.
The best is yet to come, you won't see this until I turn off the light.

Here I present you the vacuum tubes again!
A big difference when you see them now. Although I didn't edit the photo, I did adjust my camera settings to it. For example, taking the photo took 15 seconds. This allows you to capture more light than with a normal photo. If they really glowed that bright, I'd better take cover. The blue light you see are electrons shooting from the cathode to the anode. You literally see the electricity flowing. Ain't it beautiful?


Because this device is older than the one shown above, the manual is again full of extensive illustrations. I'm not even showing them all here.
If you are interested in manuals, I recommend HiFi Engine. You have to create an account but this costs nothing, you will find manuals for almost all old devices as well as new ones here. I got almost all my manuals from there.

Enough about my Akai collection, I've tinkered with other tape recorder brands in the past. Here a stack of three almost identical Philips machines.
I took the photo when I went to a good friend to try to get one to work. At least I had enough donors.
The result. The N4504 in newfound glory.
Below a little bit about the reels.

Plastic reels with a new coating.

Metal reel, I took it apart and gave it a different coatings.
I often give tapes an extra treatment, take them apart if possible and clean them. Finally, I give some a nice coating. Some people would think it would be a shame that I 'mess up' rather special tapes, but I don't care about that. Besides, I don't destroy everything precious, I just make it more beautiful ;)
I prefer metal tapes. Though these are hard to get and will be expensive.
To conclude, I will return to the 10" tapes. You have them in all kinds of formats, but for the 10" tapes you need a different tape of recorder. These also require a special reel adapter. Below are some 10" tape recorders.
I don't know if I'll ever go for that size tape recorder. They are incredibly expensive to buy, parts are expensive, reels are expensive, tape is expensive, even the adapter is unnecessarily expensive! I suspect that the price is being scaled up on many things because there is always demand for them.
After all, they are an eye-catcher! It is one of the largest audio devices ever released for home use. The playback time of a single tape can be up to 6 hours at normal playback speed. But this doubles at the lowest speed, although the quality drops slightly as a trade off.
The quality of the machines is often very good, if they are well maintained.
The playback quality is also certainly worth talking about, if you use a well-calibrated device in combination with well-recorded tapes, sound is difficult to distinguish from digital.
For now I'll leave it at that, Below a link to the information page of the reel to reel recorder, here I go into a lot more detail about the operation and behavior of the device, as well as tips to keep it in good condition.
Thank you for reading!
Related pages
- Magnetic tape (reel to reel) Information
- Sony TC-252 Reparatie
- Magnetic Tape Gallery