
Repair: TEAC PD-H570
A CD player in between my mainly analog audio setup. Like you would swear in church.
But how it ended up in my hands is a story in itself.
It works, up to a point. It is a player with space for no less than 7 CDs! It can fetch all CD drives and load the CD if it is in the player. He can bring it up to speed, but that's where it ends.
Time to see what it does!
July 26, 2019

First of all, a little preview. The CD player didn't just blow over. But actually came as a set with the Teac MD-H500i Minidisc Recorder. Although I was only interested in the Minidisc, the seller told me that he still had this Teac PH-H570. A bonk of a 7-CD player. He has sold it twice before, but he kept coming back with the story that it was defective. The seller even made a video to show that it worked in his hands! I can buy it for a very reasonable price. I even get the chance to completely disassemble it before I want to buy it.
As you'd expect, it doesn't work in my hands either, it doesn't seem to be an easy job either!
I am going to work on a device where I need mains voltage to measure components. Exciting stuff, so if you have no experience with this, don't follow my steps. I am also not responsible for any injury to the device or damage to physical parts. Well let's look further.
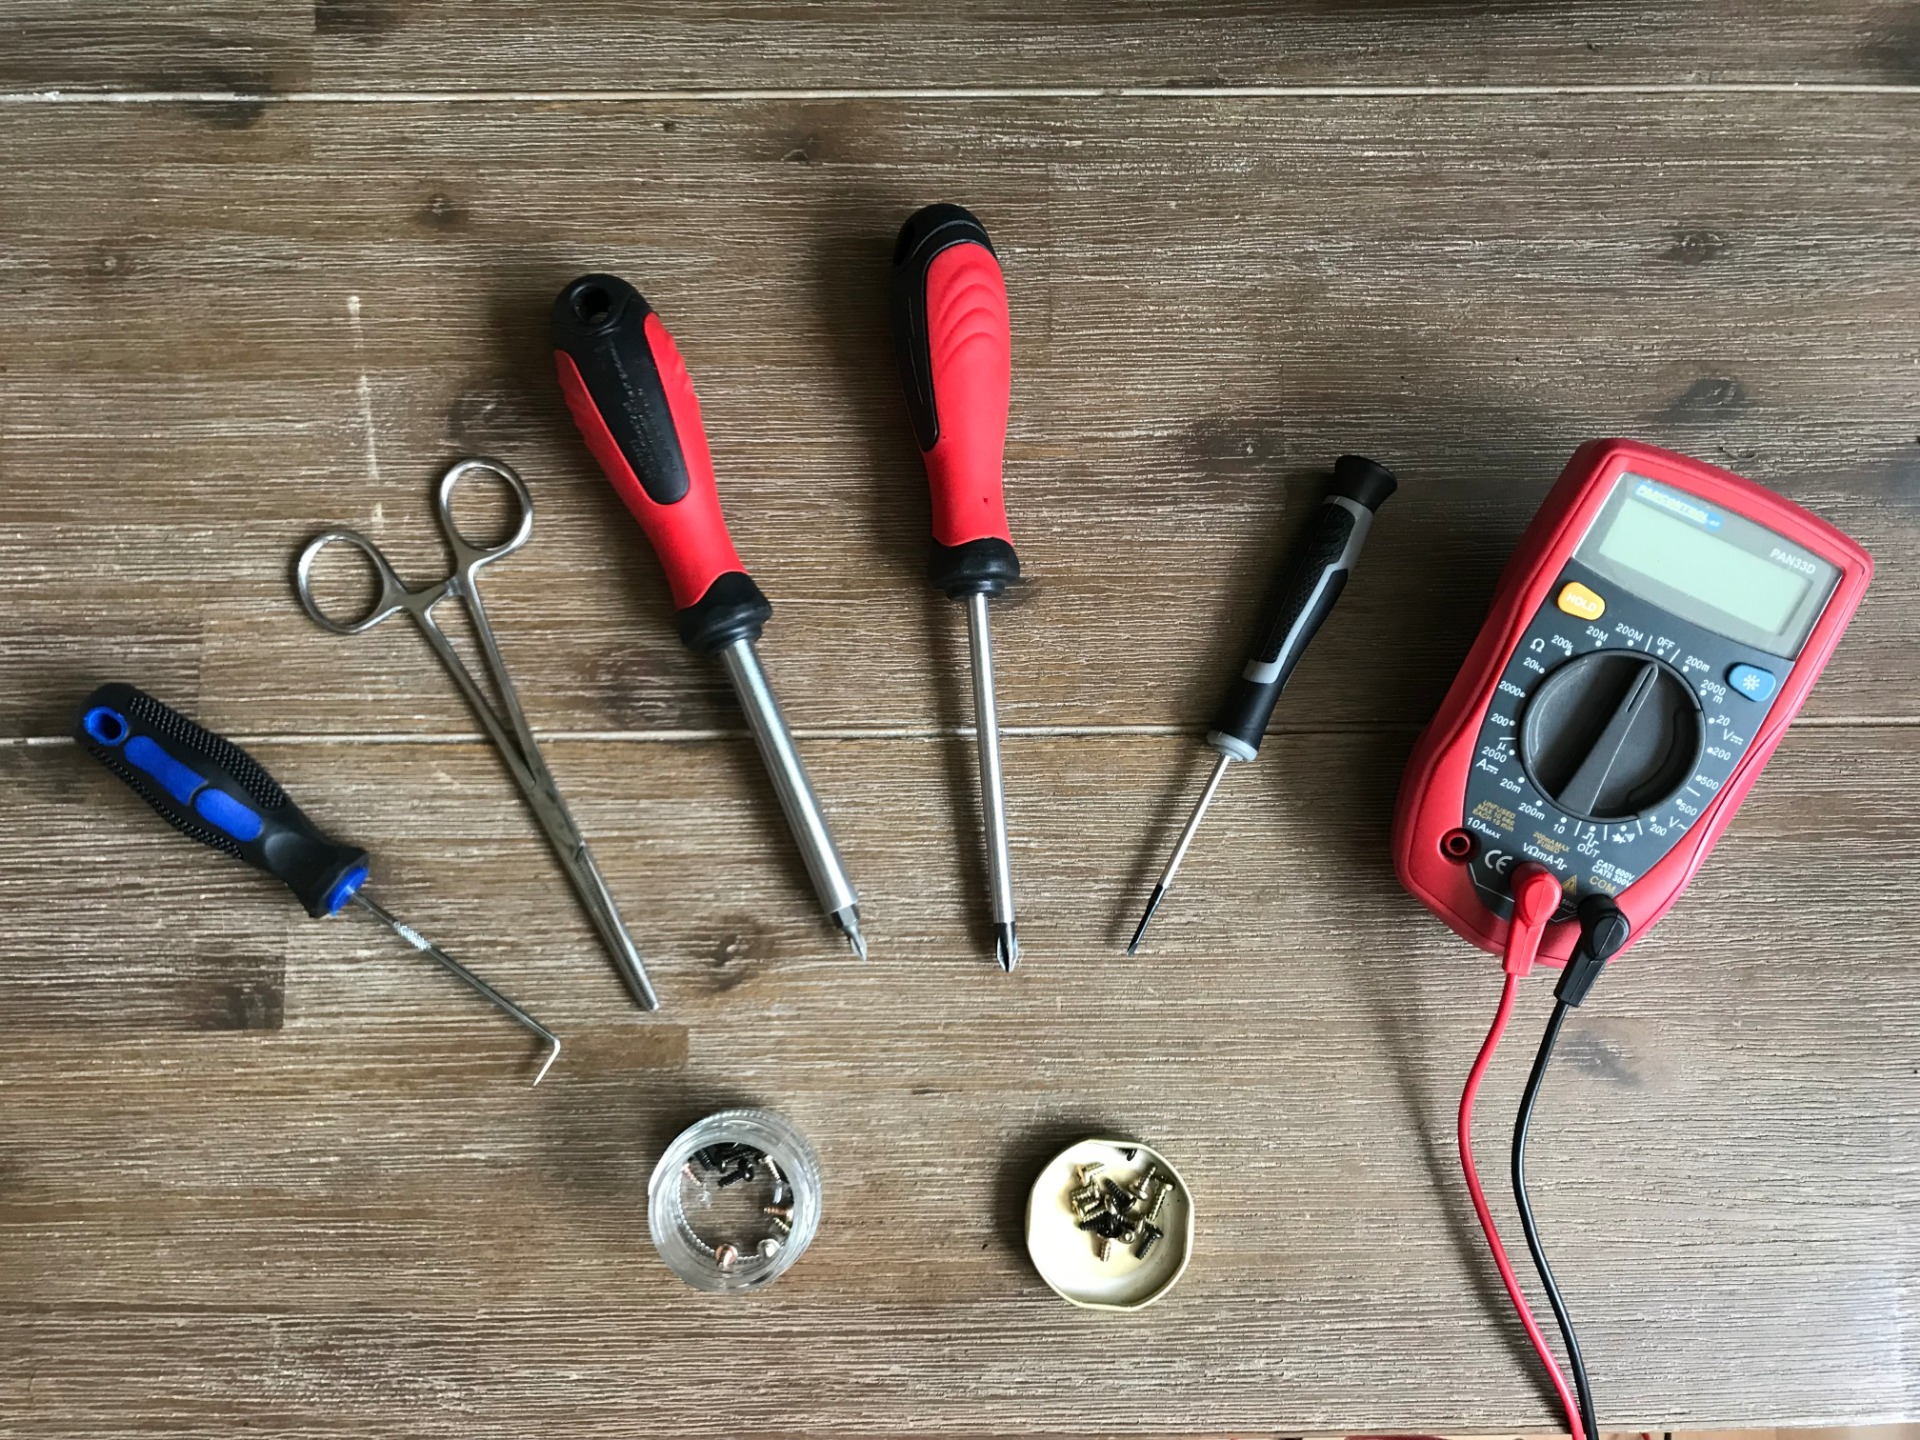
Required tools:
- Screwdrivers (PH0, PH1 & PH2)
- Small locking pliers
- Multimeter
- Tray for a whole lot of screws
In my case also:
- Soldering station + Tin
- Power wire (0.5² or smaller)
First of all, I look at why the player is not working. He loads the CDs neatly from his magazine. The CD can get up to speed without any problems, but reading won't work, my suspicion quickly goes to a defective laser. After some fiddling I see on the display that the laser has succeeded in recognizing the CD!

15 songs with a total playing time of 66 minutes. I have burned the CD myself and can therefore check whether these data are correct, they do! The laser can therefore be excluded.
The fact that I am now able to see the CD is because I have turned the gears a bit, because of this the laser is located in the inner edge of the CD and can then read the general information that is located there. He just can't play the CD.
Yet I know enough, the motor that has to move the laser does not work. The laser remains in the same position and cannot read the rest of the CD.
Time to take him apart.

If you look at the CD player long enough, it will fall apart on its own. That saves me a lot of work!
Okay, it wasn't that easy. Just like the Minidisc player from the same series, this CD player is also made up of components. I had to unscrew every component before I could reach anything. The mutual connections consist of plugs, so no de-soldering work here. A lot of screws of all shapes and sizes!

After I have taken it apart, I put all the plugs back in, now I can check whether it still works even when it is apart. The CD player itself makes some noise that is unfamiliar to me, the display tells me enough. Time to do things differently.

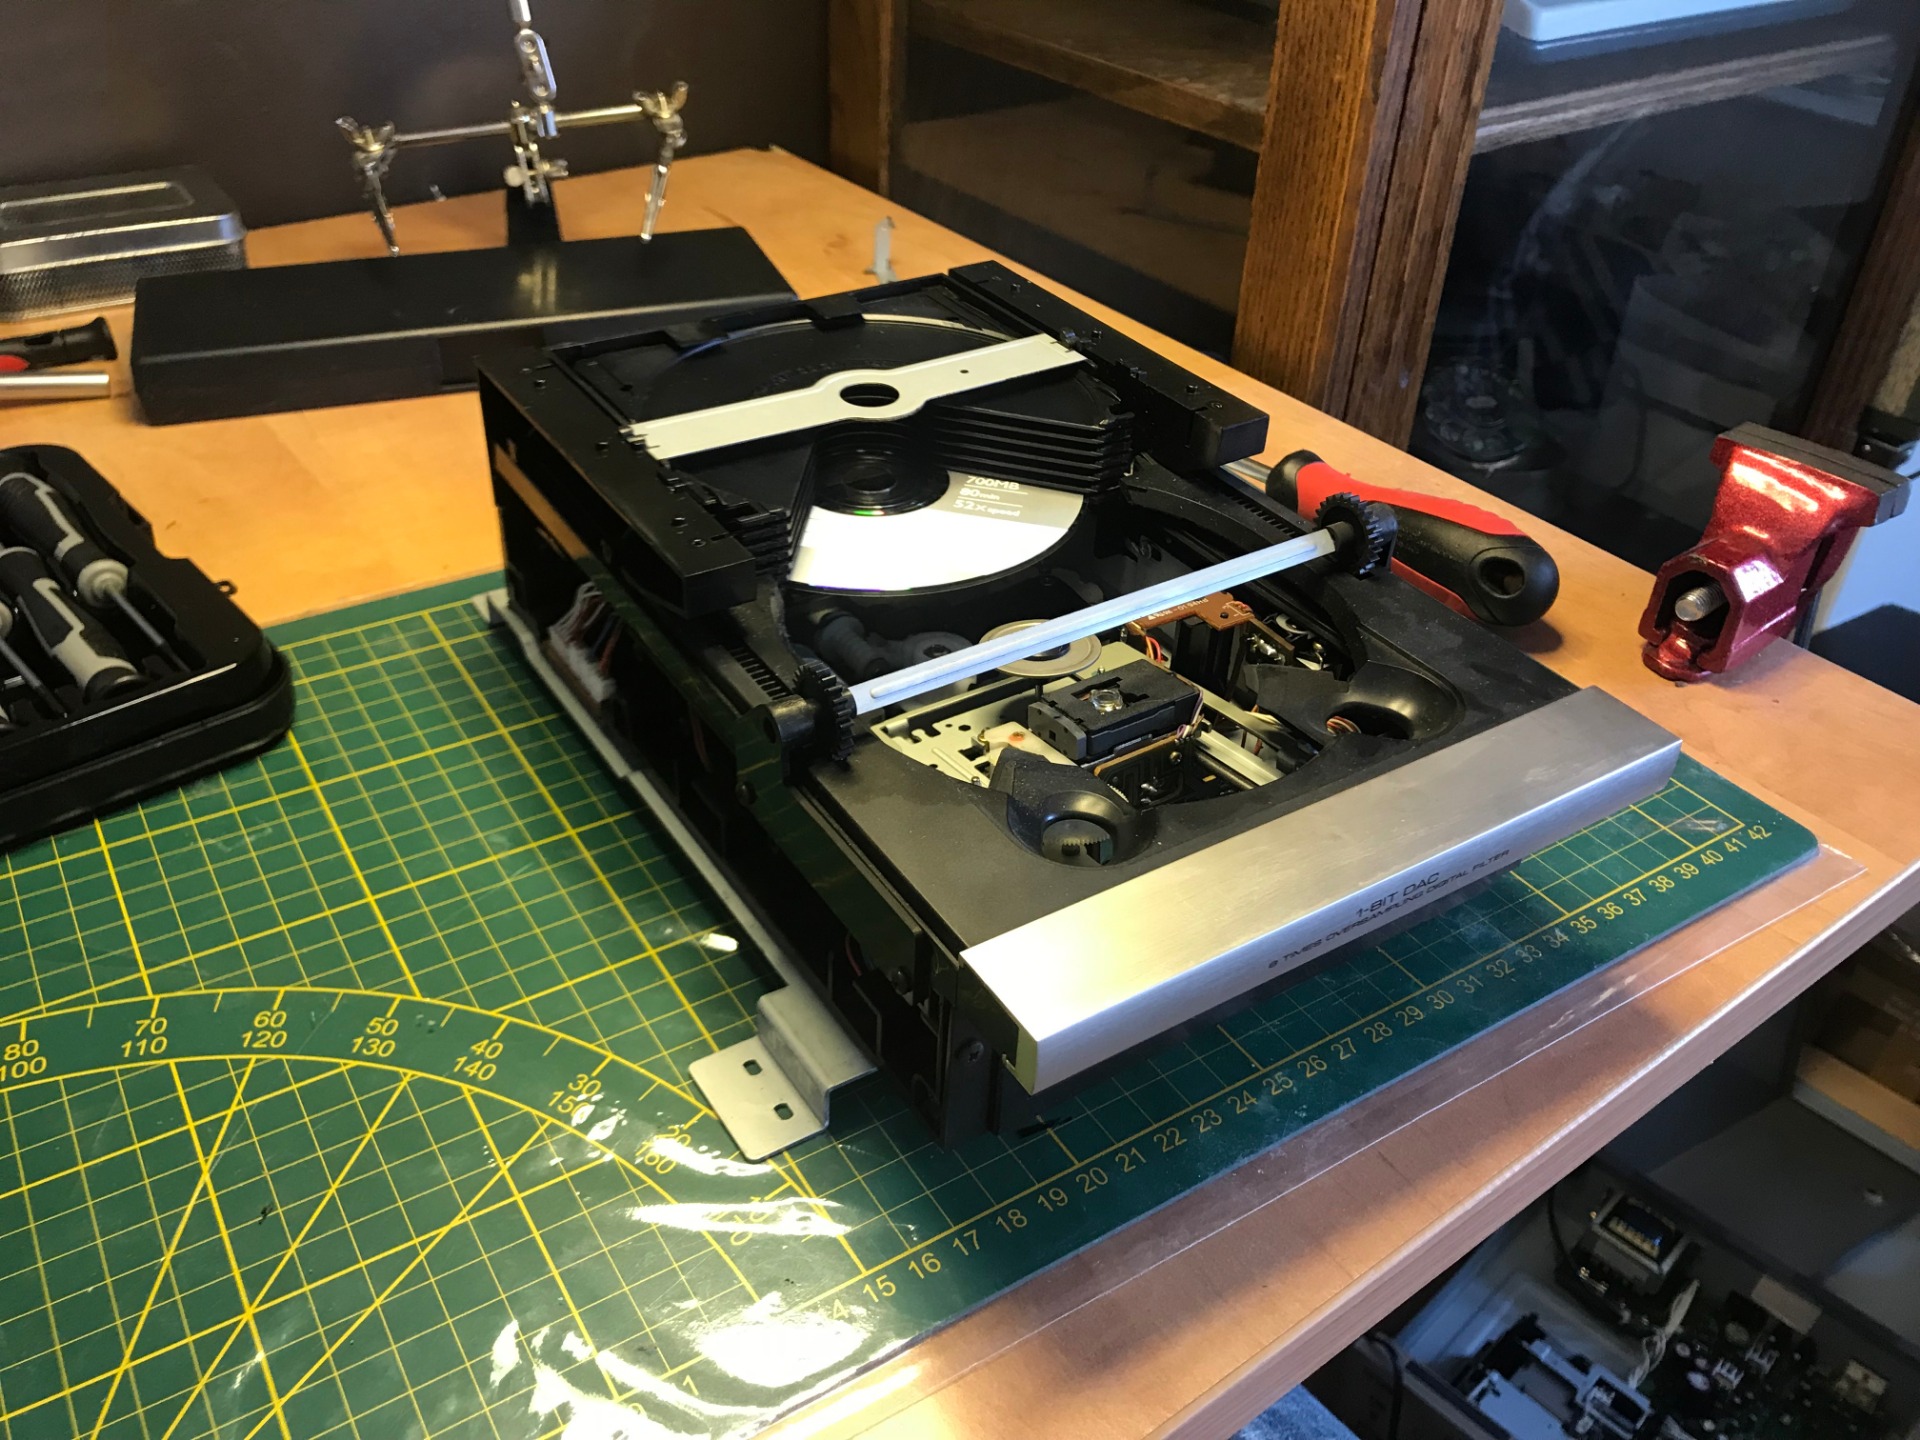
I decide to start with the player himself. This is attached to the bottom of the housing, to get those screws I have to remove all other components first, also the cables to and from the player are short, so I have to disconnect everything.
If you click on the photos you get a close-up, here you see the mechanism itself with its 7 drawers. Tray 1 contains the CD.


As I said, everything is secured with screws, at the moment the container (or jar in this case) is already quite full, I decide to keep the screws that come off separately so as not to get confused.
The bottom plate (left) comes loose with 7 screws, below is another plastic cover (right) with 10 screws this time! I loosen them all, but can't get the plastic cap off.
I don't want to damage the player (partly because I don't officially own it yet). So go see what I can do from here.

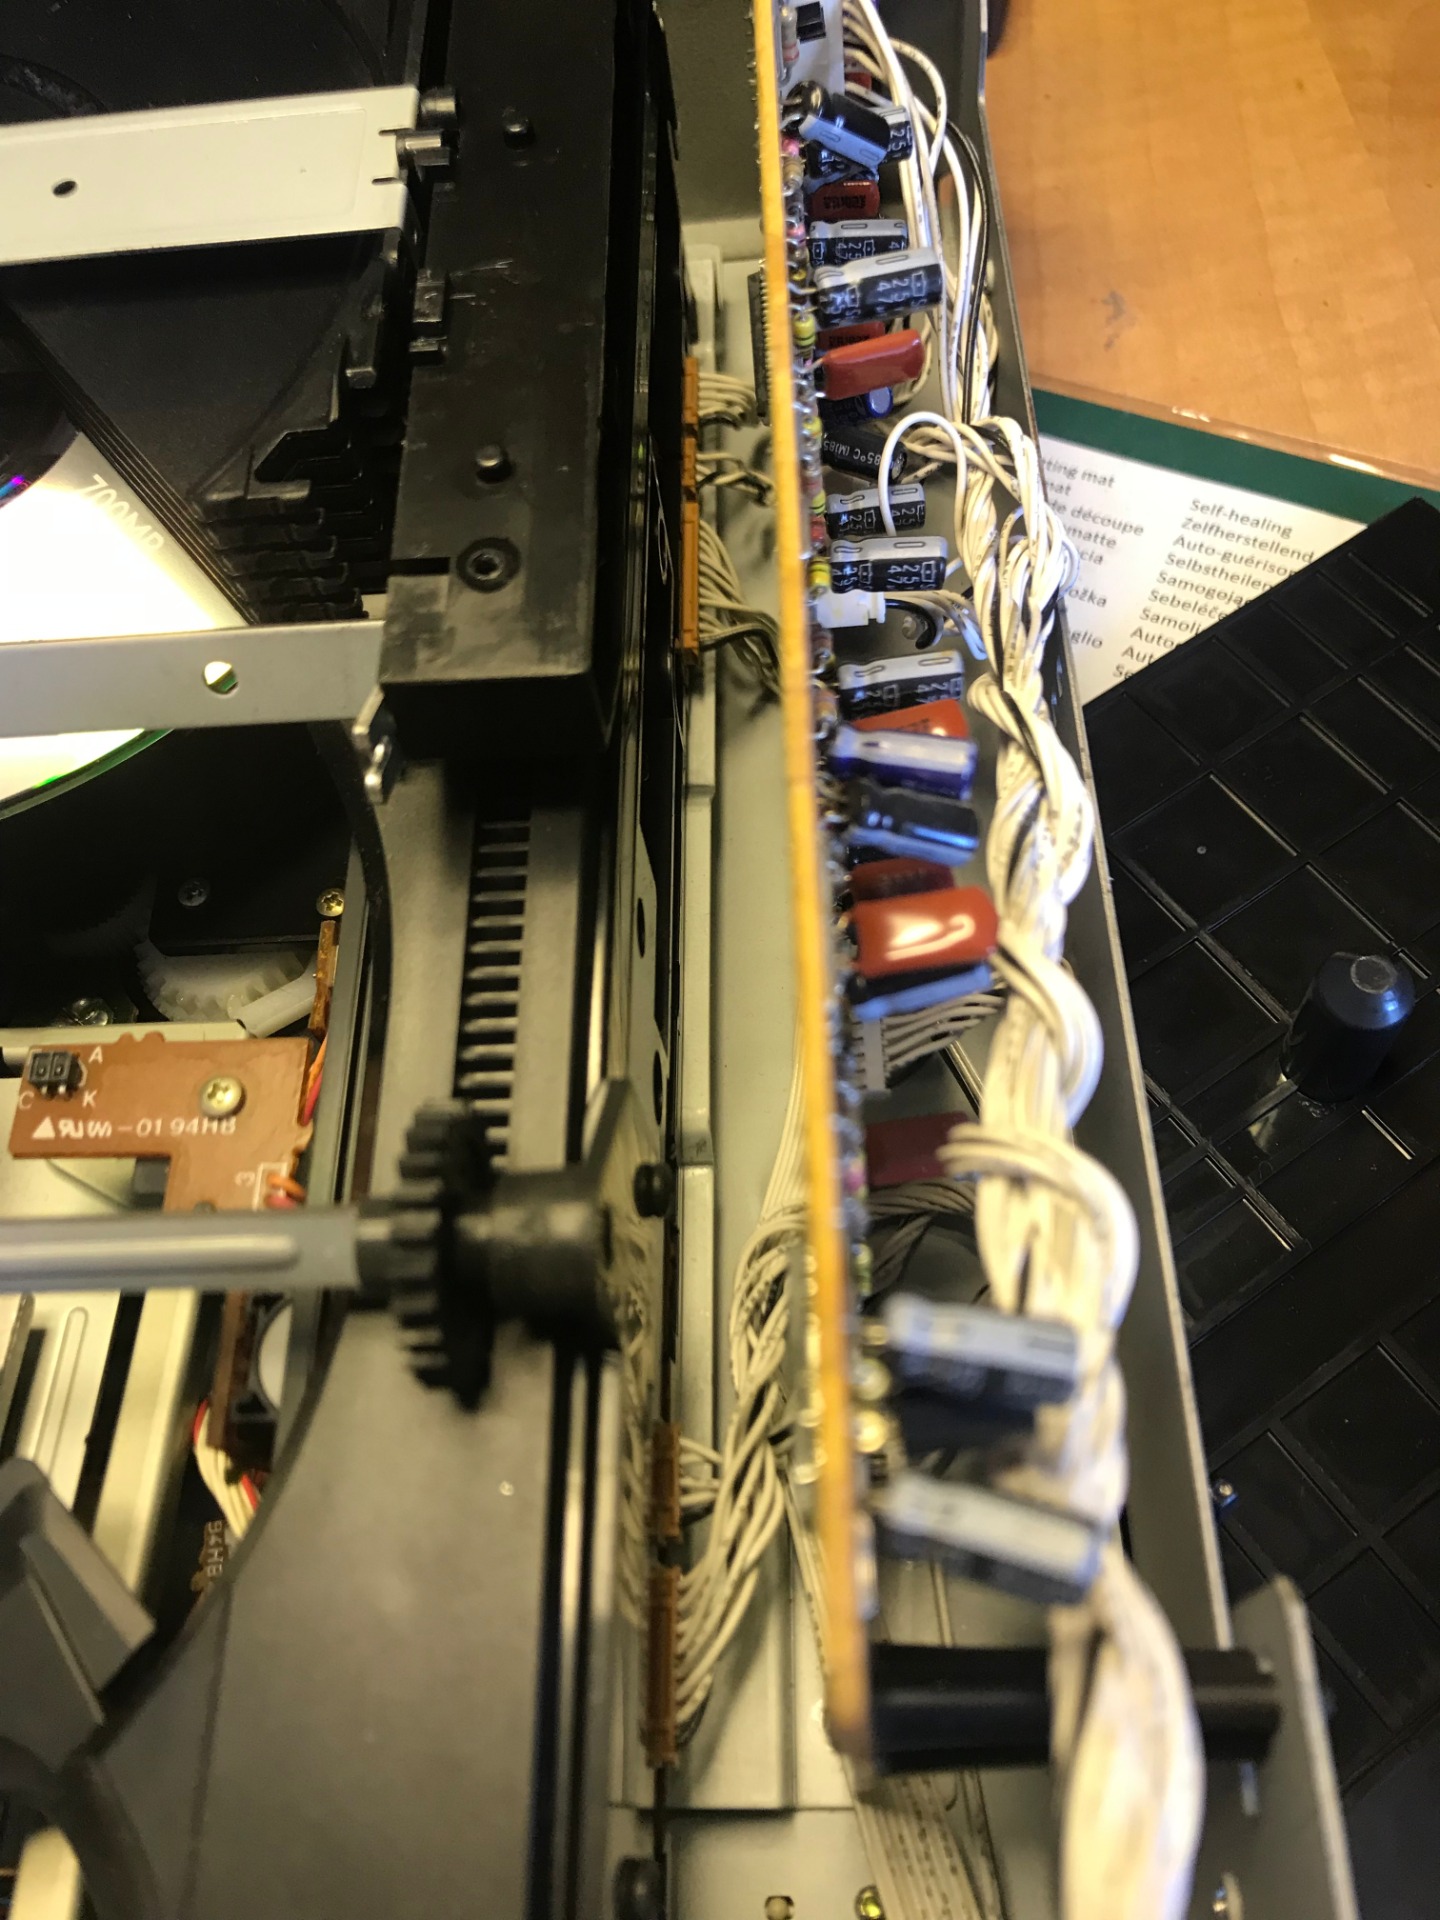
When I look inside with the camera of my mobile I see the engine in question, behind it is the other engine that revs up the CD. Both are on the same circuit board and leave with the same cable.

When I look at the plastic cover again I see the same printed circuit board, the motor is mounted on the right in front of the CD, just under the cover the motor in question is hidden. With some effort I can read which connections are the Plus and Minus. Time to beep the whole thing (by measuring for resistance or closure).
On the right you see the different plug connections.
The leftmost is the one that matters, the two leftmost veins are the plus and minus of the motor I'm going to measure.


My handy helper measures the cable through here, but can't find a closure. so this part is excluded.
Then I measure from the previously shown plug to the other side of the player (you see it here on the right), here are the connections to the main circuit board. Now I can reconnect the circuit board and see if all the wires come through there.
When measuring, I see again that everything is good, no closures or loose parts.
I decide to put the player under voltage again to measure everything for voltage.
Despite the ERROR I got before, the player now works, it scans all 7 stations (as it always does at startup), I choose CD 1 and it loads it. I start measuring between the plus and minus. I don't know the correct voltage, I don't have a manual. I don't need it now because I measure 0V (nothing).

I measure no voltage up to the printed circuit board, finally arriving at the printed circuit board, I decide to go and see where the different connections lead. I don't have to look far. We have already found our problem! Do you see it already?

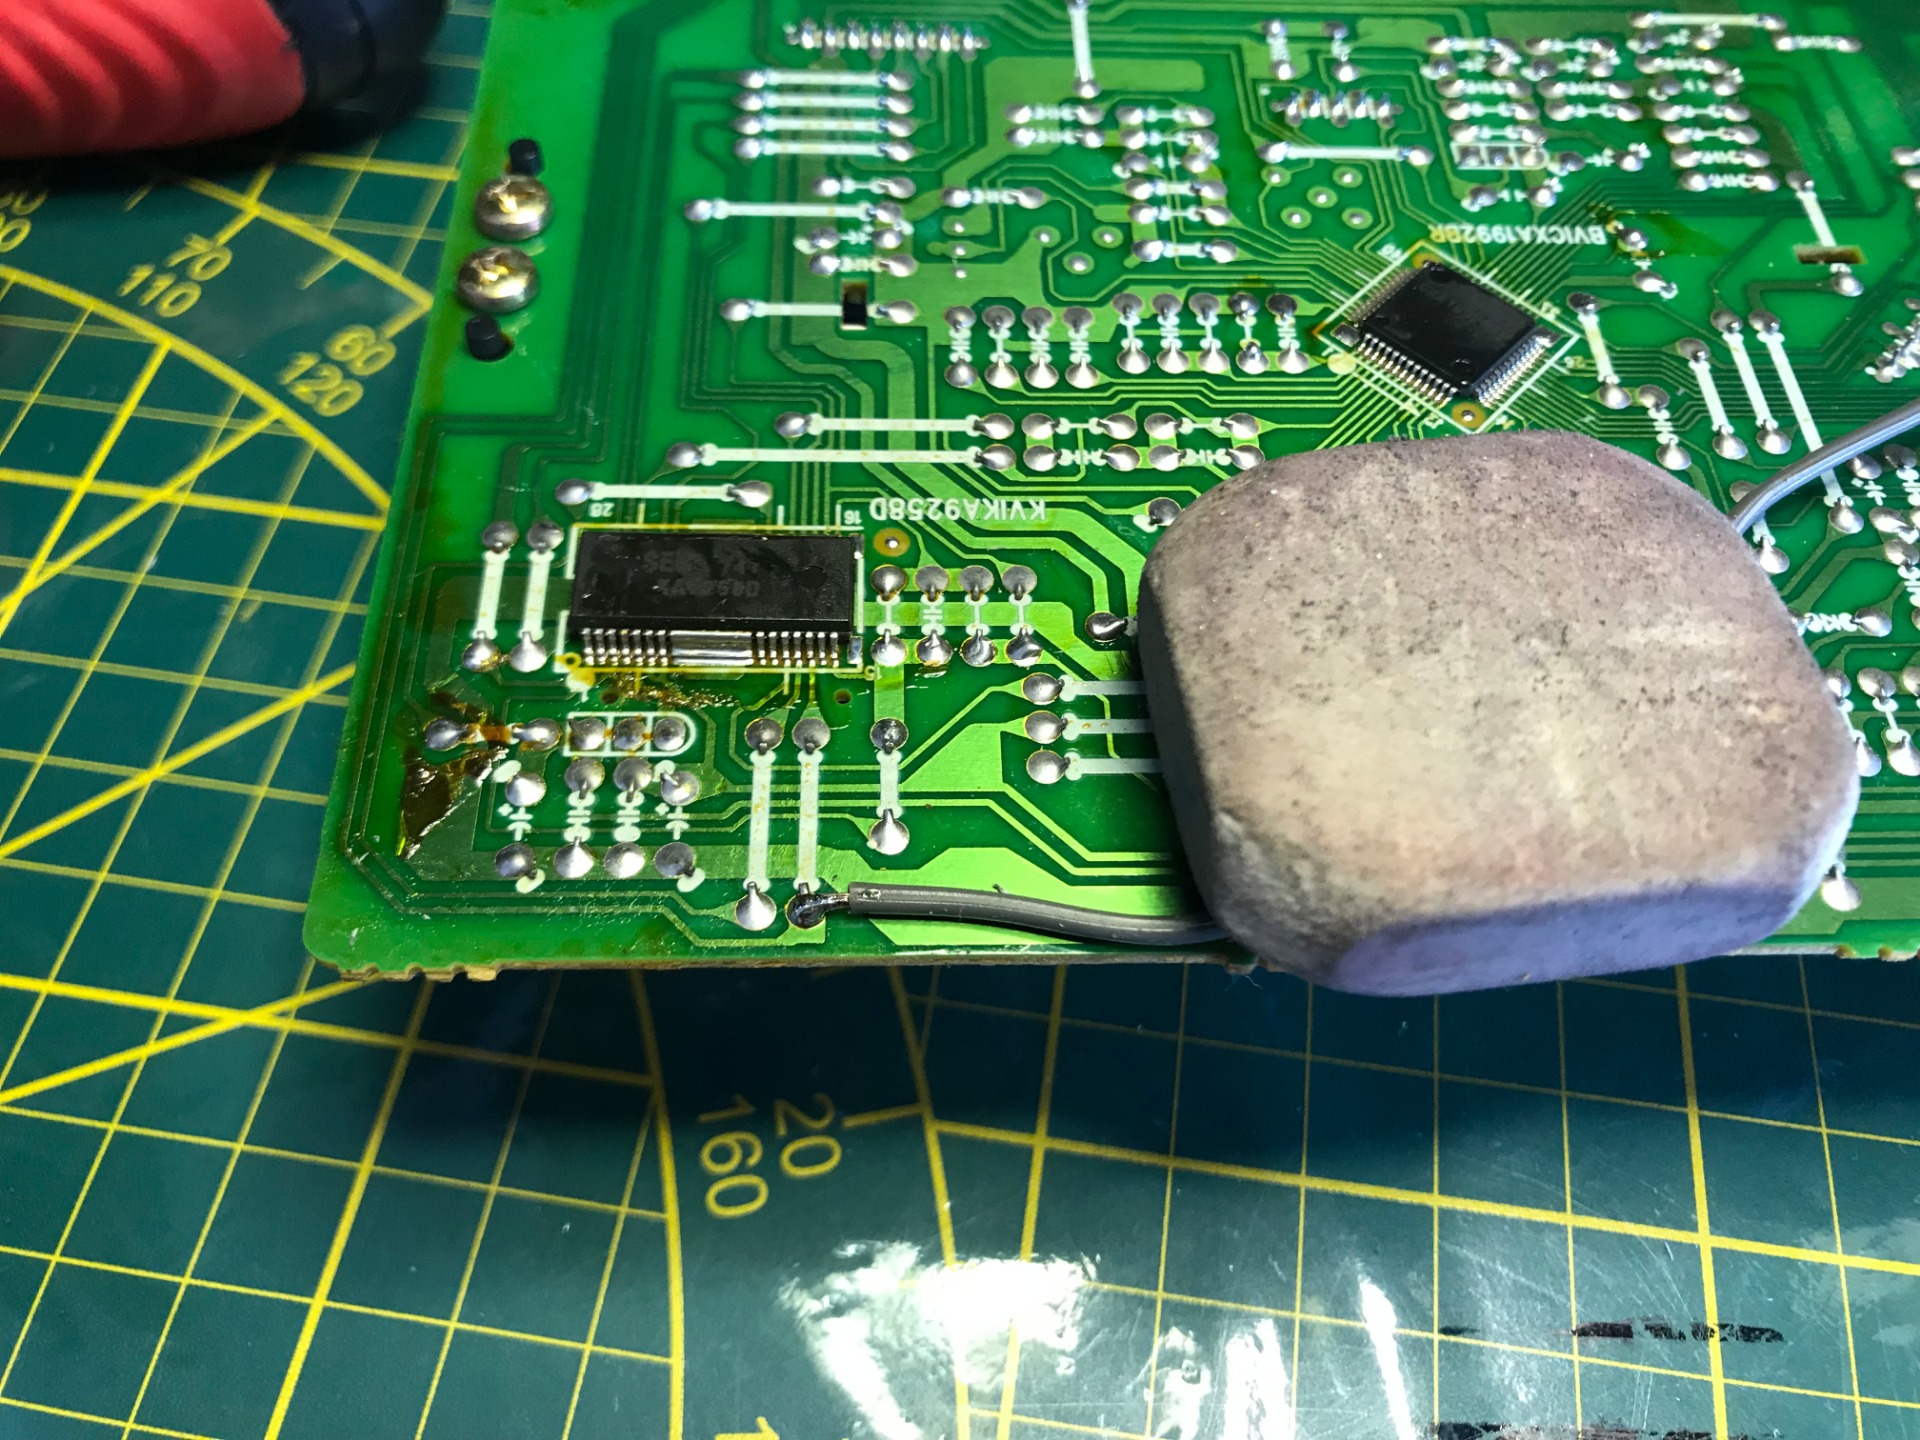
When we zoom in, we can see clearly what is going on. The leftmost pins provide power to the motor, Left for Minus, Right for Plus. We now see clearly that the Min has been broken through due to a small damage in the circuit board, the piece even sticks out!
Just a moment earlier I thought I should give up here, my circuit board knowledge is still nil. Still, I'm lucky this time.
Restoring this connection is a tricky business, I can also choose to build a 'bypass' with a loose vein, which I will do the latter. I don't have the tools to restore this print at the moment so I don't have many choices either. The scraper mentioned in the tool list is therefore to scrape away the coating from the PCB if you want to restore the connection, so I don't need it here.

I strip the ends of the wire away to a few millimetres, the printed circuit board is compact and I obviously don't want contact with other points.
I carefully solder the wire, to prevent it from slipping during the soldering I put a weight on it, in this case a large eraser is sufficient.

After the soldering I wanted to tuck the wire a bit neatly, but couldn't really find a way to do this, normally they are taped to the printed circuit board from the factory. I don't have good tape lying around, so I decided to leave it at that, as long as it doesn't make contact with moving parts it should be good, the other cables are also loose in there.

I reconnect the cables, reassemble most of the device and test it with an original CD. Good luck!
A second test with a copied CD unfortunately yields nothing, but I have a solution for this too. If I burn the CD at a lower speed (8x instead of 24x) the CD player can read them.


Above the total of screws when it was apart.
When reassembling the player we run into a small but known problem, we are left with a screw...
I took a good look inside to make sure I didn't forget this screw somewhere, the device is almost assembled and I don't feel like dismantling it completely again, I finally want to listen to the sound this creature can produce!


The end result puts a smile on my face. The CDs you see are given to me by my mother. She switched to streaming years ago and hadn't said goodbye to her CD collection yet. Now they have got a good home and she can always listen when she comes for coffee.
I owe my taste in music almost entirely to my mother, the CDs that I have taken over fit seamlessly with my taste, many of these CDs I recognize from my younger years!
Finally, a movie of the CD player after the power has been removed. He therefore has to scan all drawers to know if there are CDs in them, nice to see it in operation.
July 31, 2019
A small update since the repair was completed, now a month later:
The CD-player works great! The sound is crystal clear, and it almost always plays without problems. But now a small flaw appears.

As I write this, it is the third time I run into this problem. On a cold start (after the power has been disconnected), the player will immediately run a test cycle, you will then hear it load a CD and put it back in the magazine. (It only scans its seven drawers when I take it out of standby mode). But instead I hear the motor running very hard and don't hear the noise it makes when loading the CD, A few seconds after that the motor stops and I get this message shown above...

Eleven screws further on we look at the inside again, one CD sticks out, it is stuck somewhere. He would normally bring this to the playback position and then put it back in the magazine. So it already went wrong while loading. I have to manually free it and push it back to the warehouse like I've done twice before...

However, something I didn't expect happens now, I wanted to turn the player on for a picture of the crash with the ERR message, but instead the CD slides neatly back to its magazine and still runs a test cycle! Although it went too fast to follow, I couldn't see how he was able to free himself, but it is striking that it happens when the plastic cover of the magazine is off.
I don't feel like examining it again on the workbench at the moment (I still have plenty of projects lying around), and I'm a man of patience. I can live with this 'error', in case I get really tired of it I have a plan ready...

I drew a square on the underside of the metal cover, because I found soot inside the player I suspect that it (the transformer) gets too hot during normal use. There is no form of ventilation in it, so my idea is to set up a passive cooling here (to build in a membrane or gauze).
Although it is "an infringement of its originality" I don't care about that, my first aim is good operation, sufficient ventilation is also part of this. My second aim is to keep the device nice/clean and, finally, to keep the device original.
So it happens that some of my devices have new buttons or lights and deviate somewhat from the original. I will tackle the parts that you don't see radically if necessary, including this ventilation grille.
For now the player works again and I enjoy the CDs with music that I recognize from my younger years. The seller has never spoken again, despite the fact that I have repeatedly indicated that I want to pay. Still, the seller was very friendly, so thank you!
August 20, 2019
Small update, the ventilation grille never came back and the jamming is still an existing problem, luckily I hardly ever remove the power from the device, so this rarely occurs. Nevertheless, I got a message from someone from Bulgaria who had the same problem and also found the solution. When I find time again I will try to apply the same solution and supplement this page with my findings. Until then, thanks in advance to the best person who emailed me the solution!
May 13, 2022
Related pages: