
Repair - Sony WM-DD30
October 26, 2020 (date repair)


The Sony WM-DD30 Quartz Locked Disc Drive Walkman with Dolby B and Mega Bass! What else do you want?
The WM-DD30 is the 5th generation Disc Drive Walkman which descends from the WM-2 (the direct successor of the first walkman). To summarize the DD line:
- 1981: The WM-2 comes on the market and is the successor to the first Walkman from 1979
the TPS-L2 with an improved drive and smaller size. - 1982: The WM-DD is launched, now with a metal housing and the introduction of the Disc Drive for an even more stable drive.
- 1984: WM-DDII, enhanced with the addition of Dolby B noise reduction.
- 1987: WM-DD1, a successor to the DDII but also a branch of the DD line with a cheaper Disc Drive system made of plastic instead of the usual metal. No success because no successors of this model have appeared on the market.
- 1987: WM-DD100 (Boodo Khan), which is also a branch of the DD line, performed with dynamic sound boost (predecessor of Mega Bass). This model appeared only on the Japanese market.
- 1989: WM-DD3, the successful successor of the WM-DDII with the addition of the Quartz Lock, together with the Disc Drive, this ensures an unprecedented stable sound reproduction.
- 1989: WM-DC2, adding Dolby C noise reduction and improved playback head.
- 1989: WM-DD30, successor to the DC2, the first Walkman with 'Mega Bass' which has its origins of the DD100. Actually a combination of the DD3 and DD100.
- 1991: WM-DD33, Same function as the DD30 but now with 'slimline' housing and improved door system.

With a lot of searching I tried to set up a timeline. There is little information about which Walkman succeeds which. So it may not be entirely correct. For example, I can't place the WM-DD9 correctly...
After all, more related DD devices have appeared on the market, such as the WM-F5, WM-D3, D5, D6 and the best known: D6C.
Fortunately, a better overview is now available with a perhaps more accurate picture of the DD series. Along with extensive information on every type that has ever appeared on the market.
I can offer you the link thanks to the contact person who worked on it himself.
Here's a link to the forum on Stereo2Go:

- Play
- Stop
- FF (Fast Forward)
- REW (Rewind)
There is also a red LED to indicate the voltage in your batteries.

On the back is a window, here you have a view of the cassette. The arrow points to the direction of the tape, secretly quite handy when you put a tape in the device.
A small but handy detail is the rubber stud that you see in the middle left, this prevents the Walkman from being scratched when you put it down somewhere.
Personally, this is the second front for me, as soon as I turn it on it's much more fun to have the strap in view.

On the side is the control for the Mega Bass (the yellow switch).
You can choose from normal position, middle position and maximum.
I prefer the middle, the max setting is just a bit too much.
In the middle another switch for Dolby B
At the bottom of the Equalizer to select the type of tape you are using, Ferro or Chrome/Metal.

The double headphone jack is located on the top. On the right is another fairly sensitive volume control.
The double connection is a nice extra, so you could listen in pairs on the train, for example.

On the other side then the adapter connection and the slide with which you open the door, if you look closely you can see that I am missing a screw, that was already when I bought it. Maybe one day I'll find a suitable screw...
By the way, if you see the photos, it seems that the Walkman is bent along its length, fortunately this is not the case, but it is due to the camera position.

The inside is compact, the cassette goes in the door of the DD30. The battery cover is located at the bottom right. It all just barely fits, some batteries are actually just a bit too thick, so I have to take them out with a flat screwdriver.
Overall, it can be called an almost fully developed Walkman, with all the options you need (auto-reverse omitted for a moment). All this in an original '80s jacket. The playing time is also long for a set of batteries. It is also resistant to cassettes with a heavy barrel*.
However, there are some downsides, such as the sliding door that keeps the door closed. sensitive to wear, so the door opens easily during use, the battery holder is just a bit too small, you need strong nails or an extra tool to get them out
again.Finally, the Auto-Reverse is missing, but if you When nostalgia goes, you should also take the trouble to change the strap.
*Concerning the heavy barrel, I have some custom cassettes with metal reels, these are a bit heavier than the average, not all Walkmans can play these well.
Now that we have described the DD30 in detail, it is time to talk about a known defect that many Walkmans from the DD series have to deal with. The ticking sound.
Over time, parts wear out, some last longer than others. In this series, a specific plastic gear is very sensitive to this. After a number of warm summers and cold winters, the material loses its strength and the gear breaks.
The break in the wheel is the ticking sound you then hear, it not only disrupts the listening pleasure but is also bad for your Walkman. Replacing is then the only option...

New custom sprockets are sold on Ebay to replace the original ones.
The walkman will have to disassemble almost completely for this, a job that is not that easy.
The walkman will now disassemble, a maintenance manual will come in handy here. it is therefore advisable to keep it with you when you start tinkering.

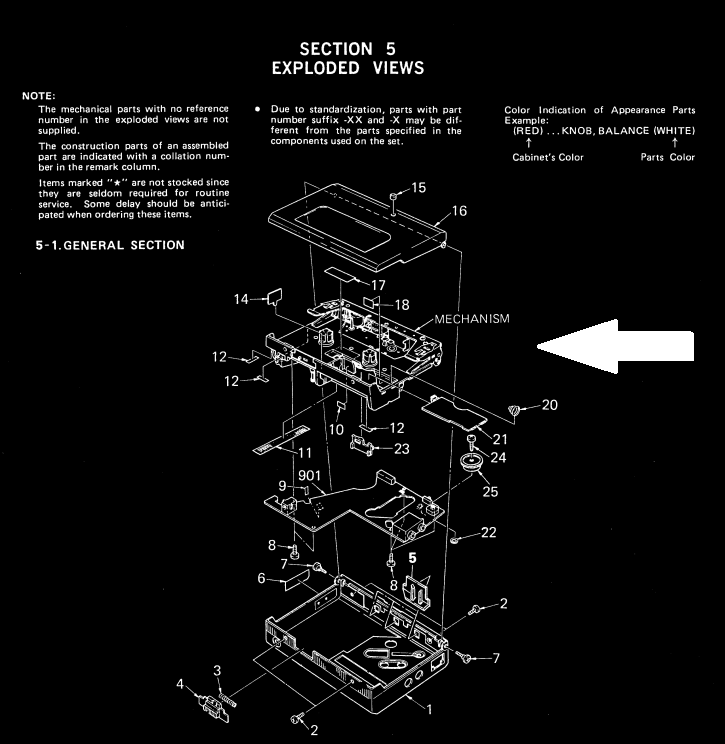
Page 3 of the manual briefly explains how to disassemble the walkman to access specific parts. Very handy, but replacing a defective sprocket is not shown here. I draw up a plan myself, instead of following the arrows, I number the various actions and follow them in steps.

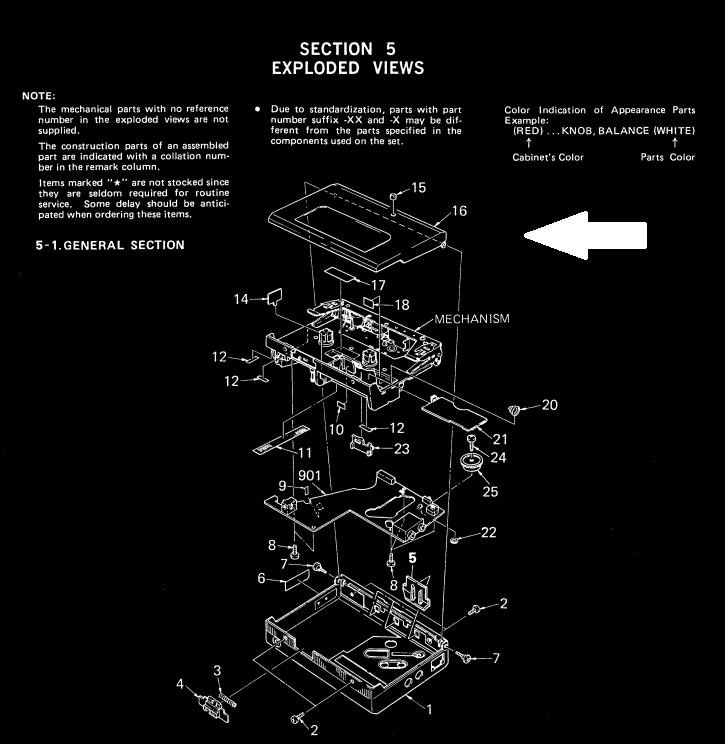
The Walkman consists of several compact layers with parts that are put together like a sandwich. From top to bottom: The cover, the mechanism, the circuit board and finally the metal housing. We will start on the outer layers and first loosen the valve.

I already remove the battery cover, so you can't accidentally damage it later.


On the edge of the door is a silver-coloured screw on both sides, these go out with a PH0 Screwdriver, the door can then be removed.


with the cover off we continue with the outer enclosure.


There are four black screws on the sides, which can now be removed.


You can now carefully lift the inside out. There is a spring in the locking slide of the door, which can jump out. You may need to hold the slide with your finger when you take it out of the housing.
The three slides on the other side also come loose, but that is not a problem for now. Keep them aside so you don't lose them!


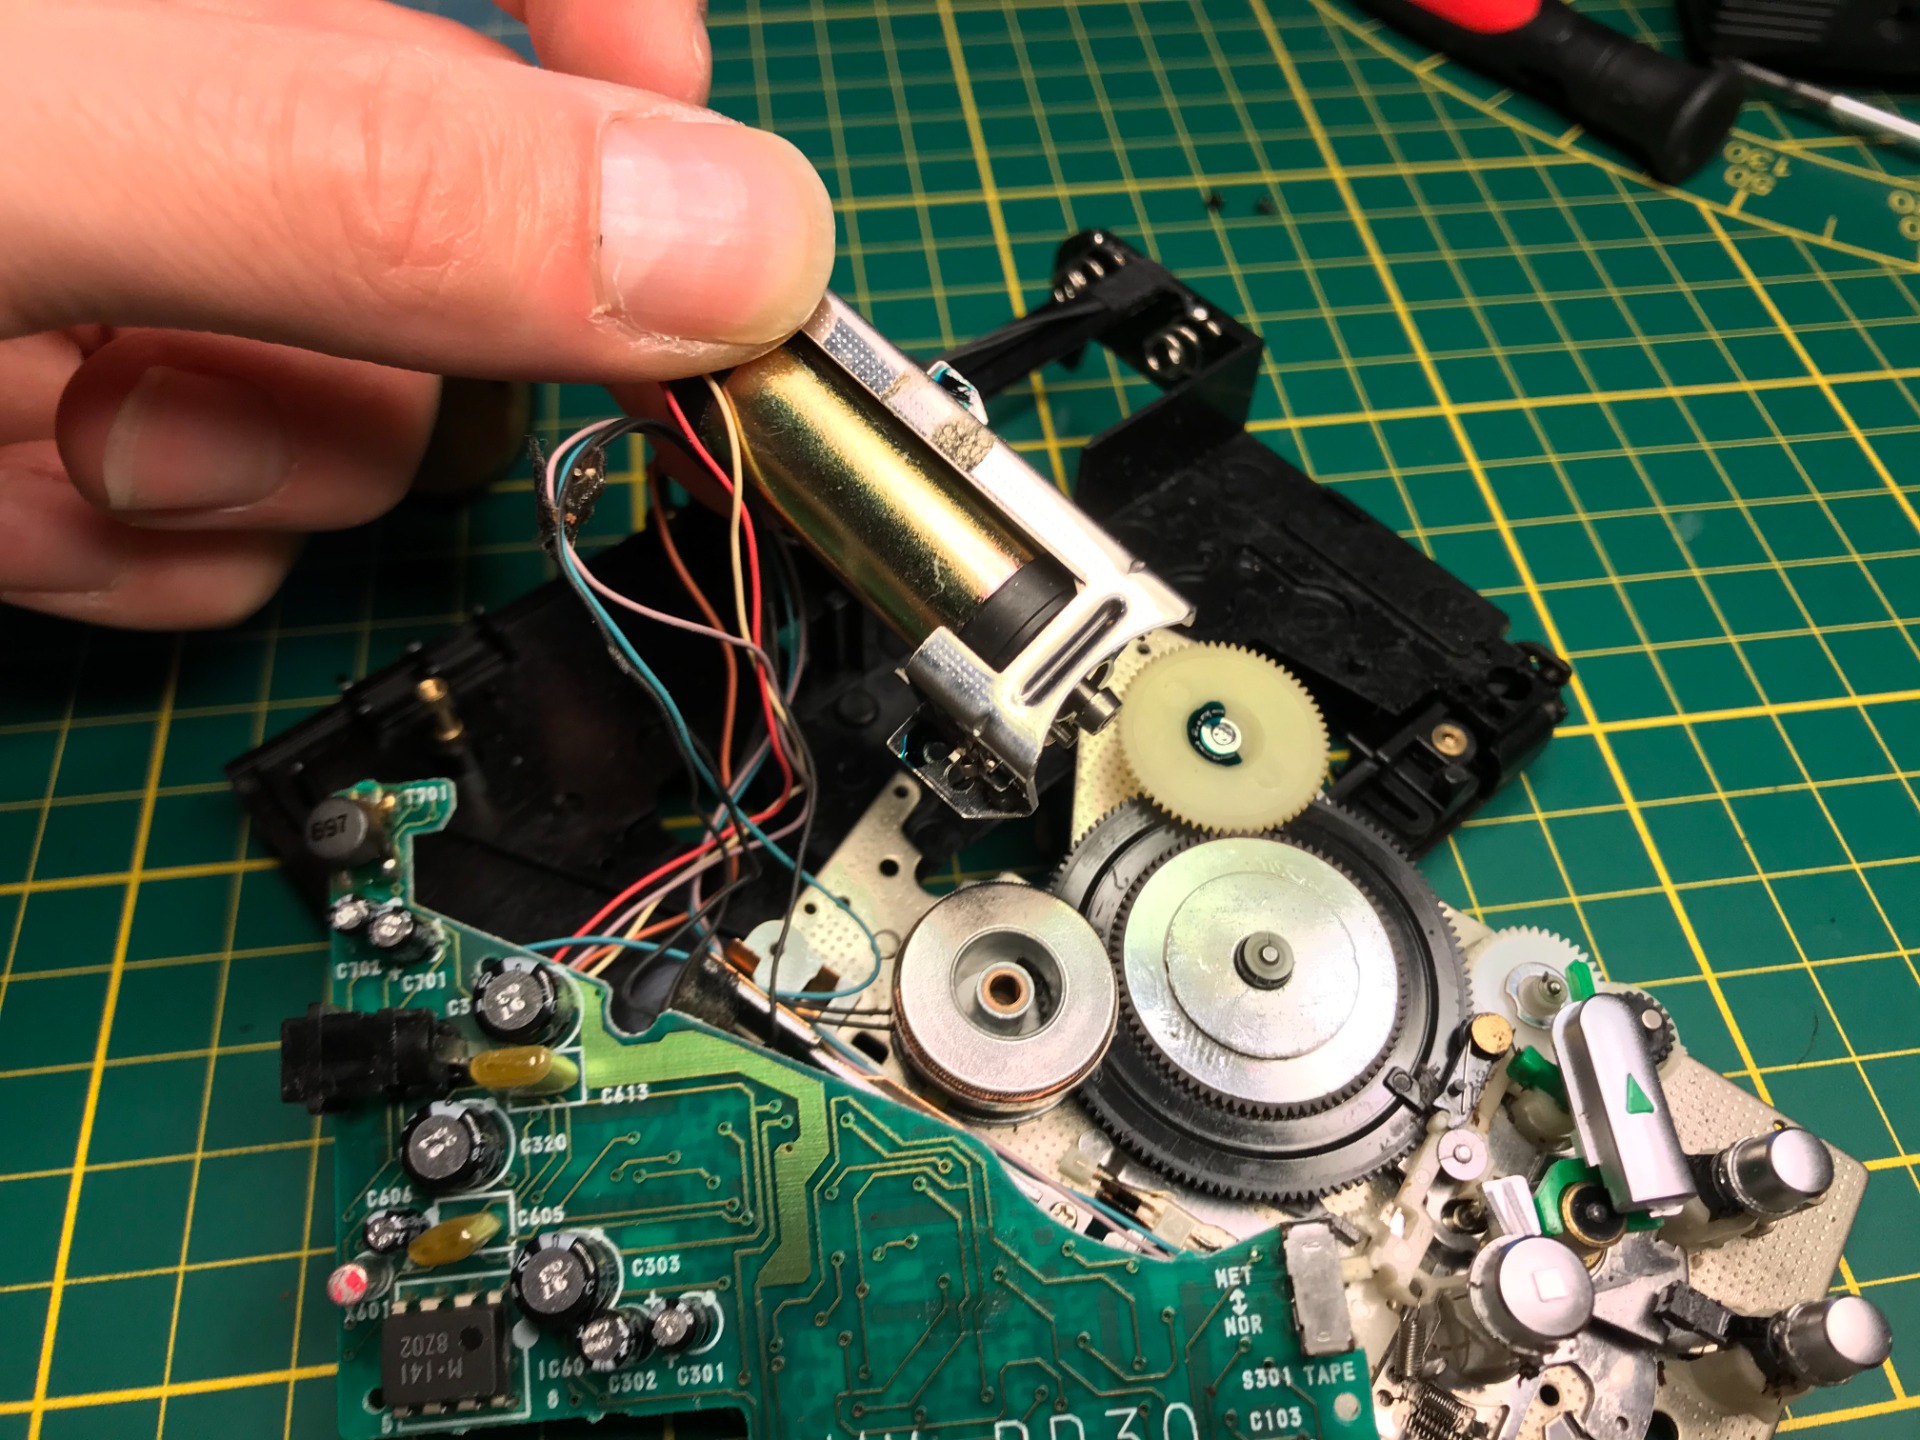
Now that the entire housing has been removed, we have a view of the circuit board and the Disc Drive motor. The rod you see is the actual motor, the wheel below it is the rotor.

Although it is a single layer in the manual, the mechanism consists of two parts, the mechanism itself and the plastic inside of the Walkman, the latter will also have to come off along with the hinge that comes off in this step.


We're just not there yet, the plastic inside of the Walkman will also have to come out, we'll start with two screws that are incorporated in the hinged part.


The screwdriver has to fit in the opening otherwise you won't get them out easily. You get two screws with it, but the hinged part is now physically loose.

The only thing that keeps the hinge with the Walkman is the cable towards the head. This one has some extra length, but make sure that it is not too tight otherwise the veins can come loose!
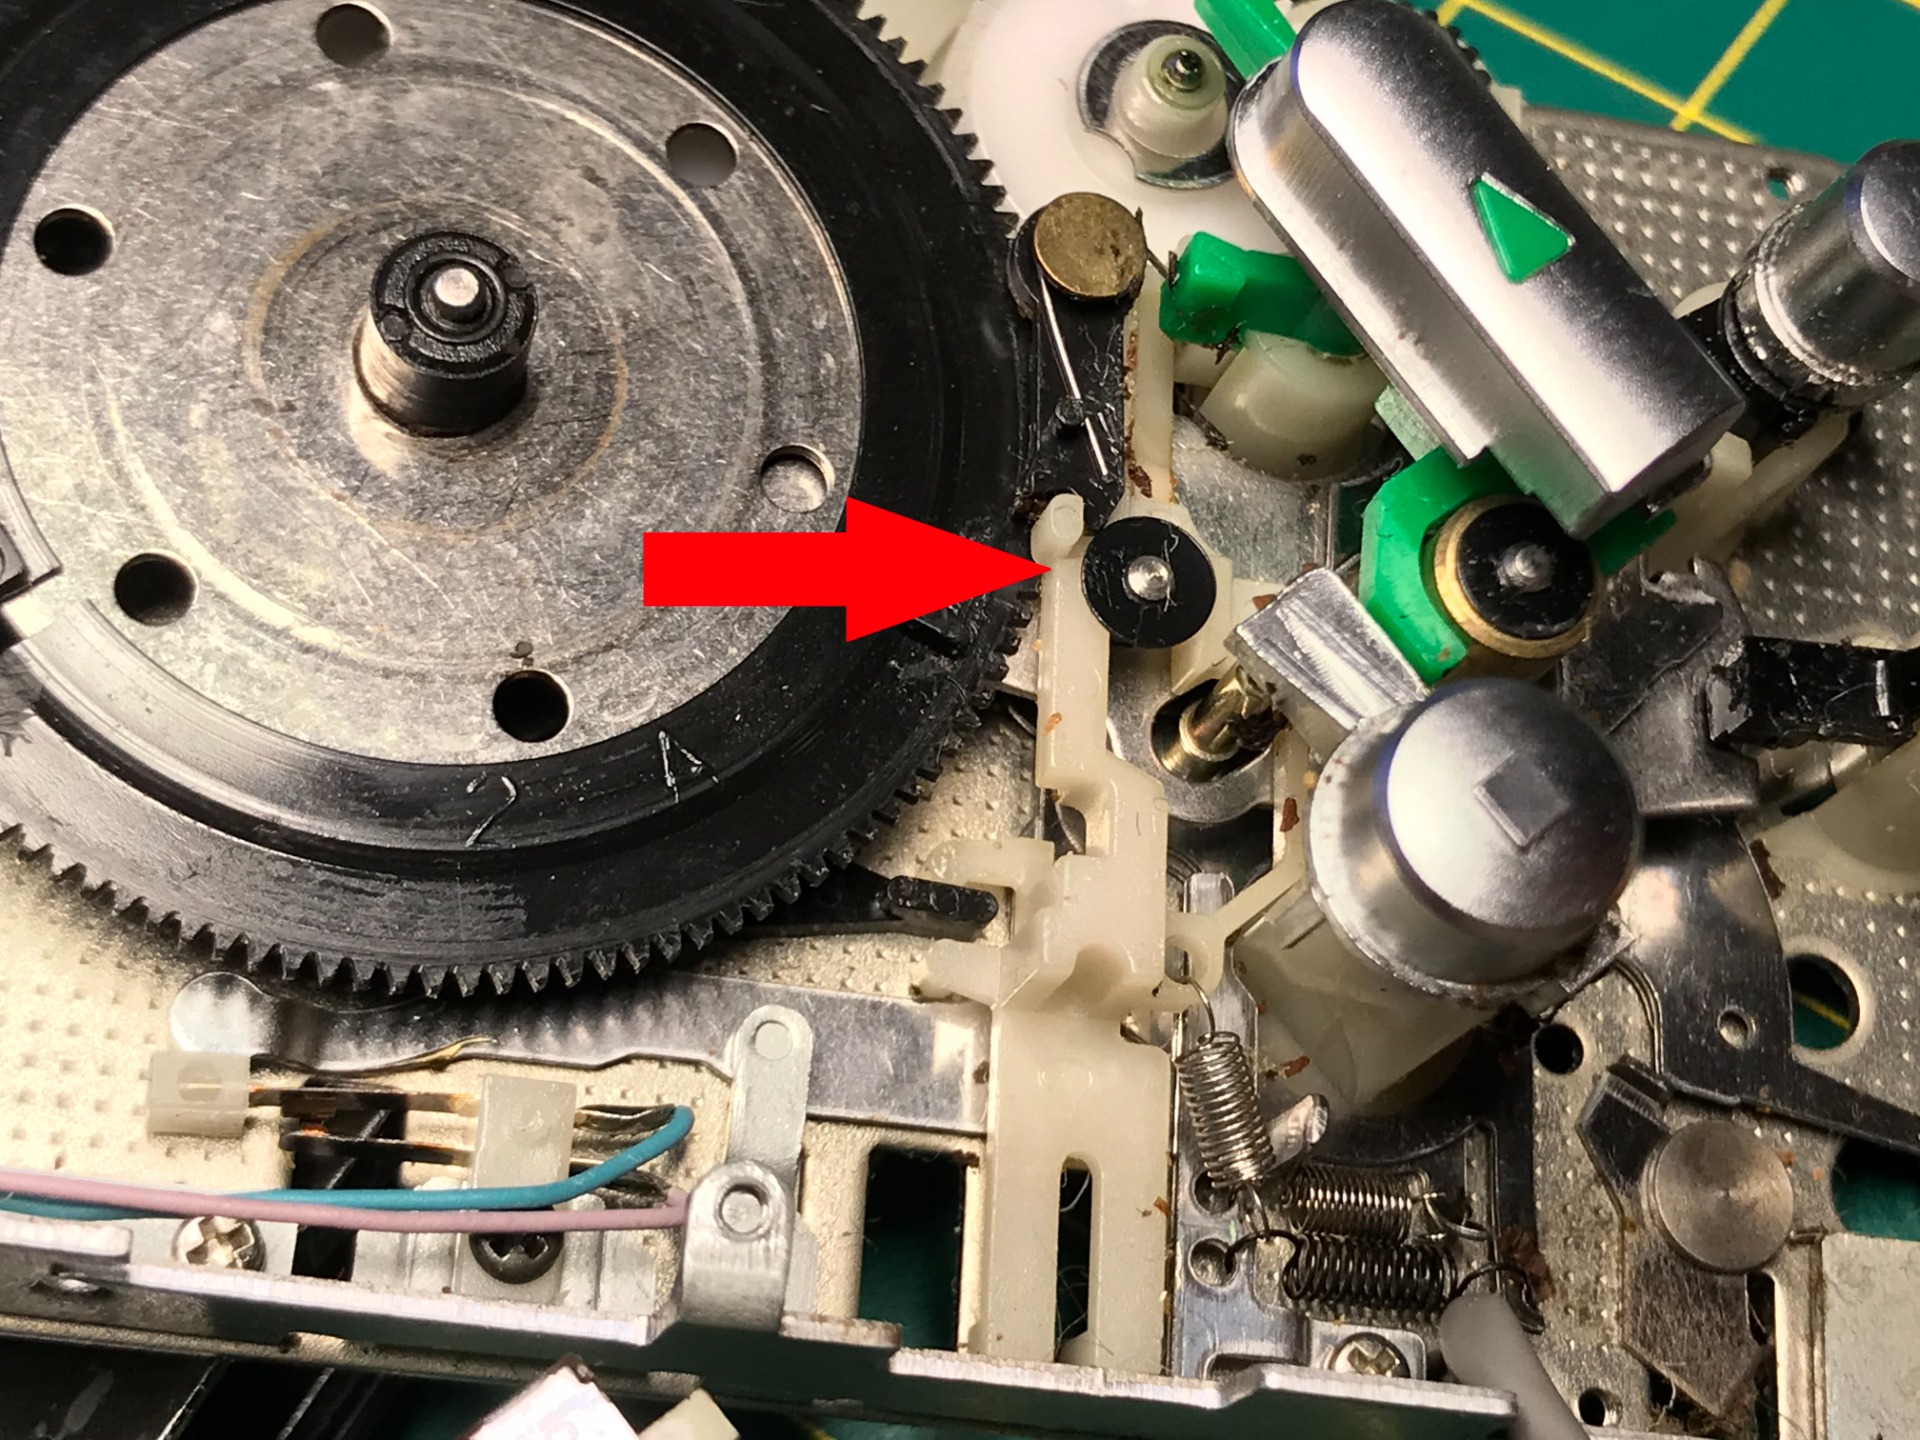
If you pay attention, you will notice that the cable is not placed correctly in my case. there is a small bracket where the cable should fall (indicated by the red arrow), the cable in my case runs to the right, my suspicion is that someone has already looked at the walkman before (which is also the missing the screw on the housing would explain). This can mean that not everything is original, such as the cable in this case.


The screws of the plastic housing can now also be loosened, so you should have a total of five screws. two long from the hinge, three short from the housing. now the thin wires also have to be released to make more room to move.


Finally, as a precaution, I remove this plastic cover from the battery compartment, it is glued to the rest.


The wires are mainly attached with pieces of tape, with tweezers they can be removed fairly well, they still stick very well and can be reused, I stick them on the edge of my desk for now.

The wires also run along a metal clamp, bend it open a little bit to free the wires.


The circuit board and mechanism underneath should now come loose from the plastic housing. you don't have much space because it is still attached to the housing with wires, yet it is enough to continue, you could solder the wires loose, then make detailed pictures beforehand of where the wires should be! I don't prefer it so leave the wires alone.


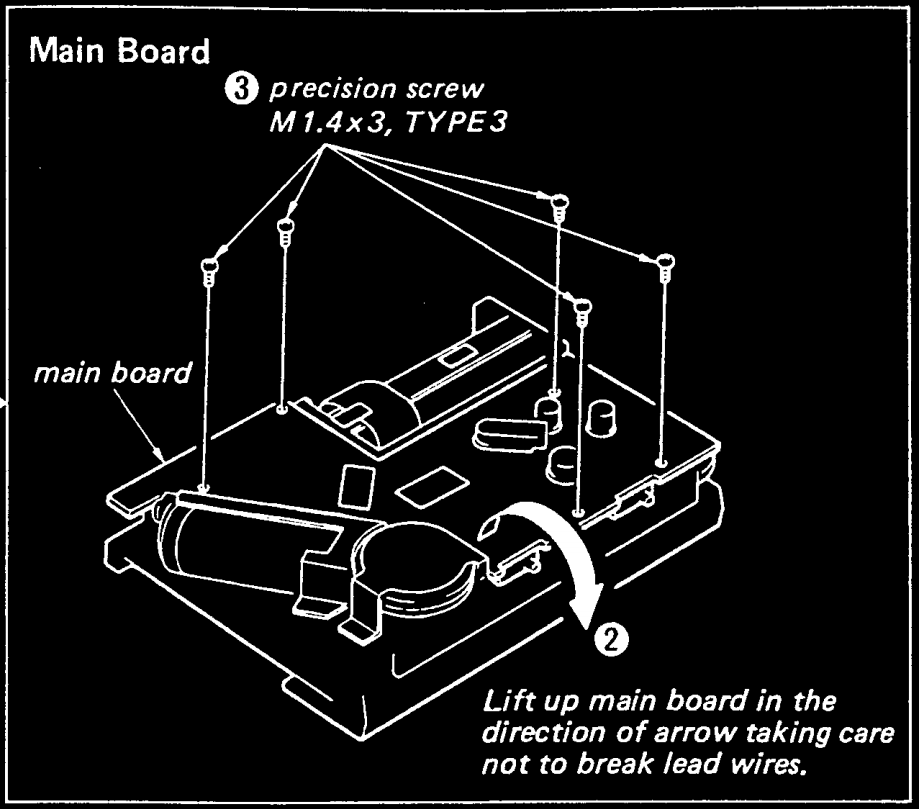
The circuit board itself is fixed with 5 screws, the arrows indicate the location of this, there is a few hidden near the motor, the wires are over it, be careful not to damage it when you remove the screw!

The PCB is now detached from the mechanism underneath, but is still attached with wires, I fold the PCB over to get the mechanism in view.


We zoom in on the rotor, it is under a metal housing, in the middle there is an adjusting screw to regulate the speed. This is covered in the manual if you want to adjust the Walkman. The rotor will have to come off, so also the housing. It comes off with two screws.


You can now lift the rotor out of the mechanism, underneath you can see the copper coil that drives the rotor.

The step-by-step plan also shows how to remove the motor.

Two screws on each side are enough to get it loose.


The white gear next to the motor comes loose with a single screw in the middle, after which you can also lift it out.


The coil of the rotor also comes off, but not without loosening three screws on the other side.

We have arrived at the part that matters. The broken gear, you can see the break. It is not just any gear, it consists of several parts that are connected in different ways. So you have to take it apart step by step!

The first thing that comes off is the C-ring on top. It holds the sprocket on the shaft, if you pick it off (best with tweezers or awl) you have to be careful that it doesn't shoot away, you will lose it quickly!

the top gear is magnetically attached and can easily be lifted off with tweezers. This can possibly already be removed before you loosen the C-ring.

As follows, next to the sprocket, this ring comes off, again carefully because it can shoot away.


The frame is still attached to the rest of the Walkman, to make it easier to work on the gear, it is useful to loosen this screw, which holds a 'microswitch' in place. After this, the mechanism is free from the rest.


I'll take the buttons off so you can get to the next one better.


the black ring near the buttons comes off. Let's take a quick look back at the manual to see what we're doing right now.


I remove the plastic arm with tweezers. There is a small spring attached to the arm that you can best loosen with the tweezers.


Finally the broken sprocket comes loose, we can now take it off and place the new wheel.


The new sprocket consists of different parts, two rings and a set of screws.

Het nieuwe tandwiel monteer je door de kunststof ring op het wiel te plaatsen, de metalen ring erachter en deze samen vast te zetten met de schroefjes.

We can now start reassembling the Walkman! First, the new sprocket goes back into place.


the arm can go back on, keep in mind that the spring will be in the right place again, use tweezers for this.


I put the buttons back and put the microswitch back in place. The switch has to be exactly right, otherwise the Walkman will not work properly.

The C-ring that holds the arm in place goes back on. Test the movement of the arm to see if everything is in place.


The magnetic gear can back it up, followed by the C-ring that holds everything together. Check again that everything rotates and the ring does not come loose.


The coil can be put back in its place. Also the white gear, make sure it fits, the bottom has a hexagonal shape that only fits one way. Also replace the screw that holds it in place.


The motor can be returned to its place. After which I reassemble the rotor and circuit board. I put the whole thing back on the plastic housing.


I give the middle of the rotor a little bit of grease and replace the housing.


after that I check the wiring, the grounding from the head to the PCB has come loose, I solder it back in place, the rest of the wires are OK.


I tape the wires back with the same tape. After this I put the plastic cap back on the battery compartment.


I turn the Walkman over and screw the housing and hinge back on.
After that it's time to check if everything works. I put batteries in it and test the controls, the playback works and the speed is good too. Time to continue with the assembly.

Now that I can still reach them, I clean the parts with alcohol.

A tip that they give in the manual is the slide to open the cover. This works on the basis of a spring that is placed in it.


First I put the slider back.


On the inside of the walkman is a slot where you can put the spring. It takes a few tries to get it right, after that I carefully put it away, the slide is still loose on it so it can fall off after which you have to place the spring again.

Before we put the mechanism back in the housing, we put back the buttons that are on the side. They give another tip here in the manual.


make sure that all switches are in the lower position and do the same with the slides that go into the housing. After this I carefully place the mechanism back in the housing as indicated on the manual. I hold the slide for the cover with my finger so that it does not come loose.

I switch everything up and down to make sure it's all right. after this, the screws can be put back in the housing and the cover itself can also be returned.
The WM-DD30 is reassembled and ready to use. the broken gear has been replaced and the ticking sound has disappeared. For now I will have to wait and see if there are no other defects, so take it out for a few days to test.
During testing, a small defect has emerged, sometimes the play button does not remain pressed and shoots out again, so that playback does not start. As a remedy I take the cassette out and put it back in, sometimes it takes a few tries but it still starts up. I haven't had this problem for a while now either.
The batteries last a long time and it plays quite stable. It also works well in colder temperatures.
Especially the bass boost makes listening to music on this Walkman more fun.
January 19, 2021 (date completion of page)
Sony TCM 6 Repair
Sony TCS-370 Repair
Realistic SCP-7 Repair
Erres 3537 Cassette Recorder Repair (vol. 2)
Erres 3537 Cassette Recorder Repair (vol. 1)
Compact Cassette Information
Compact Cassette Repair
New old tapes! blog
Compact Cassette Gallery