
Repair - Sony WM-24
The WM-22 and WM-24 are the first walkmans from Sony that were both good quality and cheap. All superfluous parts have been left out, only what benefited the sound quality remained.
They were very popular, partly due to the low price, and were sold in large numbers.
I also didn't have to pay much for it because I found it in a thrift store for almost nothing, it was defective when purchased but I partly got it to work. On the first test he started eating the straps after which I put him on the shelf.
Now my last walkman has also given up and on top of that my cassette deck is now also having problems so that I can no longer play tapes.
May 17, 2020

There he is. The original sticker is even still on it. It has some signs of use but otherwise still looks pretty good. Let's take a look at the details before we start.

On the side are the playback functions, forward, backward and play. The stop button is also the eject button when you press it again. There is a small battery light built in that lights up when the battery is still good.
There should also have been a harness because there are eyes on the top and bottom, which was unfortunately no longer included with this copy.
The buttons are made of plastic, as is the entire housing, to keep the price down.

On the top there are some extra options, choose from the type of strap (Ferro, Chrome and Metal). A switch for Dolby B noise reduction, connection for headphones and the volume control, which is particularly sensitive!

The back is not very special, the battery cover is loose and falls out if I don't stop it with plank tape, but it still closes neatly.
A small detail is the gray cap that is just above the middle screw, below is the speed control of the motor, you can adjust this with a small Phillips screwdriver.

Because I've worked on it before, you see a nice ribbon here to easily remove the batteries. For this I cut a strip of spectacle cloth and glued it on the inside with glue. It takes two AAA batteries.

Unfortunately a little bit of damage to the housing, luckily I still have the part.
When I bought it it was already hanging loose, I glued it but because some batteries are slightly bigger than the others, it broke again when I took it out too roughly...

The inside is compact, a cassette just fits in with which all the space is filled.
Incidentally, you load a cassette directly into the playback mechanism, instead of into the door, as is often the case. This can take some getting used to if you don't know how to do it.
The Walkman plays, but very unstable. The right axis falters a lot and sometimes stops, there is also a lot of disturbance in the sound that comes out. In short, it needs to be checked again. High time to bring out the tool list.
Tool list:
- Phillips head screwdrivers: (PH0 & PH1)
- Awls (with bent point)
- String attachment aid (barbed bar)
- Tweezers
- Tray for screws and parts
- Cotton swabs
- Ketonatus (96% alcohol)
- Listening equipment (headphones)
- Test tape with recordings
In case of this repair also:
- Sandpaper (fine grit)
- Donor walkman
- superglue


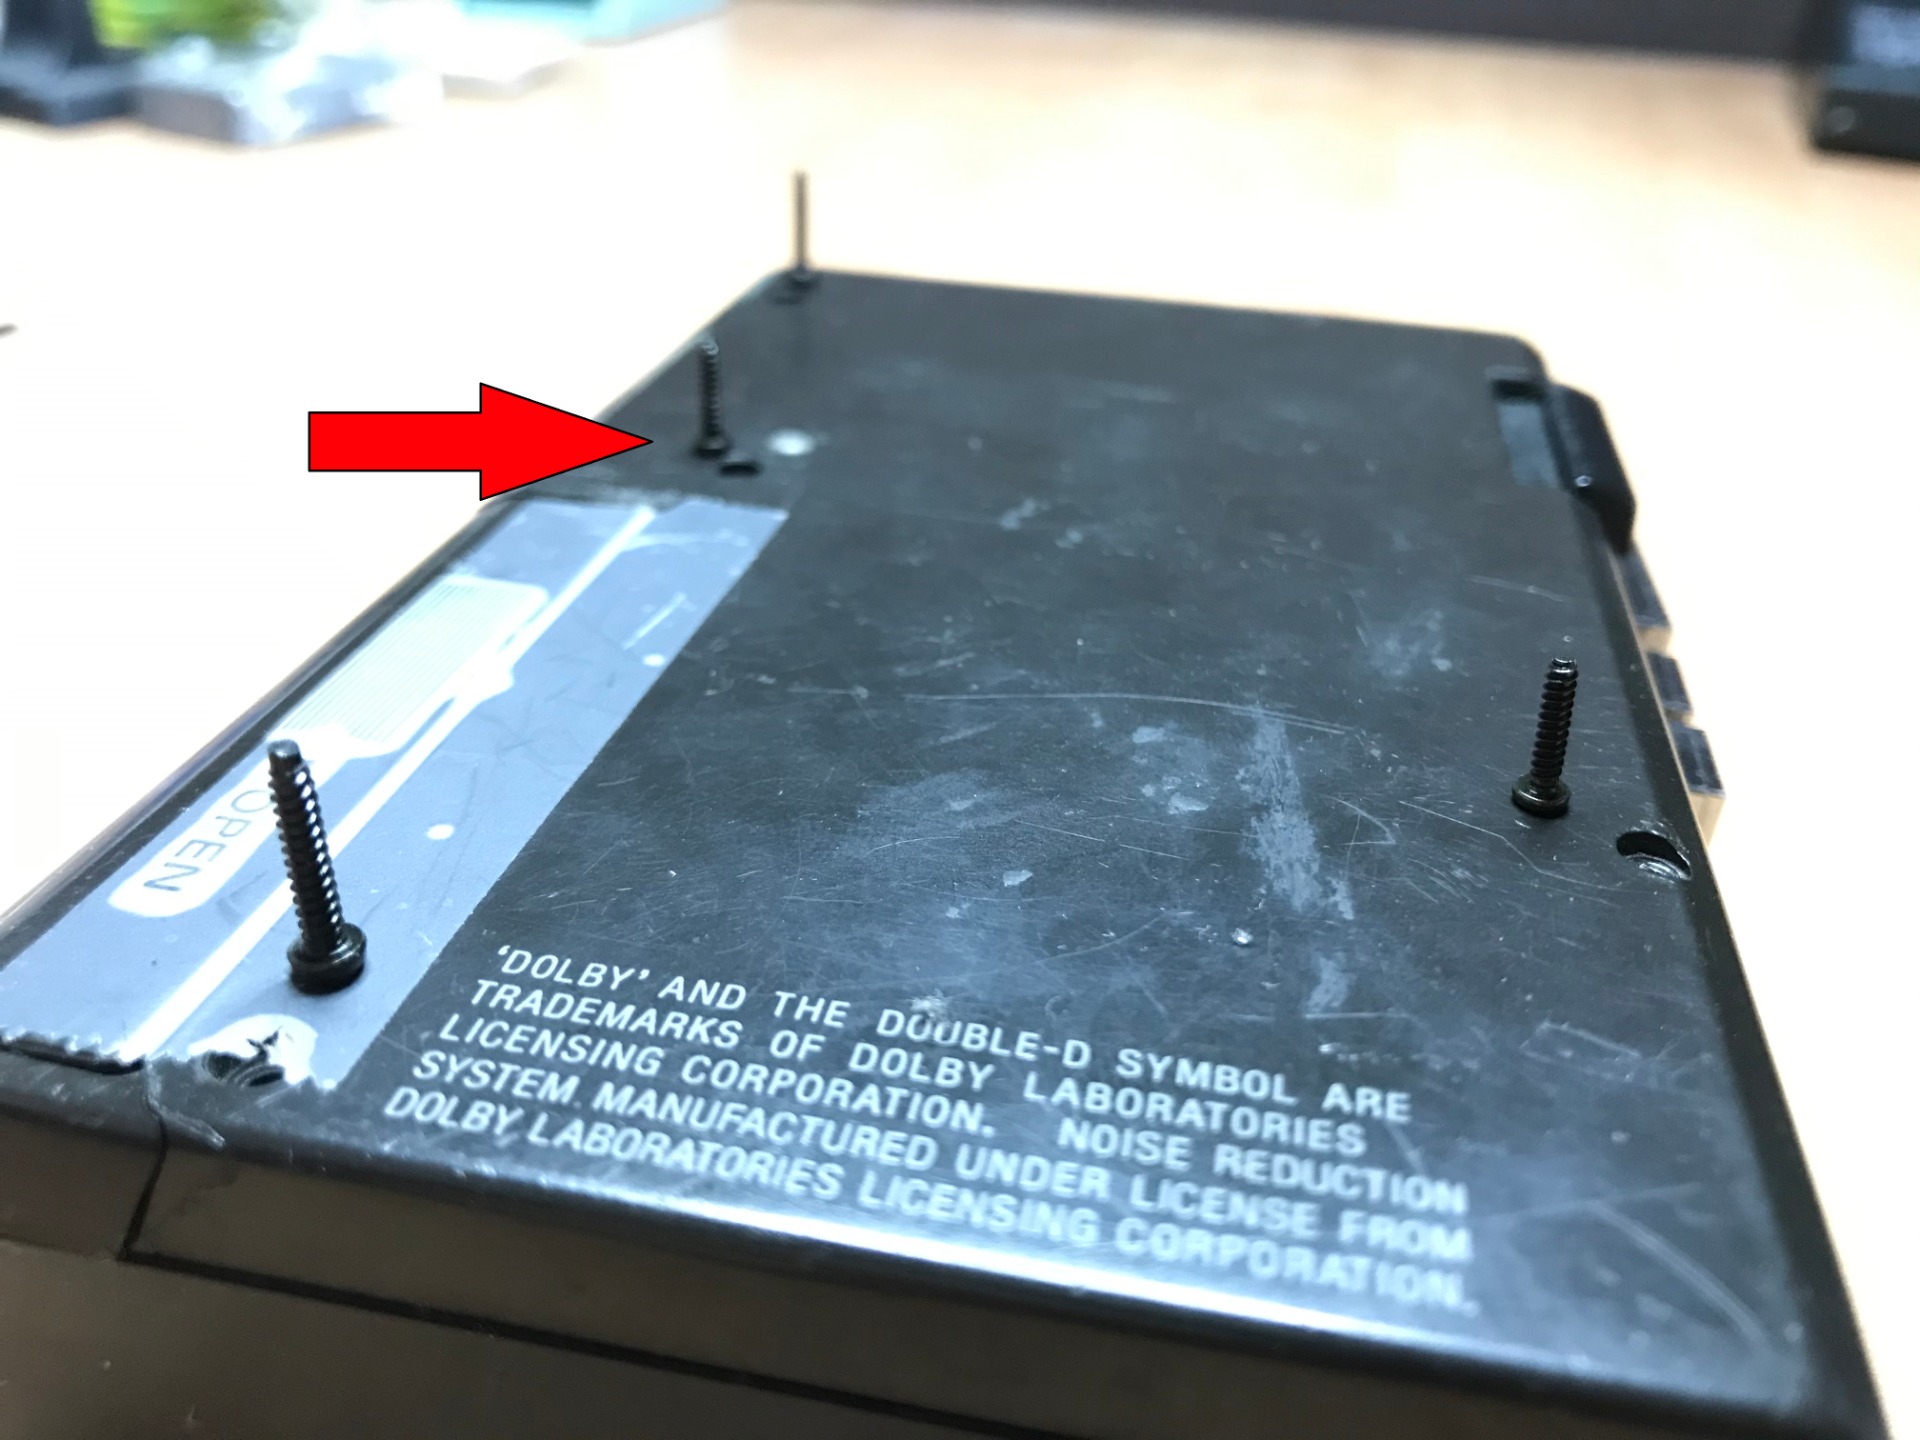
Opening the walkman is not a difficult job, we start with the bottom, there are four screws in it. Note, two screws are a bit longer than the other, remember which one goes where!

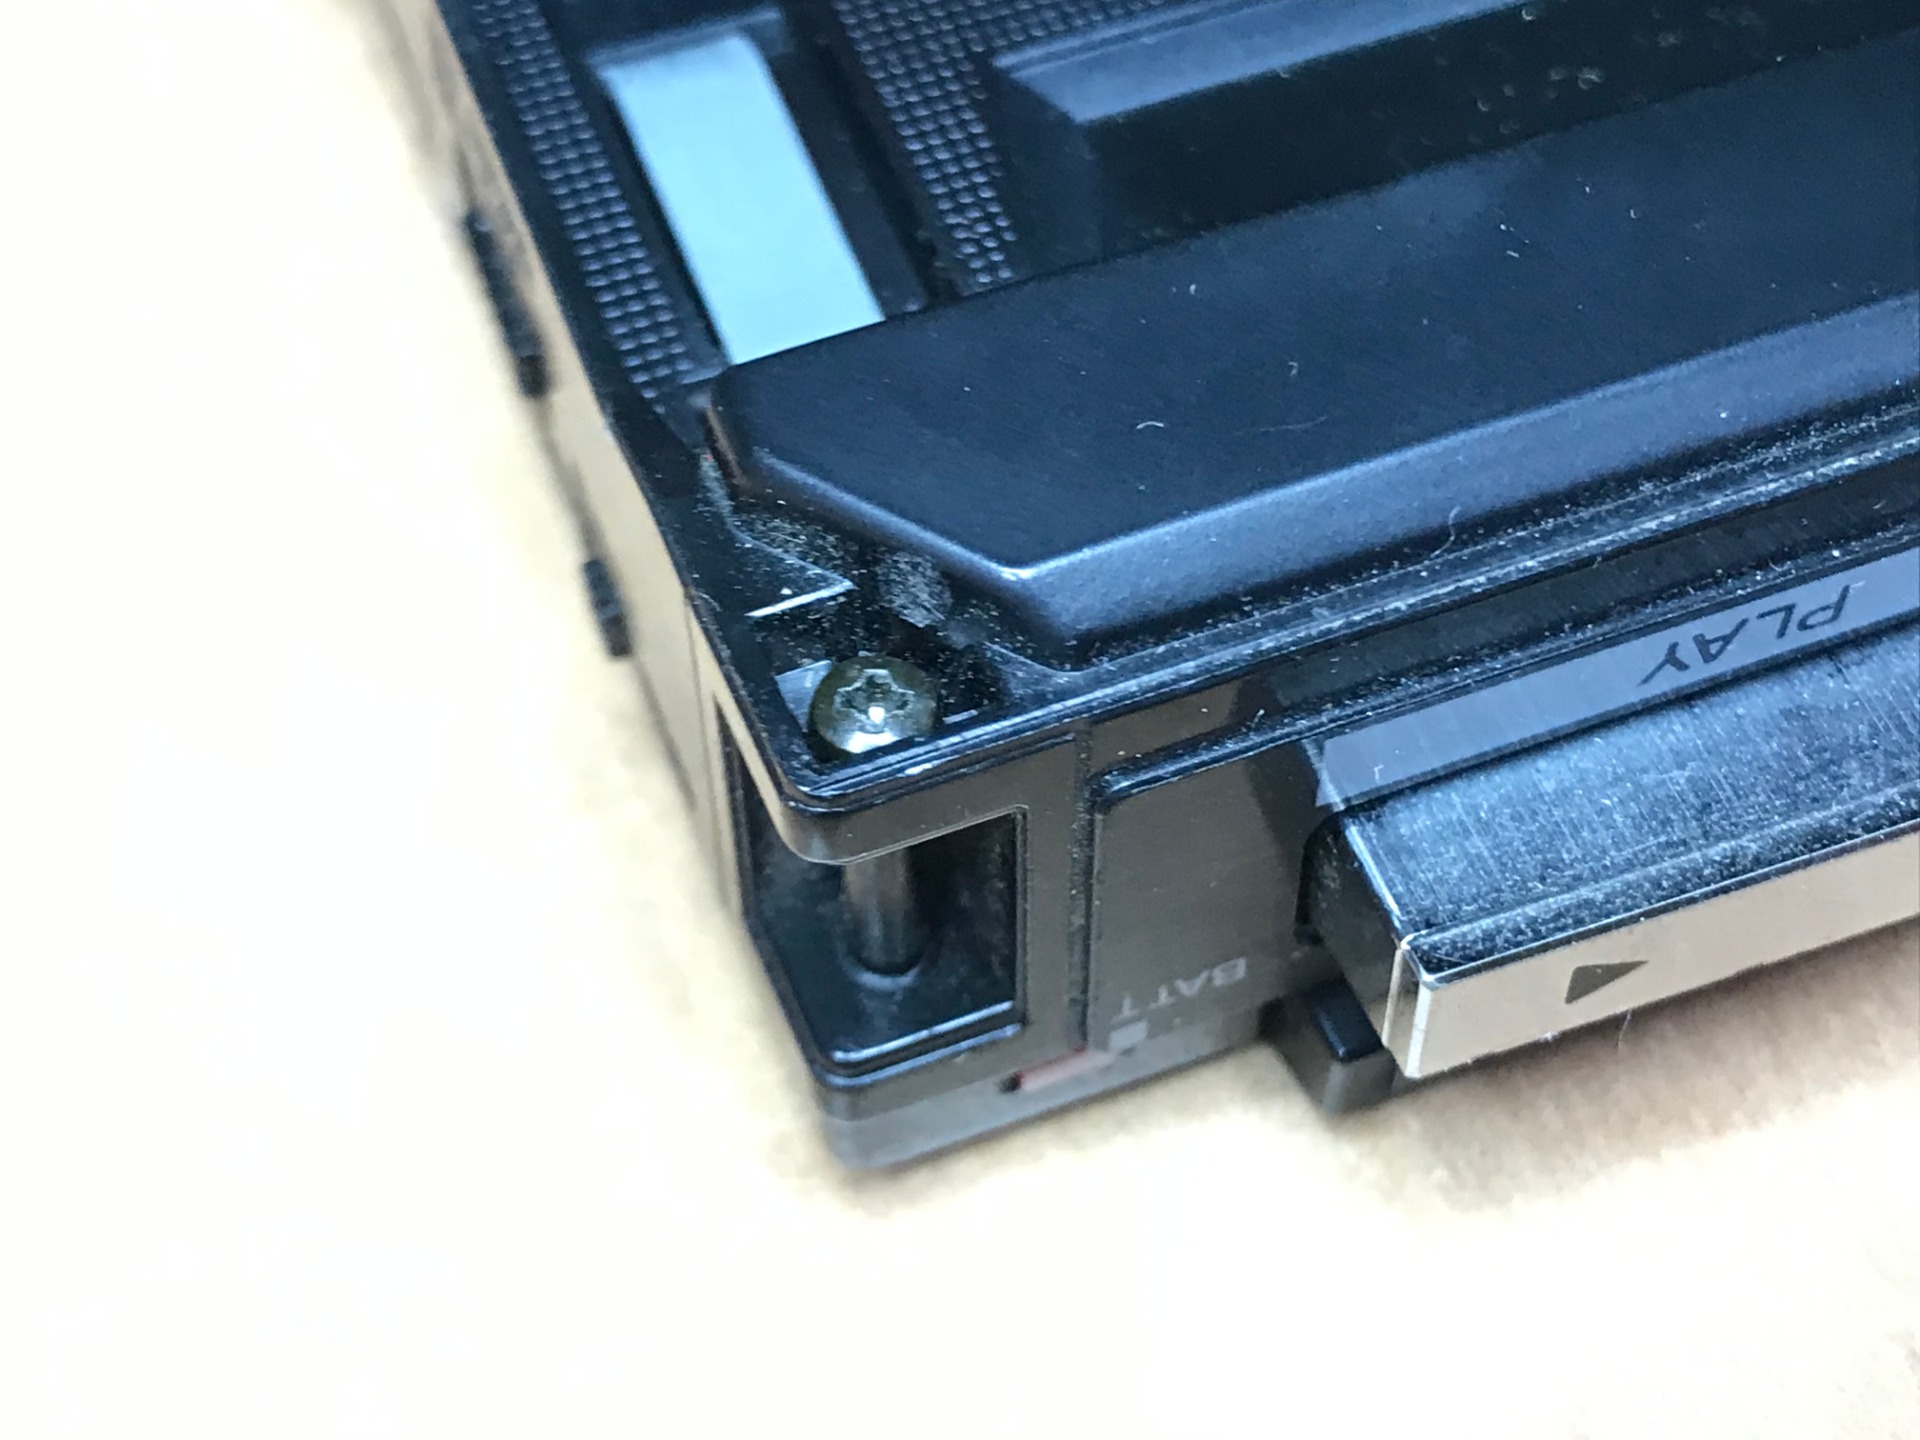
With the first four screws removed, we turn the walkman over again and open the door. Here are two screws in the corners that hold the housing together. These also go out.

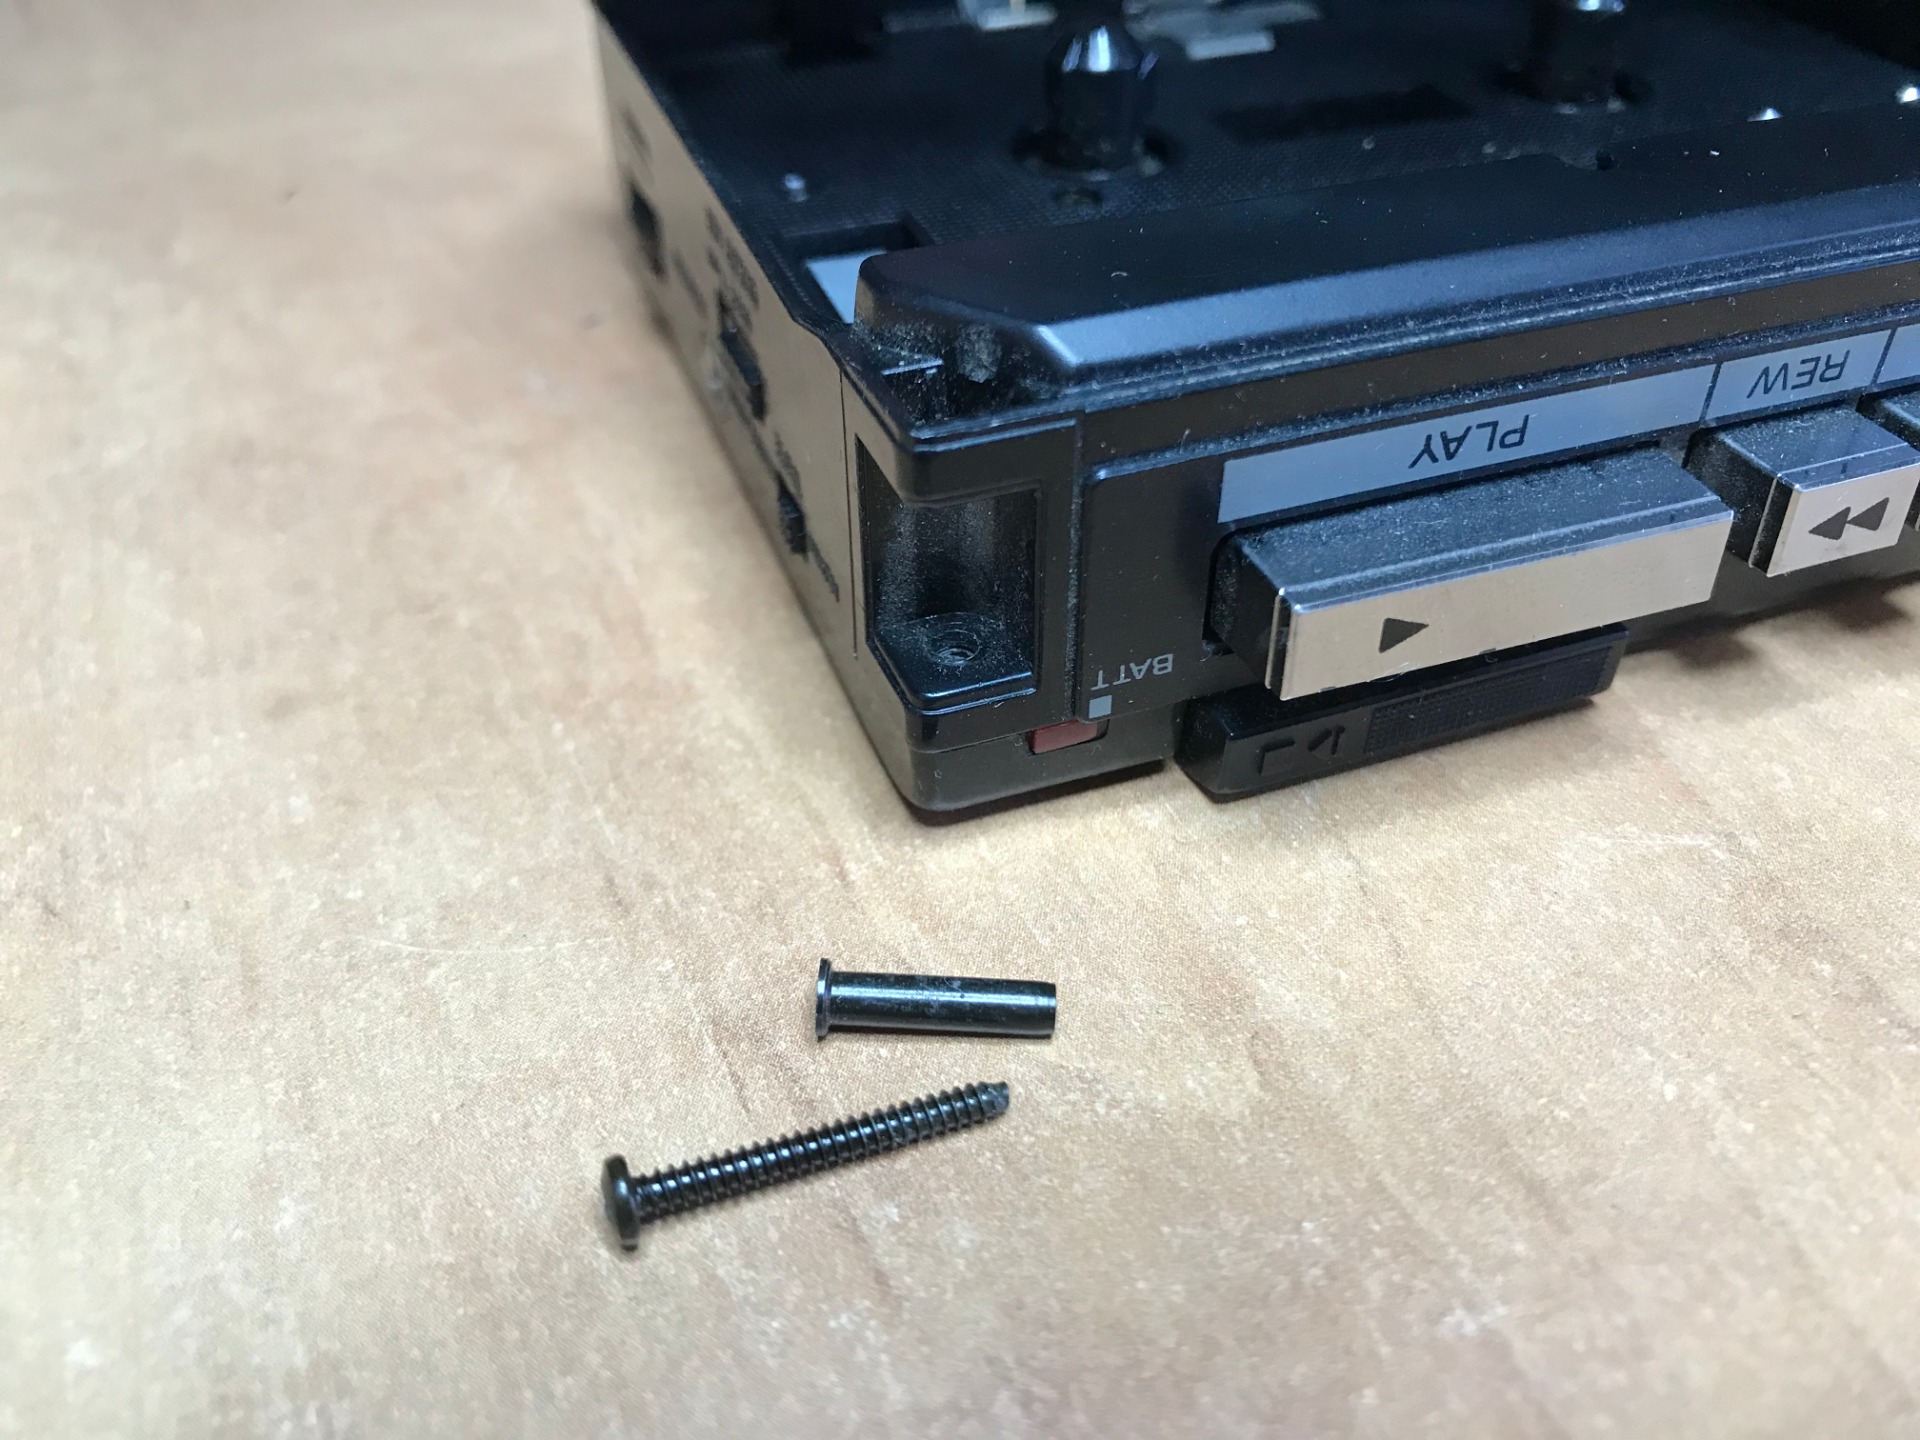
When the screw is removed, a metal hub remains, it is best to remove it with tweezers through the hole where the screw comes out. You can also turn the Walkman upside down for convenience and shake it gently until they fall out.

Once you have removed the six screws, you can remove the cover at the back. Do this carefully, it may still be a little stuck.
The dark yellow layer on the inside of the lid is striking. A metal foil is hidden behind this that absorbs any interference signals from outside so that the printed circuit board is not affected by this, which benefits the sound. Walkmans quickly pick up signals from outside (mobile devices, cell towers and other sources. You can hear this when playing back as annoying sometimes deafening beeps and noise. The layer of foil provides a Faraday cage and prevents this problem.

We will take a closer look at the belt of the main motor, I already replaced it last time so it is no longer necessary. Replacing the belt is not difficult, but it is important that it is positioned correctly. It is a square strap, so there must be no stroke in it or it will affect the playback.
For now you can remove the belt, the large brass flywheel will have to come off later.

When we look at the circuit board, especially the part where the stop/eject button is located, we see two different screws. If you want to have better access to the running gear, this must also be removed. Note which one belongs where!

There is a big difference in the screws, moreover they are quite small. So don't lose them and put them in a container.

The printed circuit board can now be removed, but is still attached with wires, carefully tilt the PCB over, the wires are soldered, so keep in mind that they can come loose if you handle them too roughly.
The gray wire that comes off the circuit board can pinch against the brass flywheel, keep this in mind as it can greatly disrupt the playback of a tape.

It is always wise to take a look at the condition of the gears, as can be seen here, age has already made a victim. A break in a gear can cause you to hear a continuous 'click' during playback, I'm in luck here. The fracture is not serious enough and I know that I have repaired it once before with a drop of superglue.
Pinch the break closed when you are going to glue it, use small locking pliers for this.
Gluing can also be dangerous, too much superglue and your gear will get stuck with the surface or the teeth will be full of glue. This is disastrous for the operation of the whole! It would be best to look for a replacement, but this is not easy.

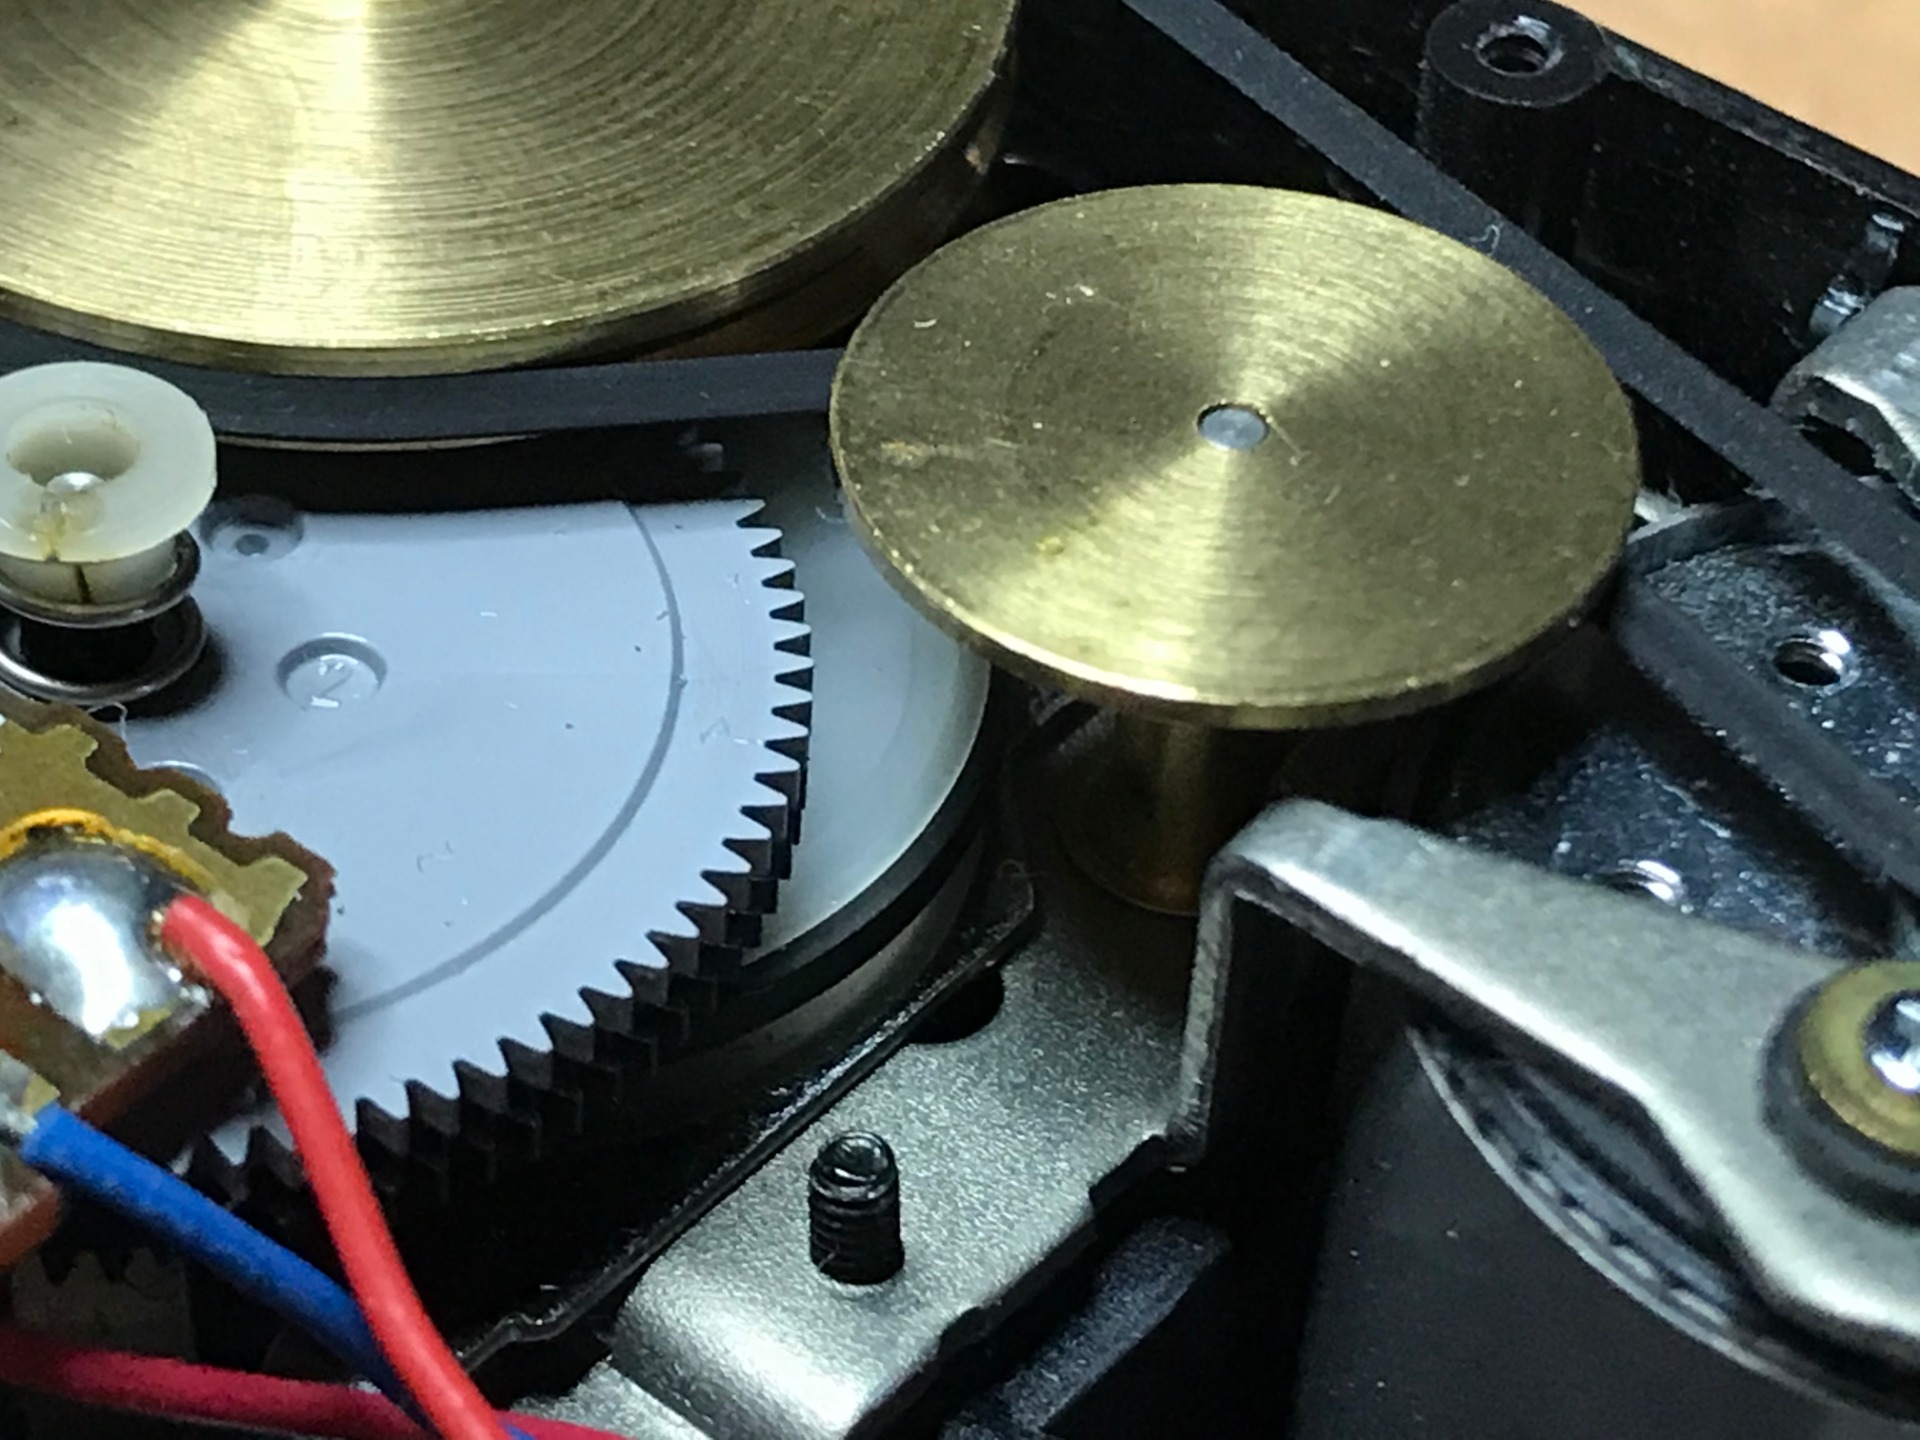
We take a look in the running gear to see what could be wrong, the problem is easily found. I see another belt here that is not quite in place. The only problem is that a number of parts have to be removed to reach it...

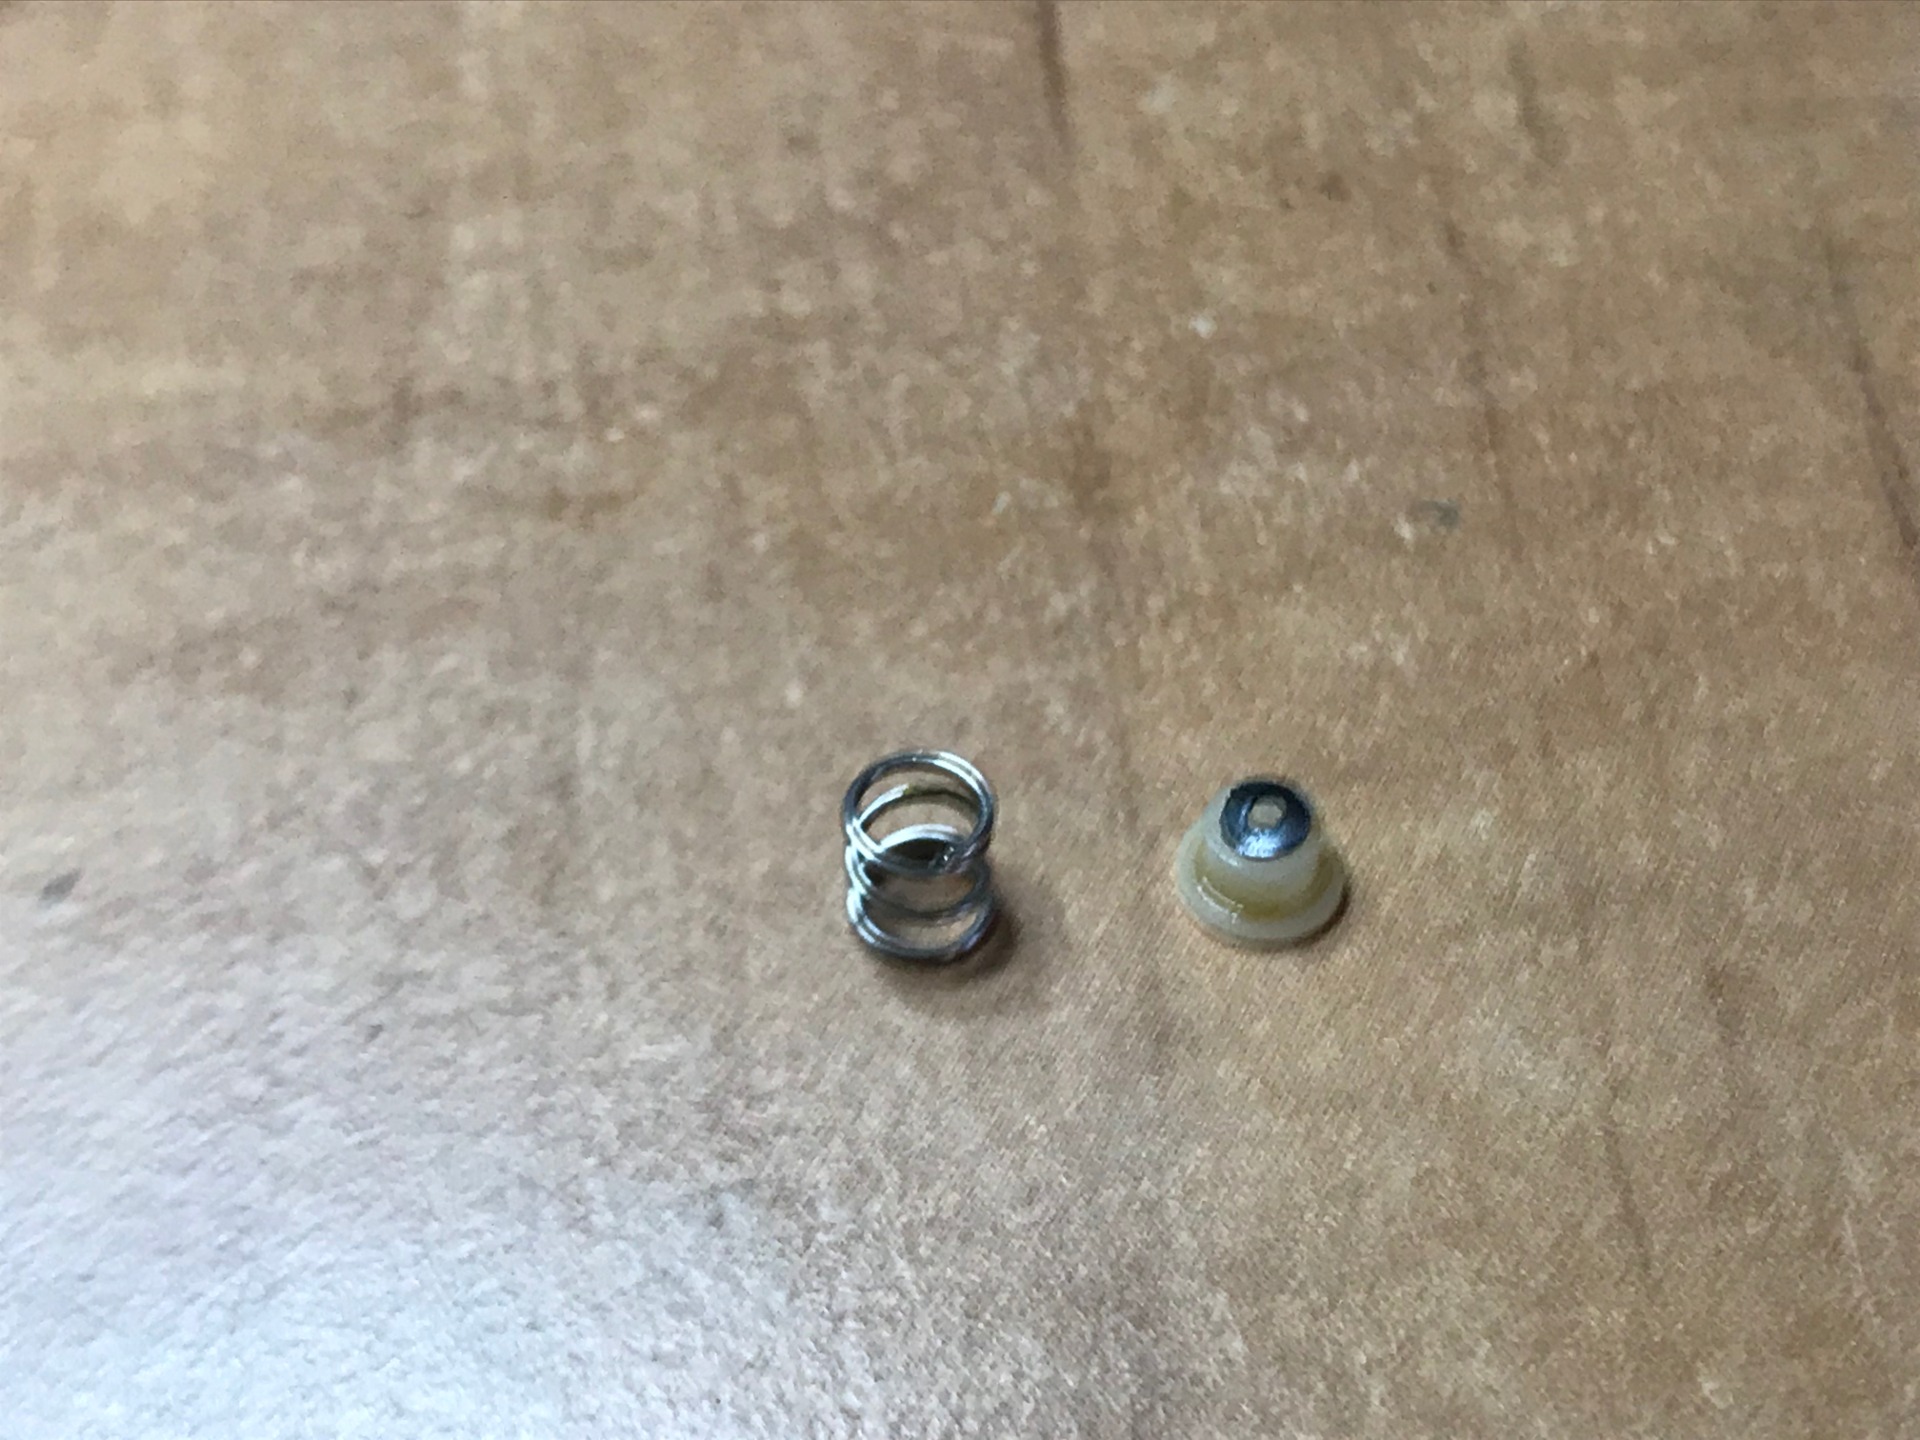
To start, I remove this coil spring with plastic hub from the gray sprocket. This can still be done by hand and I recommend it to you. Carefully lift it off because there is a small C-ring underneath that you don't want to lose!|
There also appears to be a break in the white hub, luckily the coil spring keeps the break closed so it will have little effect on the operation.


The C-ring is very small, you can't get it off just like that. I manage to get it loose with the awls. the ring is a very special one because it overlaps itself and is twisted. (twisted).
You do not want to lose it because a replacement is not easily available.
(I will come back to this later).
The gray sprocket can't come off yet because the flywheel is still above it, to release it we have to be on the other side.
Before you start, it is wise to fasten the circuit board again with a screw, this way you prevent damage.

On the inside of the cover is another C-clip attached to the capstan of the flywheel. You can also get these loose with the aforementioned awls, make sure it doesn't shoot away!

Also put the C-ring safely away, turn the walkman over again and carefully remove the flywheel. In my case I only now remove the main belt.
My method is not the best, the flywheel could have easily come out first, even before you started working on the circuit board and the gray gear.
The circuit board can now be detached again and only needs to be reattached when we start to put it back together.

Now we can start dissecting the running gear.
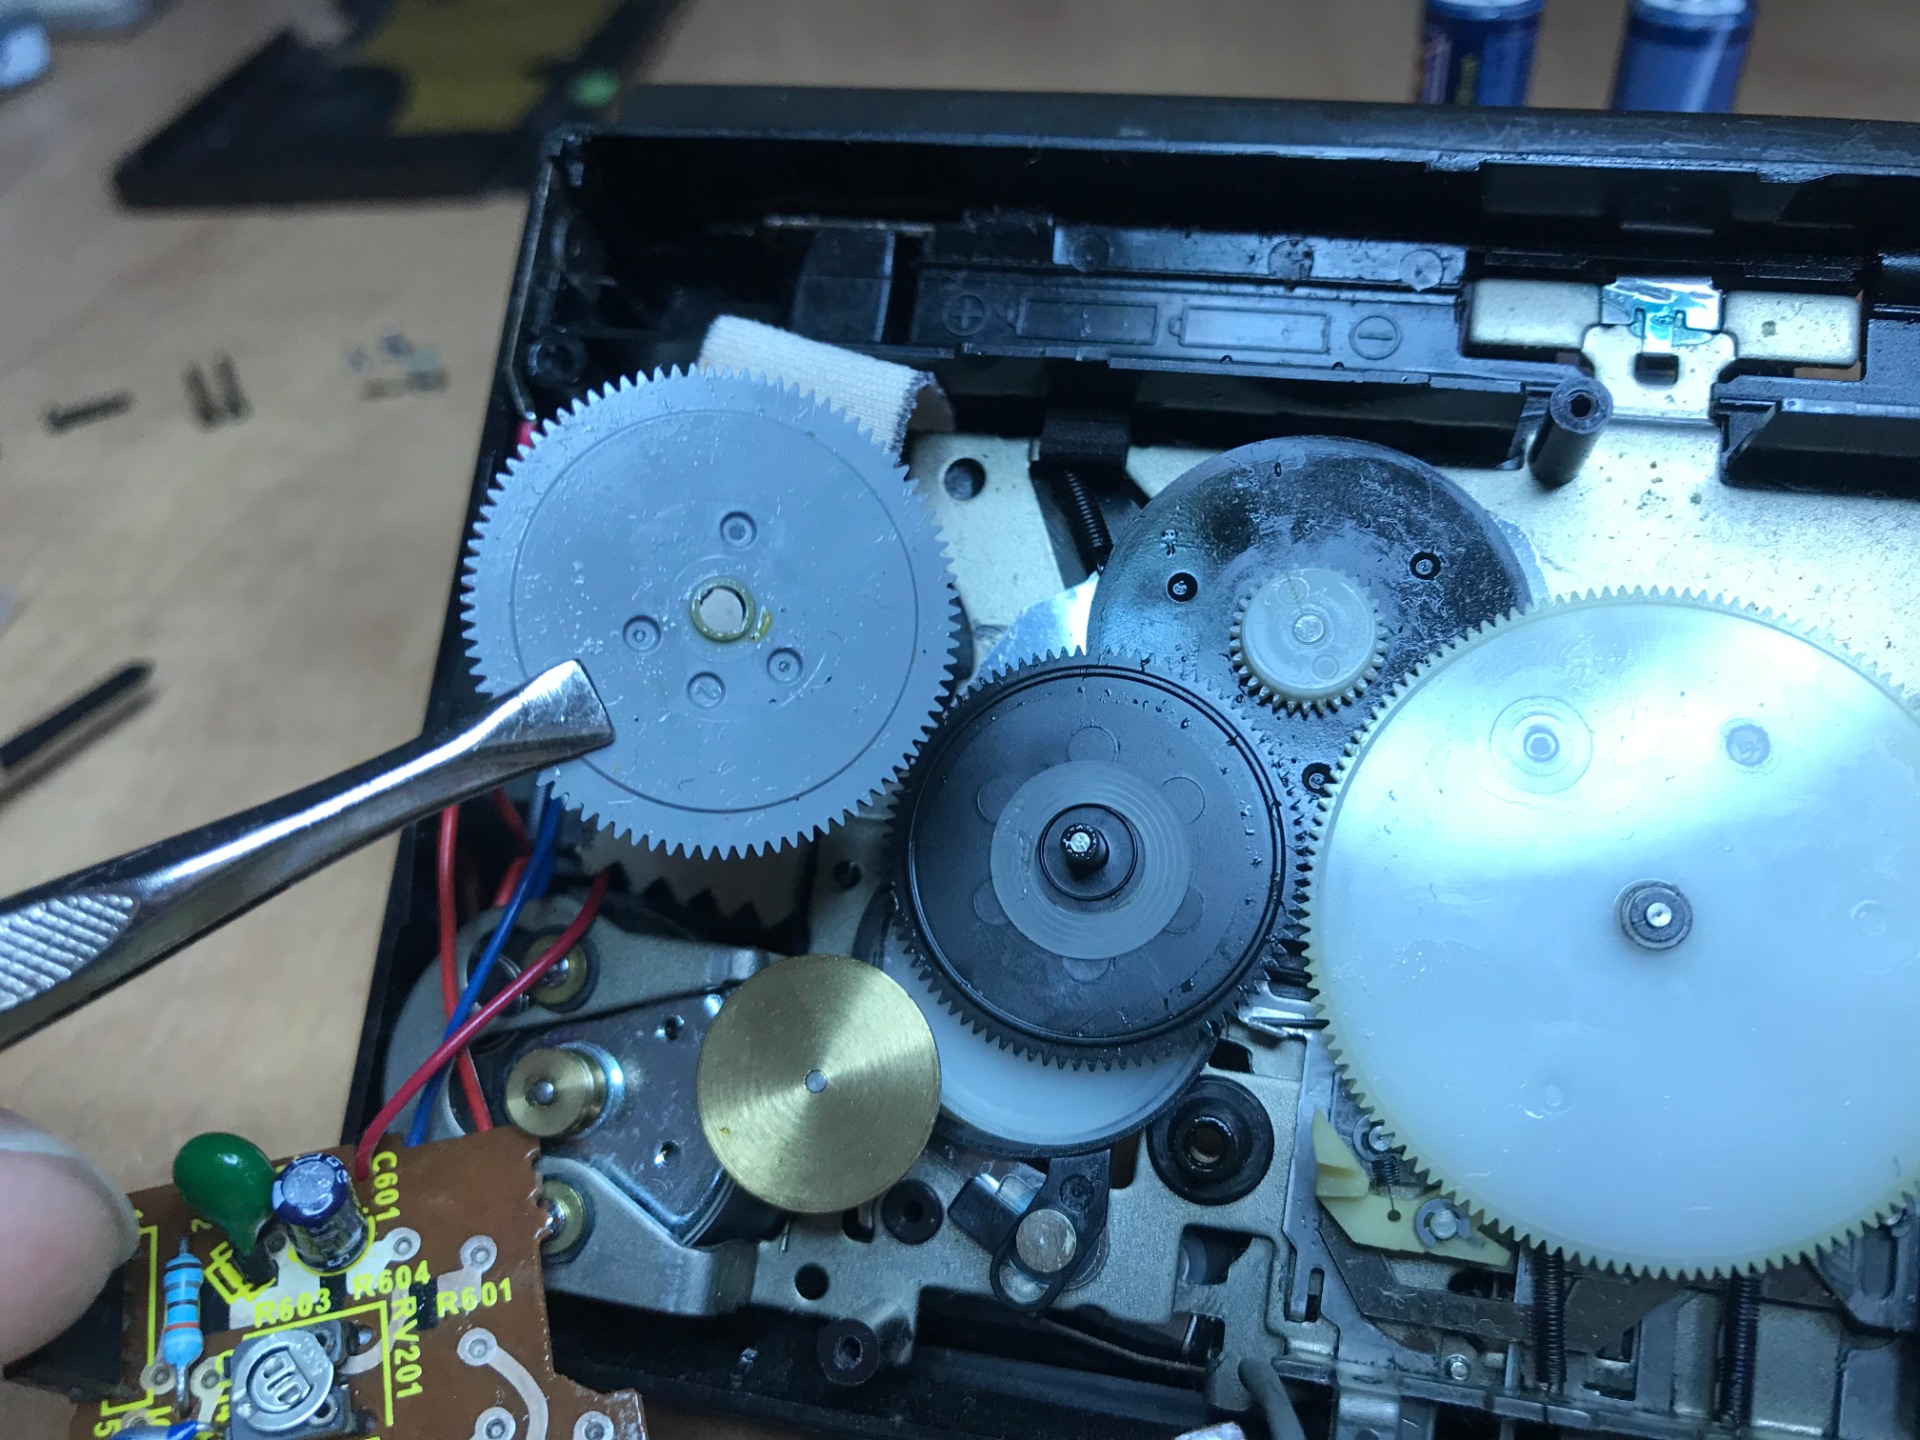
I remove the gray gear wheel with tweezers, it is no longer wise to work with bare hands here.

Between the gray and black gears is a silicone ring, this is loose on and can also be removed.
This ring presses the gray wheel against the black one, the function of the wheels is to rewind the cassette, not necessary for playback but very useful if you want to be able to rewind or forward a tape.
The coil spring that we removed from the gray wheel earlier presses it against the black one by means of pressure. It is important that there is slip between the two wheels, the silicone ring takes care of this. Otherwise, the walkman pulls too hard on the tape and can damage it. Complicated stuff to describe I must admit...
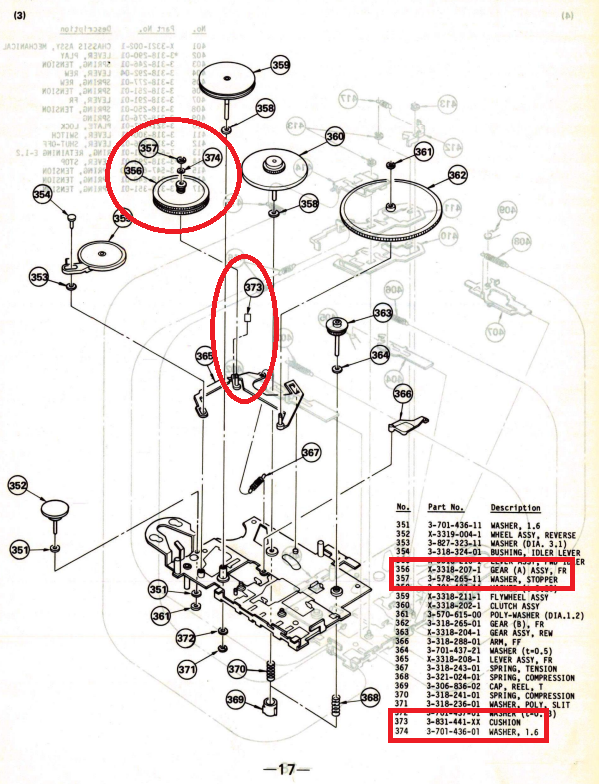
I take the manual for it, the silicone ring is strangely enough not indicated here while this is a necessary part for correct operation.
Reference is made to an extra ring (number 357). I just can't find it in the walkman itself...

Finally, the black sprocket can be removed, what remains is a metal bracket on which the wheels rest, in theory this could also be removed, but I have now stripped the walkman far enough to get to the second belt. It just won't be easy...

Removing the old belt is not that difficult in itself, with the barb I can easily reach it, otherwise the metal bracket is very close to the white wheel. You can lift the bracket slightly. Don't do this too far or it will bend!

Just an overview of the progress, the Walkman is far apart and its parts are scattered everywhere, I currently don't have a container to put the screws in so I have them loose...

I've had a bag with an unknown strap for a while, although I didn't notice it at first, it turns out that this is the replacement second strap for the WM-24! During my first repair I never noticed this belt and I put the new one with a question mark on it back in the 'belt box'.
You can already see that the old strap is stretched a bit, this explains the poor functioning of the walkman and why it occasionally gnaws on the tapes when playing.

Still, I still have to undo some damage first, I smeared parts with sewing machine oil during the previous repair attempt, I can now say an unwise move. If you have looked closely, you will see that there is a thin layer of oil in many places. I have to carefully remove this first. The best way to do this is with cotton swabs.

It is still quite a bit of work to remove as much as possible, also the white wheel where the new belt should be was covered with oil, because of this the new belt can never get enough grip and will slip sooner.

I can't get everywhere with cotton swabs, moreover they can still fluff quite a bit if they get stuck behind something, I clean the underside of the bracket with a glasses cloth.


Taking off the old belt was easy, putting on the new one is another story. Again I have to lift the bracket a little bit to get the new belt under without damage. After this, it is still an art to get the belt to the white wheel without a hit being left in it. It takes me a few tries but in the end it's on and fits perfectly!


Now that the new belt is on and it rotates well, I can reassemble the walkman. I'll grab the same images as before, but now in reverse order.
Make sure that the silicone ring is in the middle, it is not attached to anything else, so it must be perfectly centered.

I put the flywheel back so that I can put the C-ring back, press the flywheel as close as possible to the housing when you do this, because there is a small notch in the capstan just on the edge where the C-ring falls.

Now that the belts, flywheel and sprockets are back in place, you can clearly see the difference between the old and new belt.

Now that the belts, flywheel and sprockets are back in place, the coil spring and hub can be placed back on the gray sprocket, you will also see a small notch here where the special C-ring from earlier must fall into.
However, putting it back doesn't go according to plan, after I put the C-ring back and want to slide the hub over it, the whole thing shoots away across the room. I can find the coil spring and hub, but I have lost the C-ring for good, it is now somewhere in the room waiting for the vacuum cleaner to take it away...
I finally searched for it for another hour but without success.

There is no other option for now than to look for a donor, in this case an old walkman that already broke down a few months ago, maybe there is still something useful in it...
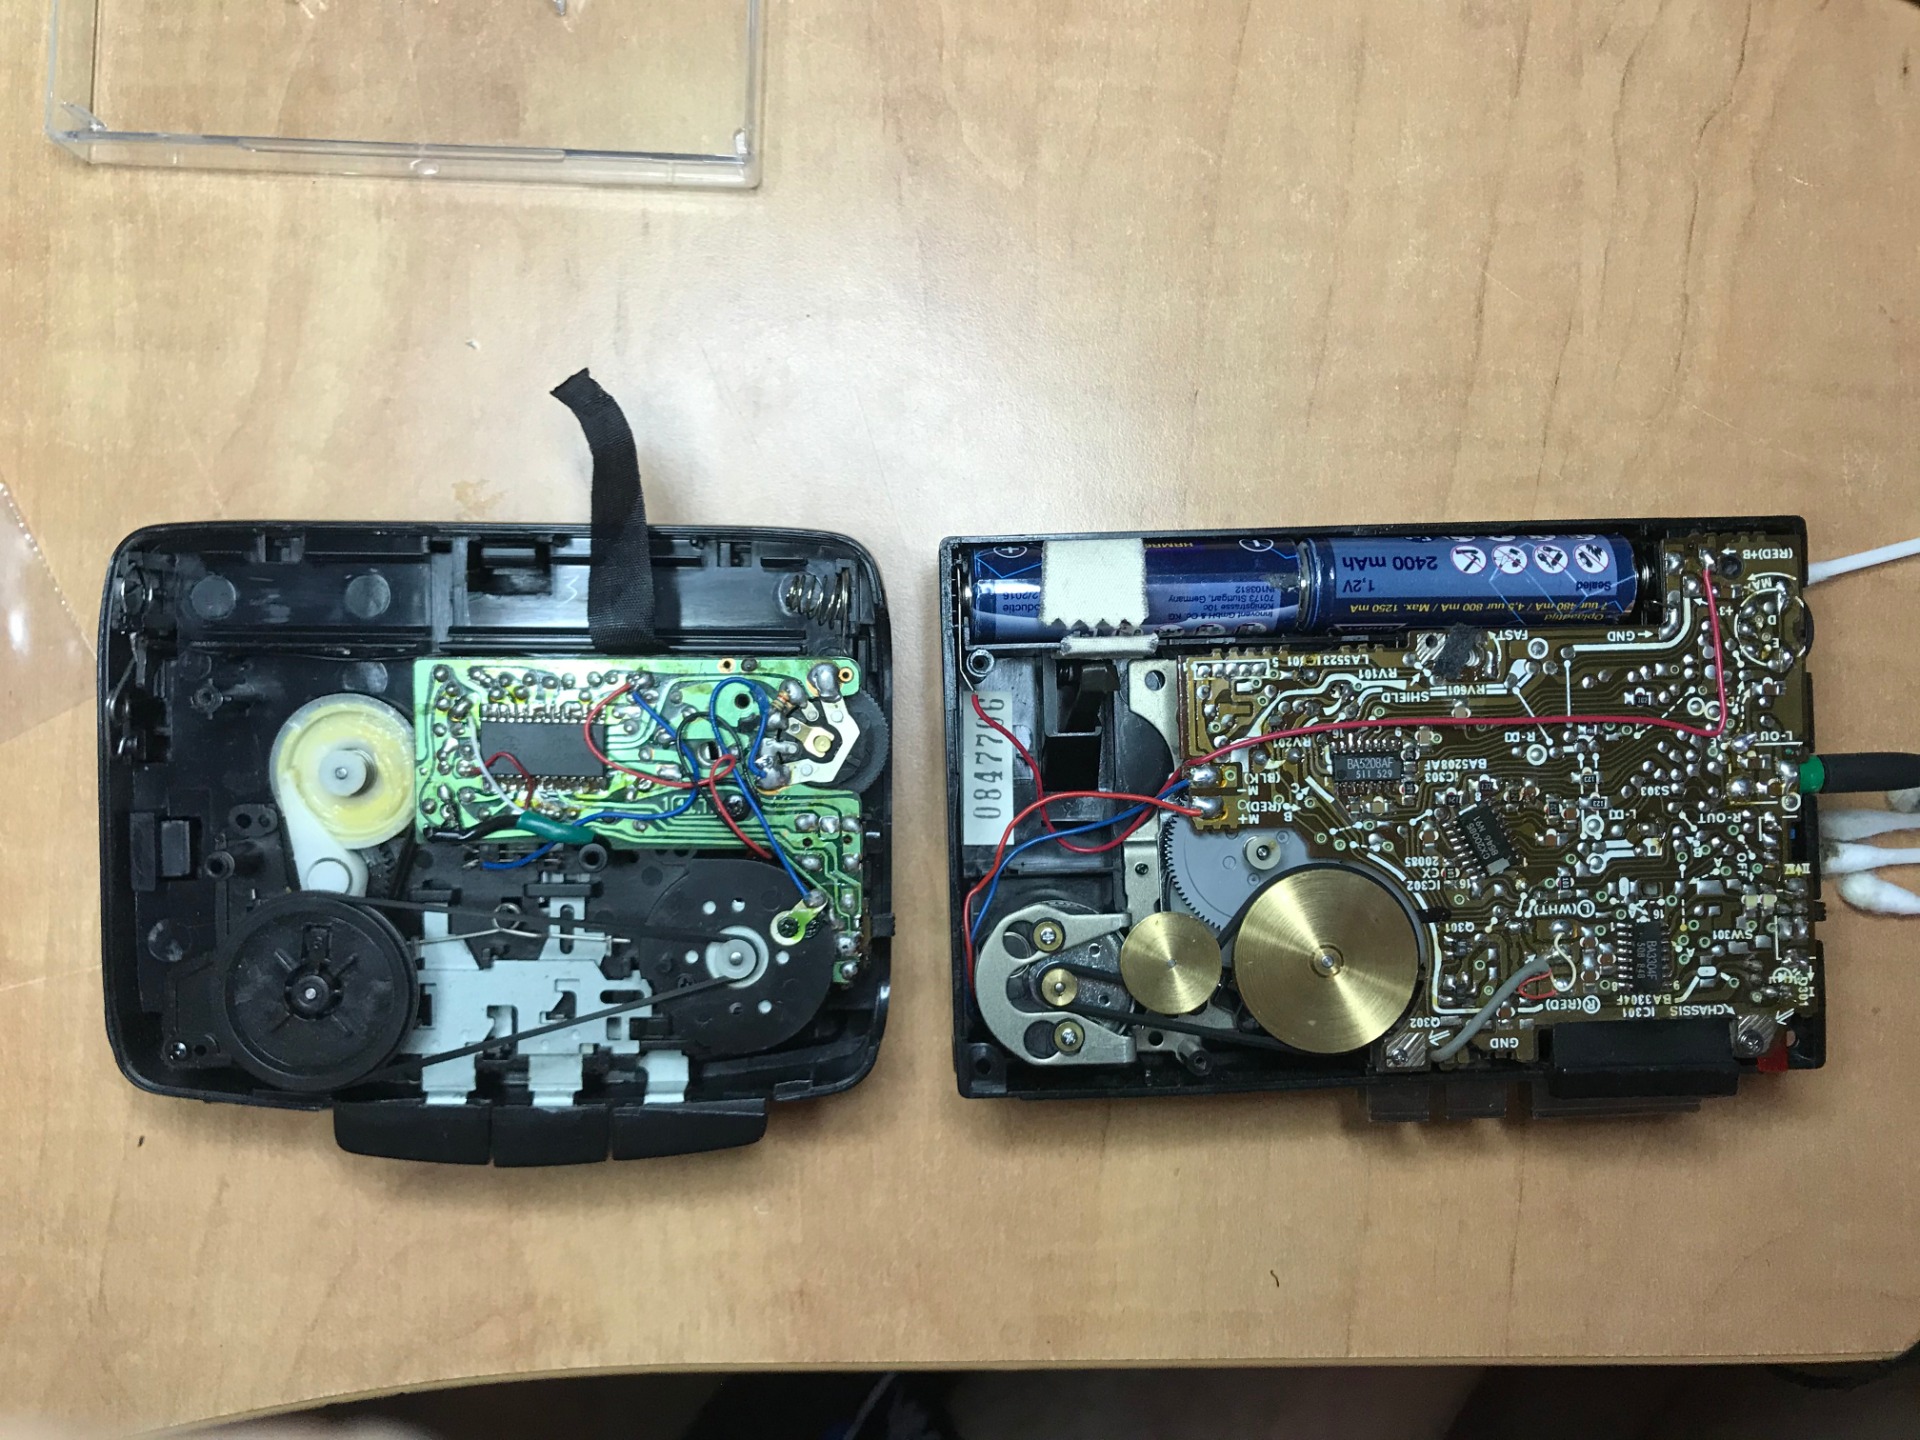
Immediately a great opportunity to keep the two next to each other, you can now clearly see the difference in construction. The walkman on the left is the cheap one, a simple circuit board for control and a flywheel made of plastic. There is also no rewind function on the cheap walkman.

I can't find much information about the original sizes of the ring, the only thing stated is the outer diameter of 1.6mm. After some measuring I find out that the inner diameter is 0.5mm, not exactly big.
I'm still hunting the model number through the internet, but I don't find any useful results...

In the end I manage to find a C-clip from the capstan of the old walkman, this one is just way too big and does not have the right shape, there is no other option than to sand it to size with a fine grain of sandpaper. A job that will take a long time without being sure whether it will work... Time to put my head on the reading lamp and peer through the magnifying glass.

Little by little I sand away from the ring and cut the ends to make the inner diameter smaller, so I finally get it to fit on the shaft. Here the outer diameter is still much too large, but the inner size is correct now.


after three hours of sanding and peering through the reading lamp, the measurements are very similar to those of the old ring, the shape is just not right and my confidence is not great either. Still, I'll give it a try (or two, three).

At attempt three it stays put, a deep sigh because this was not easy. You can see that the size is not quite right yet, the hub has expanded a bit but the coil spring keeps everything in place. Time to further reassemble and test the Walkman!

When I want to put the back on it, I notice that it does not close properly, after some searching I see these two hooks, the left one is bent, with tweezers I manage to put it right again, I have to be very careful again because he's about to break. After that, the lid fits well.

When replacing, I also have to take into account that the tab on the back is in the right position, the screw that I'm going to put back later must fall into this. Otherwise, the Faraday cage will not function properly and you run the risk of noise during playback.
Of course I test the walkman before I close everything again. The sound is good, all functions work properly again. The playback speed is not correct yet, but that is not the main issue right now.


Time for finishing, I glue the broken piece near the battery holder again with super glue. Just press it and it's back in place. From now on, be more careful when removing the batteries...

The original 'It's a Sony' sticker is still on it, but the edge is already coming loose, I glue this loose piece back, over time I have to put a transparent sticker over it to prevent further wear. For now it looks good again.

Of course I set the playback speed correctly, the plastic cap I mentioned in the beginning can be picked out with your nails. below is a potentiometer (set screw). you can move it with a narrow cross head.
While listening to a well-known song, I turn this until the sound is right in terms of speed. I compare the speed by playing the same song on the computer at the same time. I can't get the speed perfectly, but it's no longer noticeable to the ear.
In the end, he is a small second behind on five minutes of playing time. Not bad if I do say so myself!

The first days the walkman goes to work by bike, I notice that it doesn't play too well, but after a few rides it starts to work better and better!
Of course it stood still for an unknown period of time until I started using it, the parts need some time to work as usual again, sometimes it is better to let it run for a day instead of fiddling with it...
Eventually I have to make a long journey by train, a good moment to let the walkman run for a while.

Whether it's a bike ride, a walk through the city or a breath of fresh air on the beach. This walkman is ready!
May 24, 2020
Related pages:
Sony WM-R202 Walkman Repair
Sony WM-DD30 Walkman Repair
Sony TCM-6 Walkman Repair
Compact Cassette Information
Compact Cassette Repair
New old tapes! blog
Compact Cassette Gallery