
Sony TCS-370 Repair
July 9, 2020

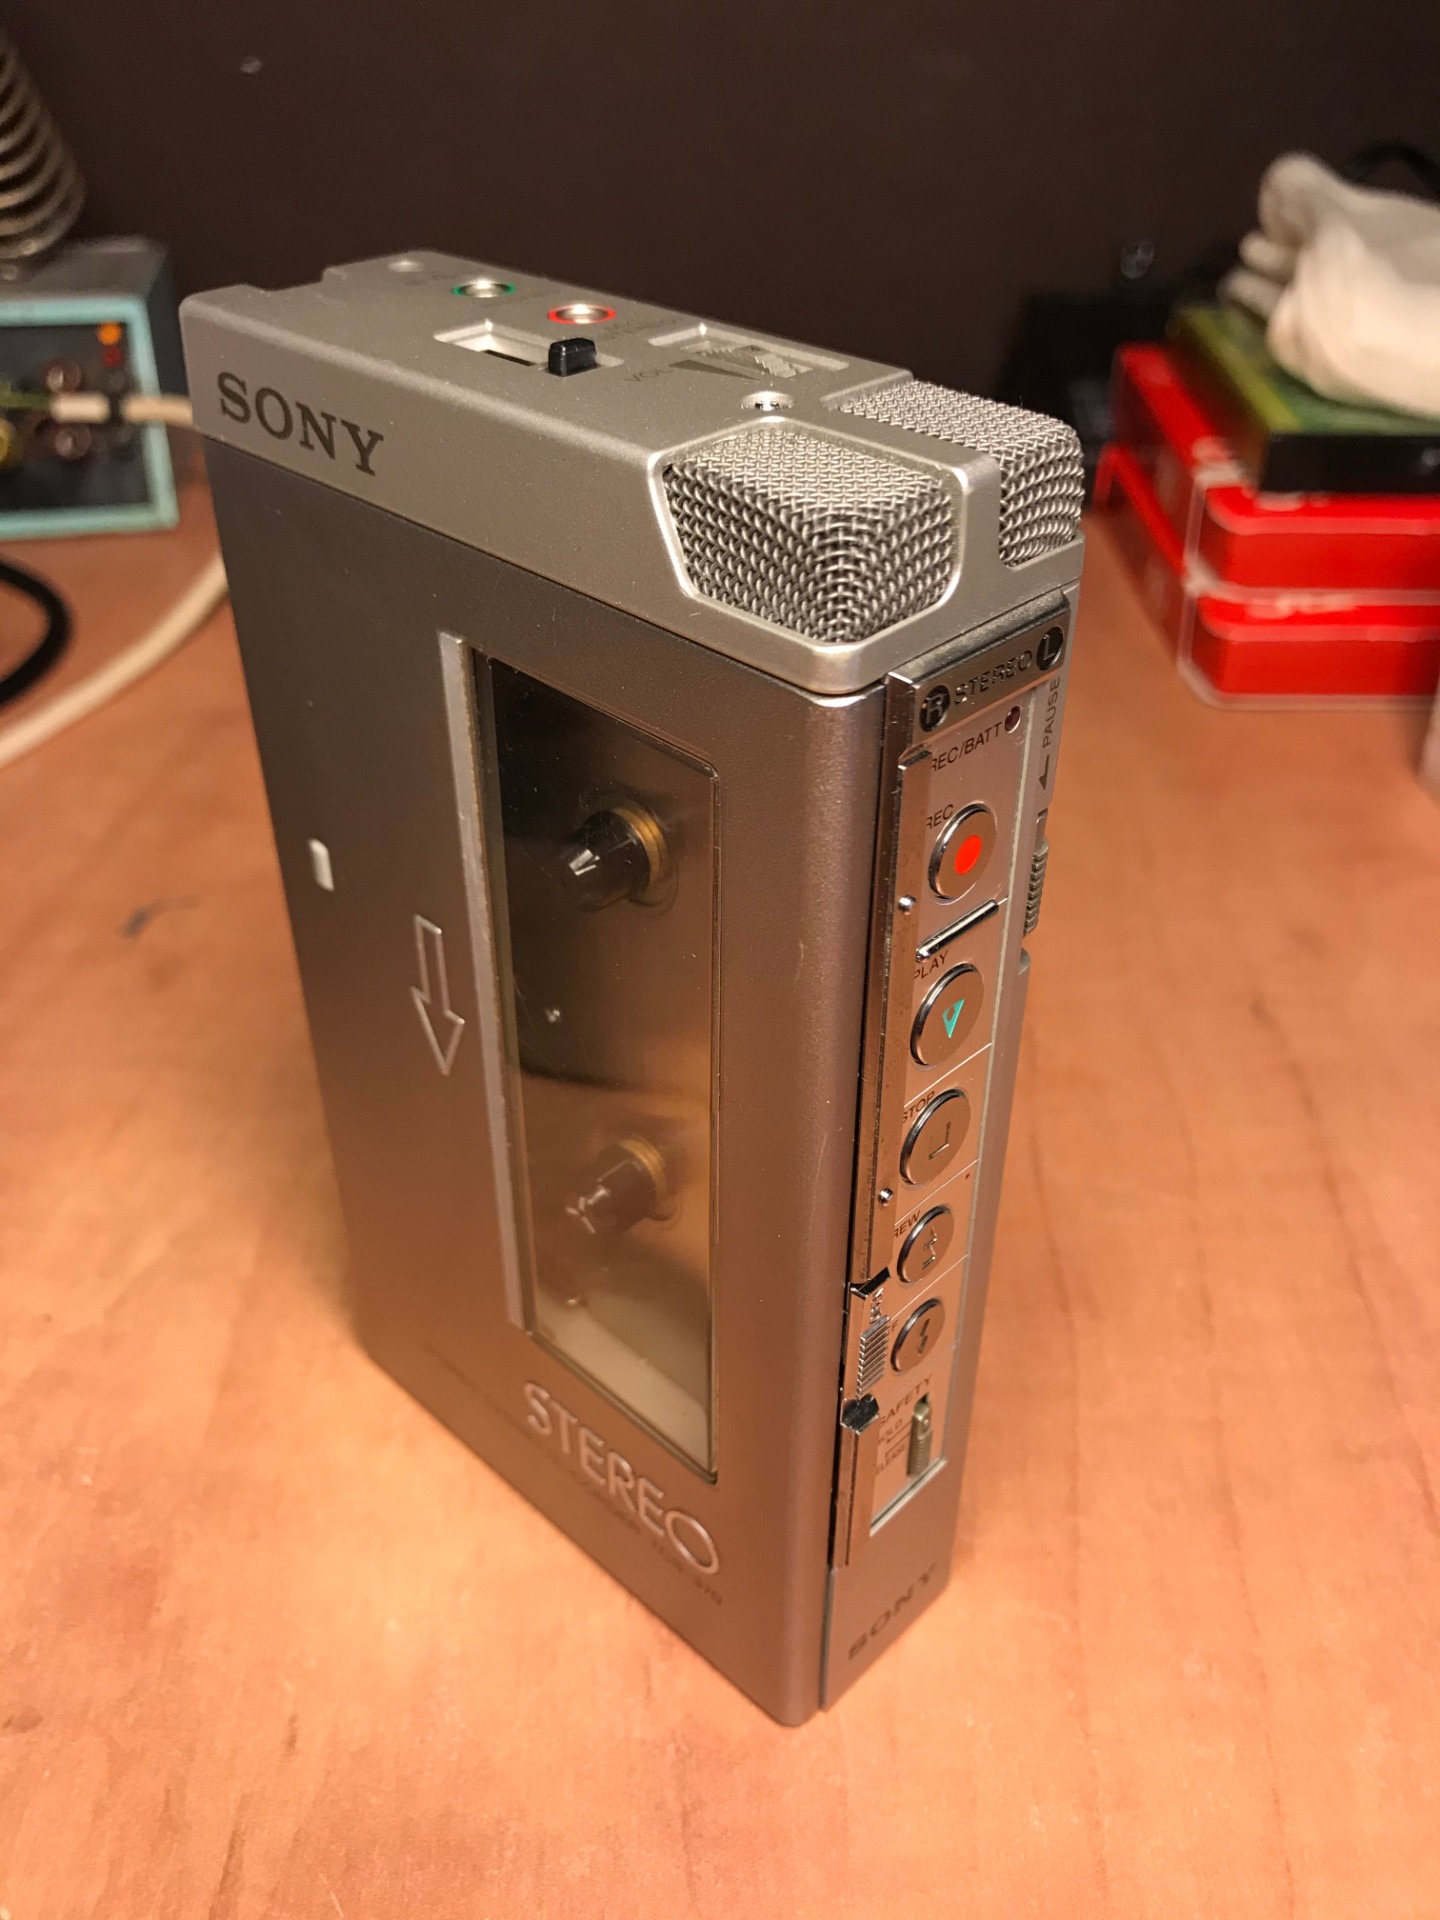
Here is a somewhat different type of Walkman from the series that Sony has produced.
Year of construction 1984/86.
The TCS-370 has been launched for outdoor shooting and playback anywhere. Officially it is not even a 'Walkman' but a Cassette-corder, at least that's what Sony's models were called.
This 'Corder' has a striking number of options aimed at fieldwork. The built-in stereo microphone, a speaker with which you can play recordings on the spot. Both are of good quality by the way.
You can even fast forward and rewind while the playback head is still pressed against the tape. This way you can listen to the tape while winding to determine where to stop. Now I'll name just a few.
Strikingly absent, on the other hand, is Dolby noise reduction.

The operation of the play functions is fully electronically controlled. From top to bottom:
- Rec = Recording function, above it is also a small LED that reacts to sound volume during recording.
- Play = Play function.
- Stop = Stops all other currently active functions.
- REW = Rewind.
- FF = Fast forward, both forward and reverse can be done in two ways, with and without playback option.
There is another button protection at the bottom, if you slide it upwards, all other buttons will block, so you can safely transport it without accidentally activating a button.
There is also a Pause slider to the right, slightly above the middle.
On the left is a slide to open the cover.

The connections are on the top. one for an external power source, below that a headphone jack followed by a microphone jack.
Interesting is the presence of a tick counter, which keeps track of the band in inches per second (IPS).
Finally, there is also a volume control.
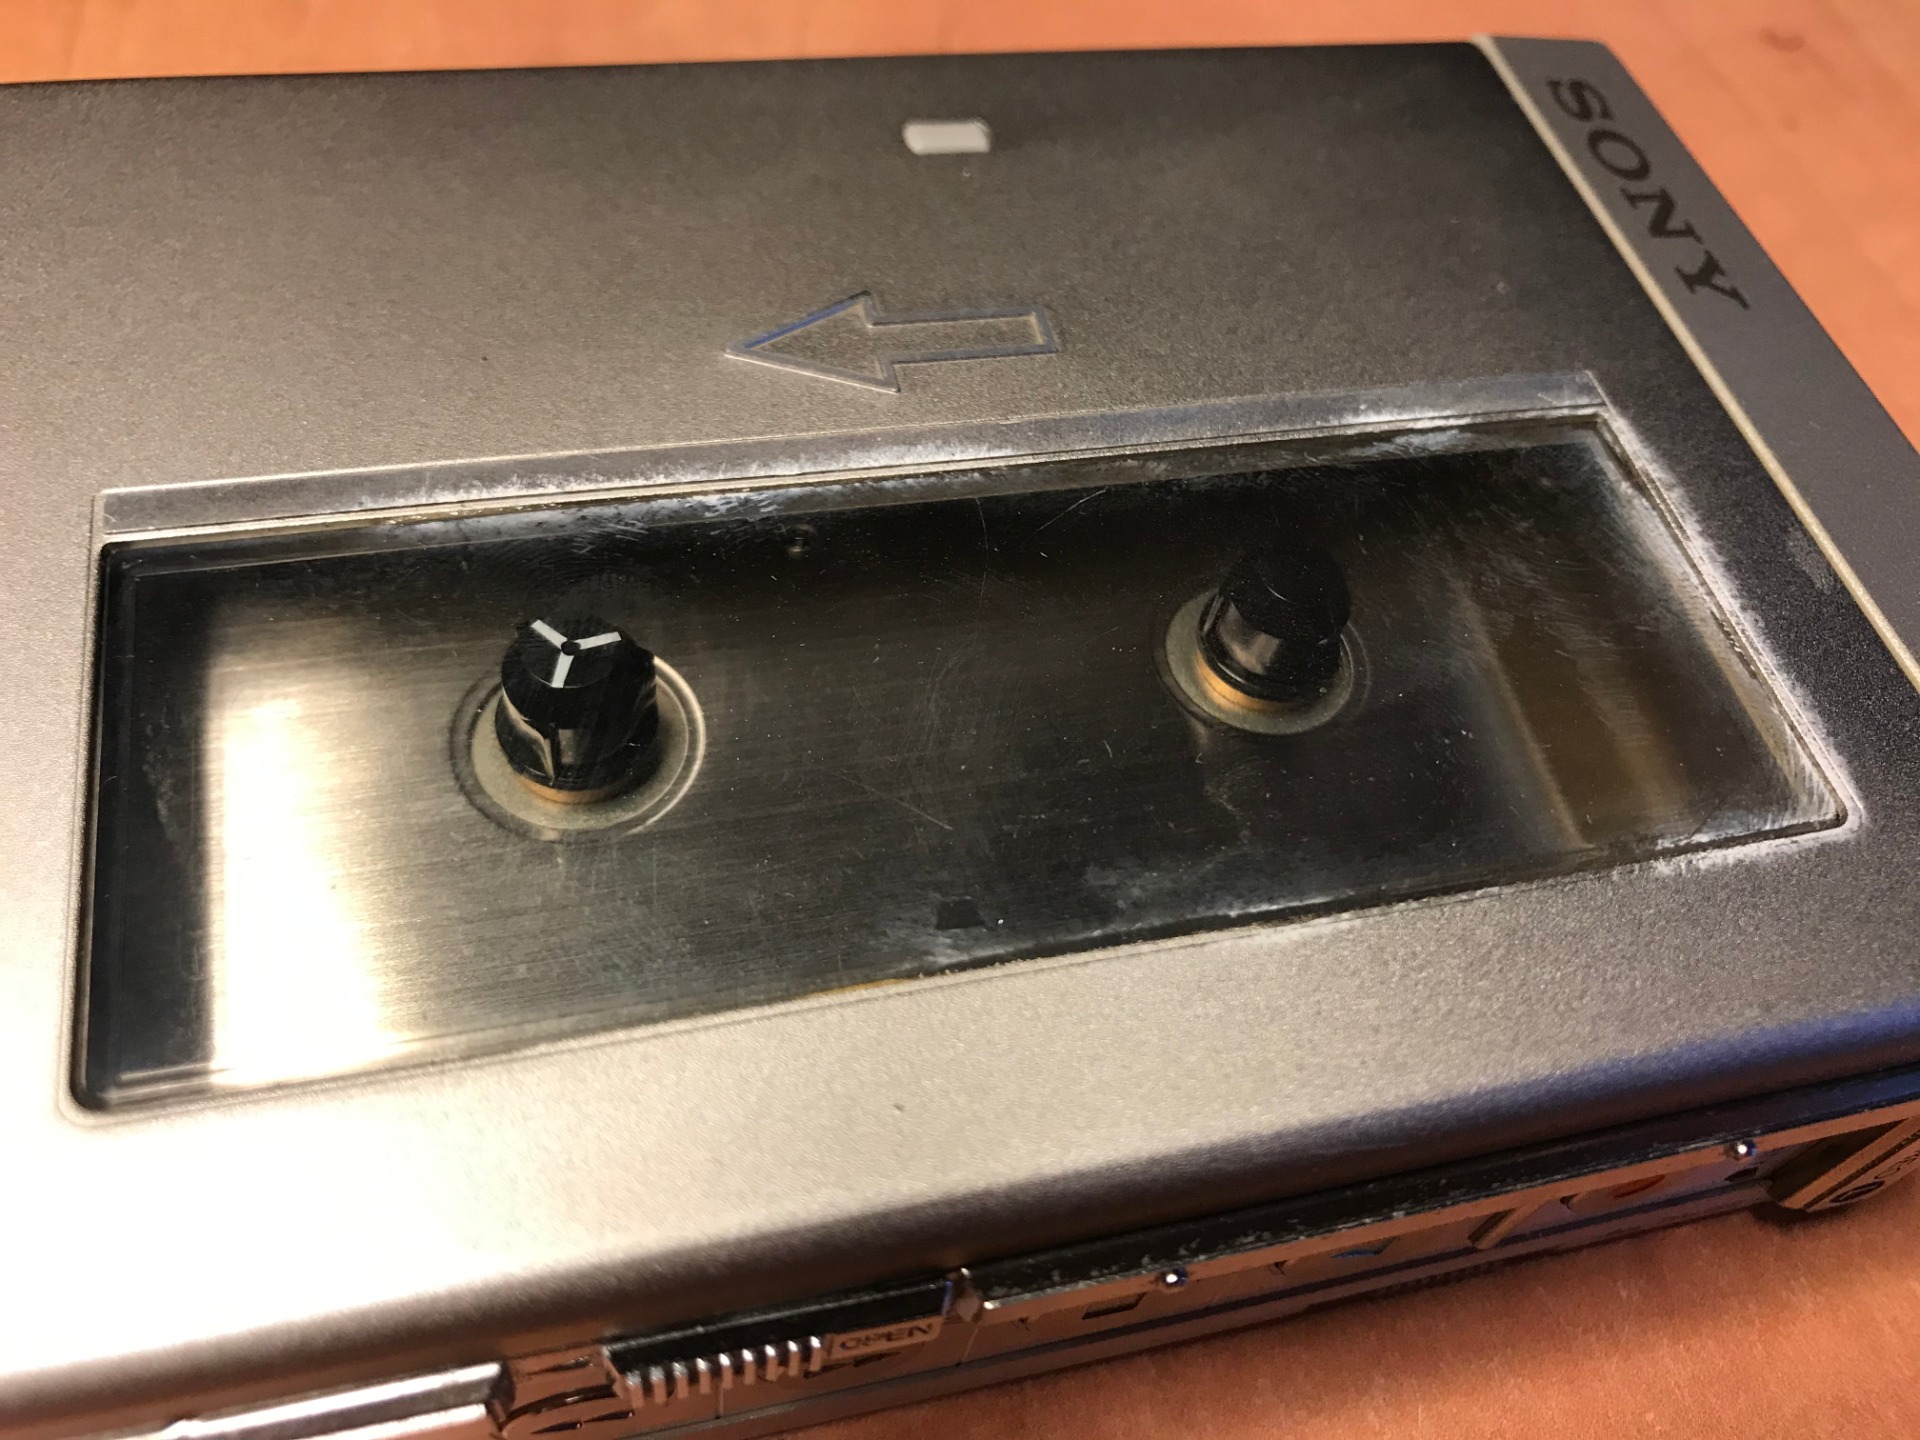
Here we also get a view of the microphone, which is double/separate to make stereo recordings possible.
They are actually two separate microphones.

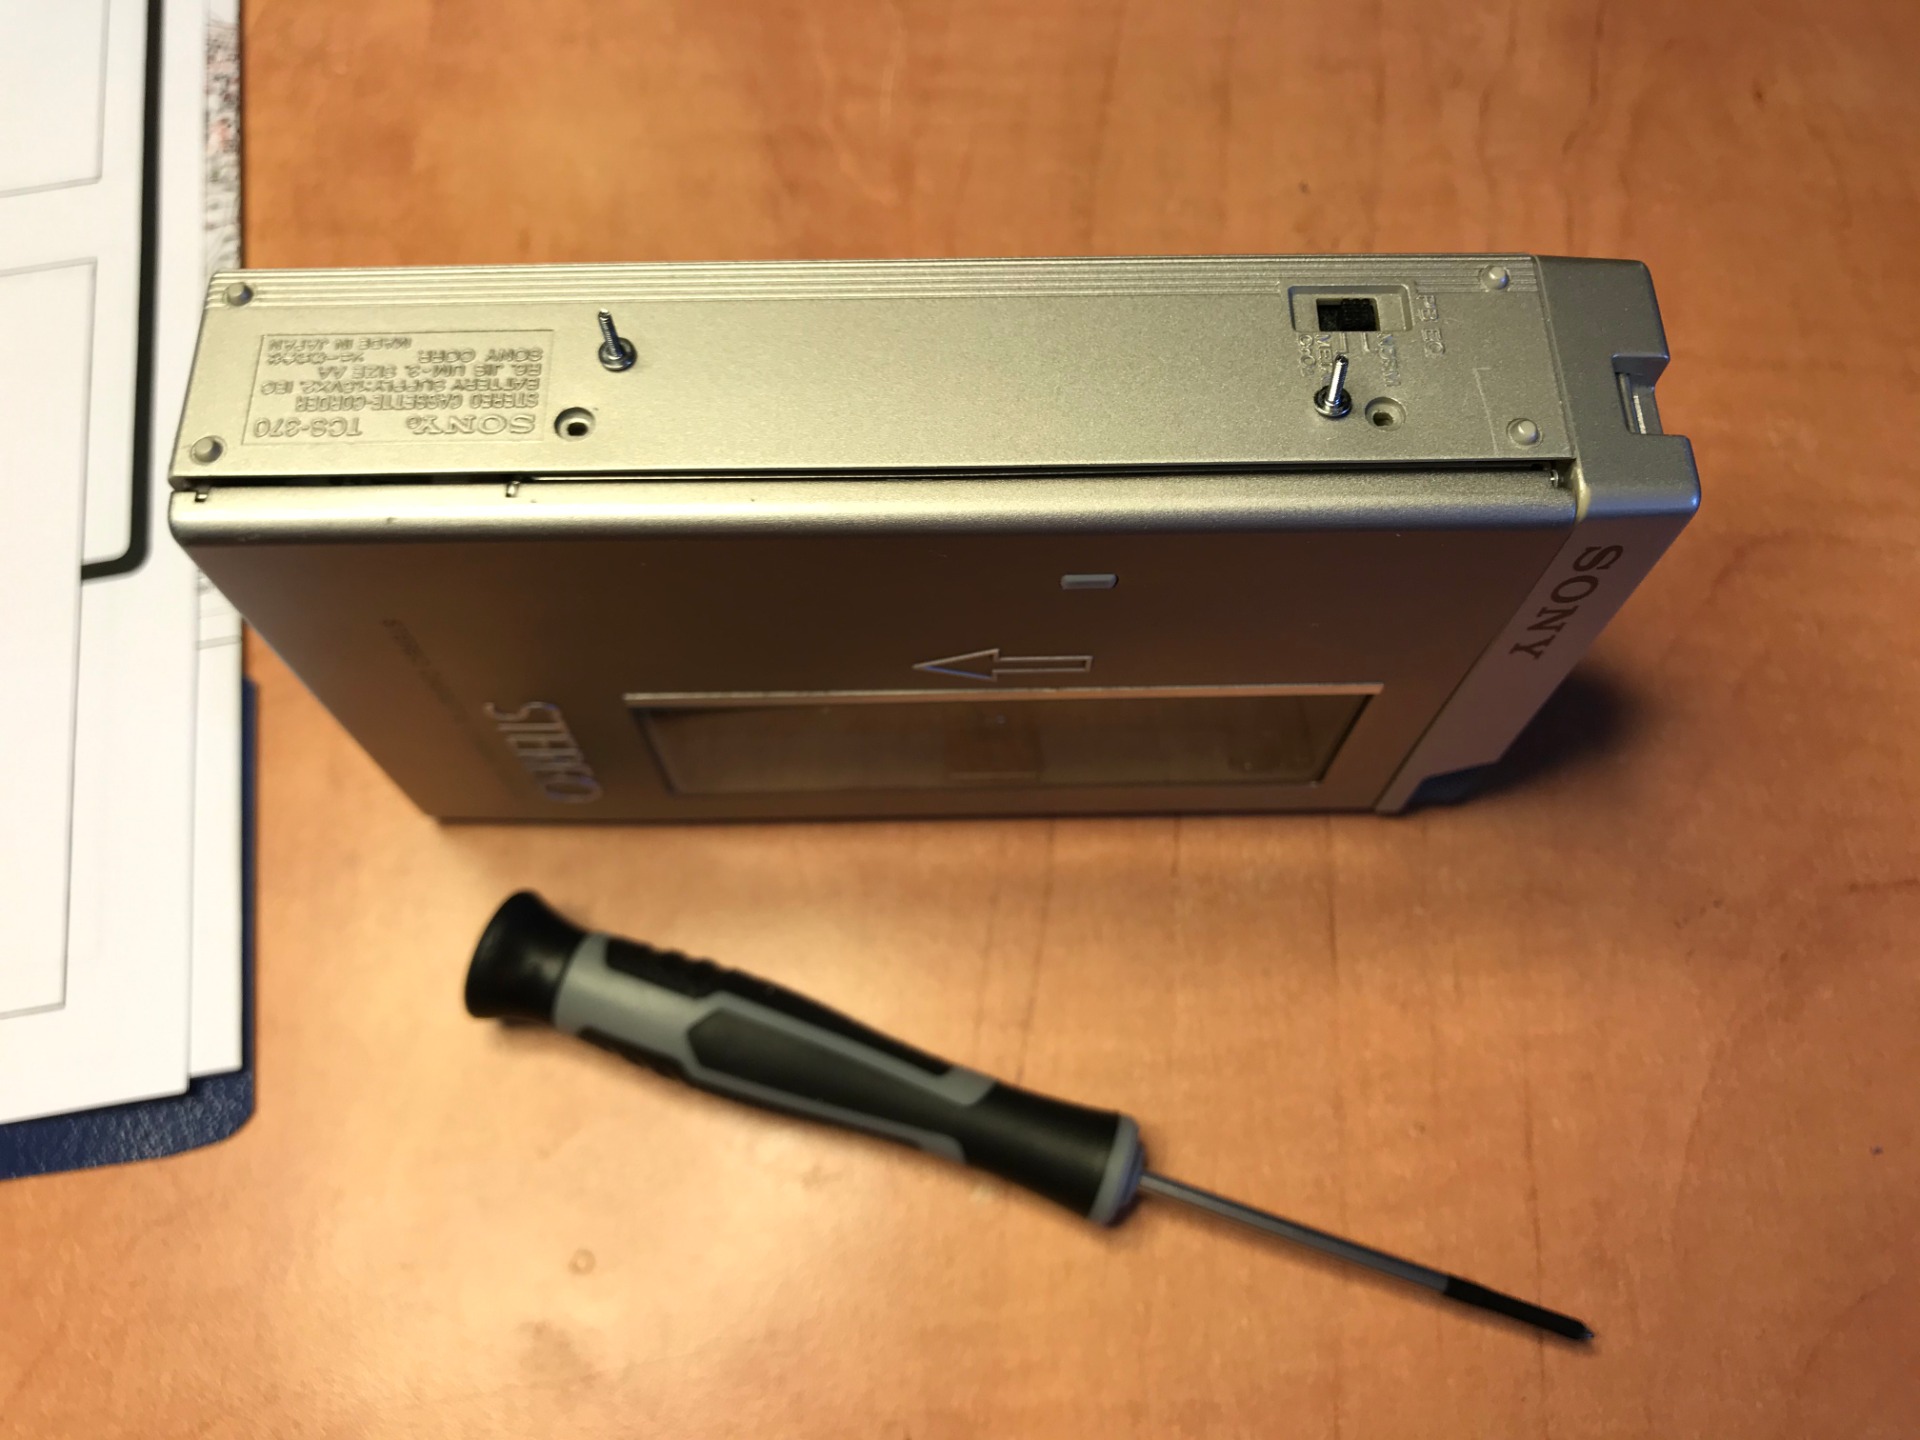
The battery compartment is located on the bottom of the device, which can hold two AA batteries. don't forget to put the ribbon behind it because otherwise it is not easy to get the rear battery out.


We also have the back, where the loudspeaker is located. Finally, the other side where there is a switch for the type of cassette to be chosen, from Ferrous (Type I) to Metal (Type IV).

This copy also came with a leather cover. It looks nicer without it, but I suspect that it is still in such a neat condition because of the cover. There are hardly any scratches or signs of use. The only thing I can notice is the weathered green paint on the play button.
Of course we put the Corder through a basic test. It can be clearly seen here that the buttons are controlled by an IC (Intelligent Chip). You also see that playing and winding is not completely error-free. The device needs new belts so that's what I'm going to hunt for.

I couldn't find a ready-made belt set for this model so quickly, so I searched the maintenance manual, luckily I could find it. So here are some additional specifications.
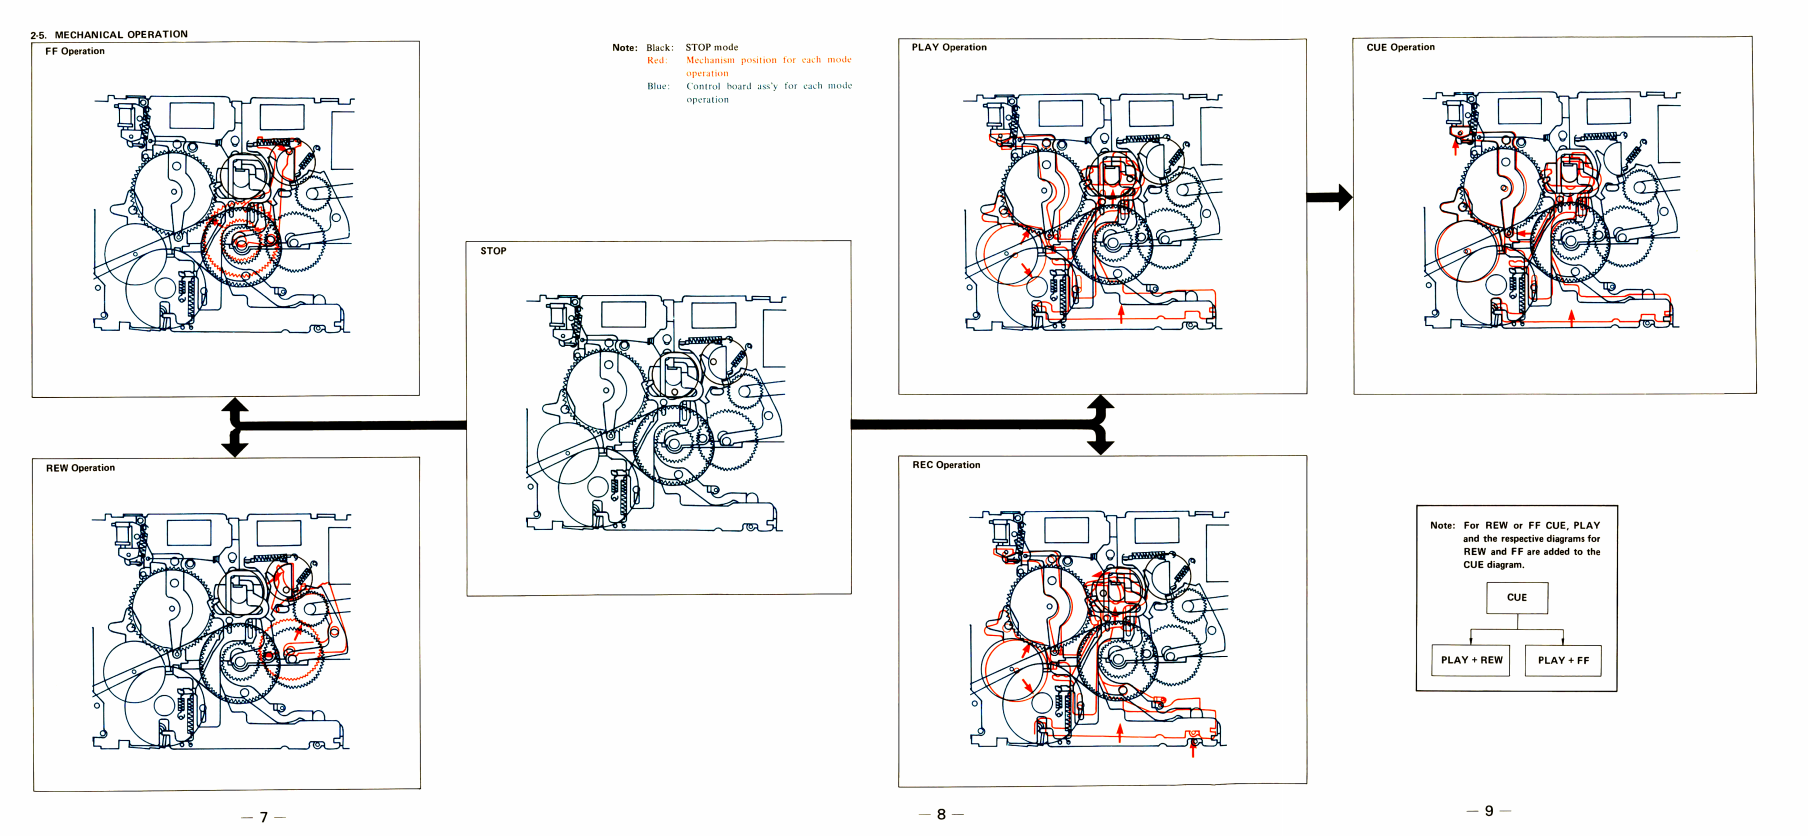
The manual is full of information, here is an example of the positions of the running gear.

A complete disassembly manual is also included, which is certainly welcome, I will need it soon!

But for now I'm looking for these pages. Here you have the 'exploded views' in which all individual parts of the Corder are neatly numbered. In my case I'm looking for numbers 306 & 324. For now I'll write them down on a post-it and scroll on.

Each part has a part number. Because I can't find a belt set on the internet I have to assemble it myself, the easiest is to write down these numbers and search on a website that can supply parts by serial number.

Source: www.turntableneedles.com
Unfortunately I can only find one of the two belts by serial number, luckily the belt that is not available is the one from the tick counter which fortunately still seems to be in good working order. For now I order the belt that drives the running gear. Because I have to order more belts for another repair, I can immediately combine them.
For now we have to wait for the belts from America to arrive here...
In the meantime, here's the tool list:

- Screwdriver PH0
- Tweezers
- Super glue (exceptional)
- New belts
August 12, 2020

We are a month further, the belt has arrived and in the meantime I have provided a printed manual. My goal is to disassemble the Corder according to the instructions in the manual.
It is quite a comprehensive device, packed with features. I expect the inside will be crammed with parts. Normally I dive into the devices without glancing at the manual, but here I wouldn't want to try without it.
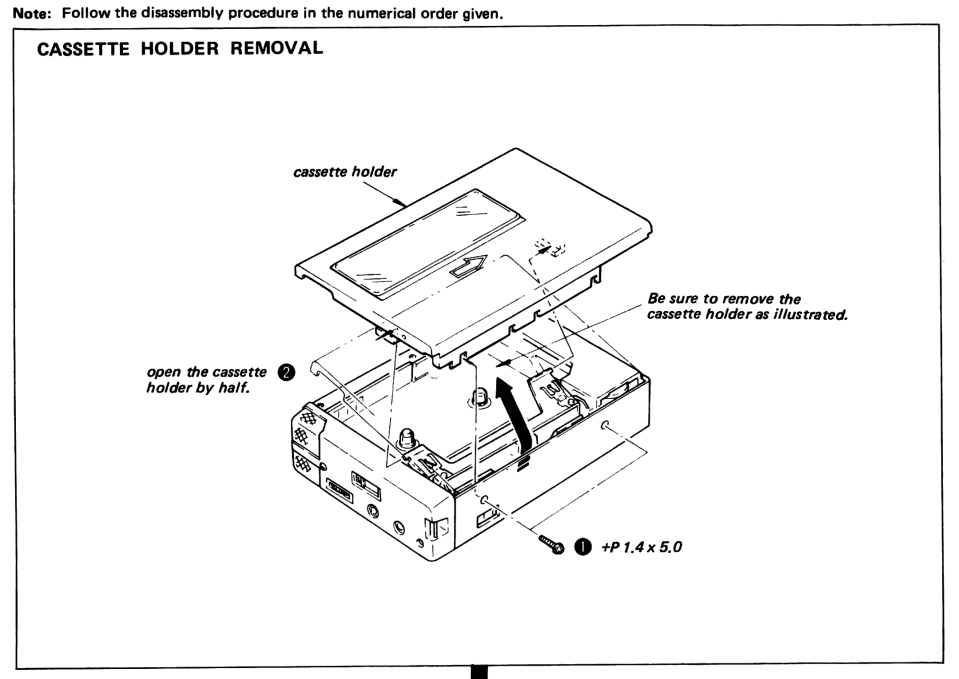
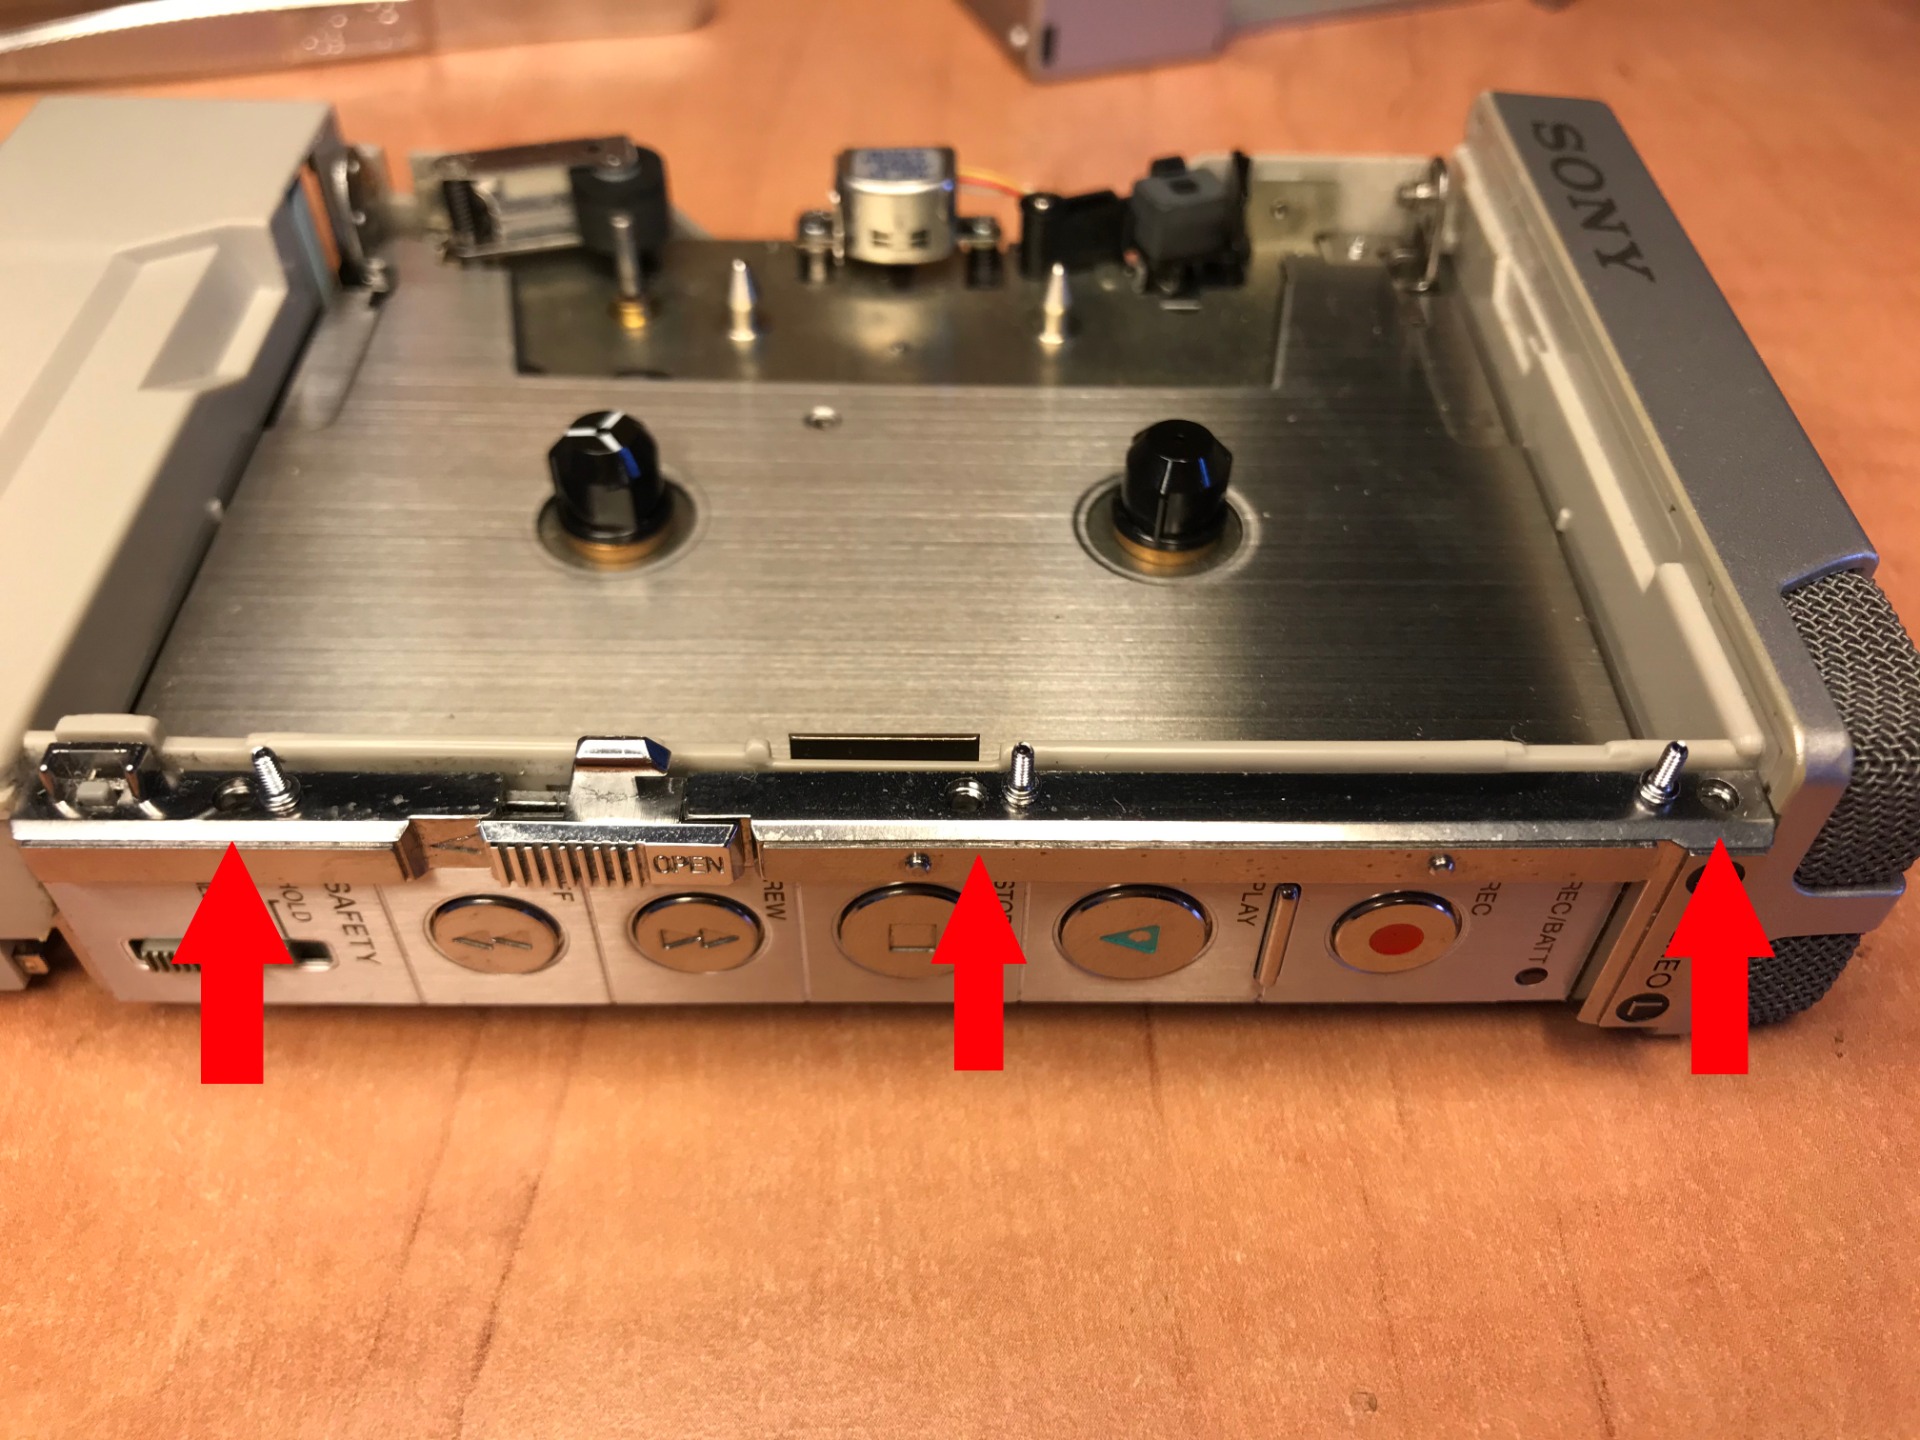
The first step is to remove two screws on the side.
After this, the lid of the Corder must be partially opened in order to be able to remove it.

You only have to open it for a small part, after which you can lift the flap straight up to take it out.


The next step is to loosen the hinge under the cover. Here is also shown how to remove the Pinch roller, in my case this is not necessary.

You have to loosen the hinge with two hands, first push the whole to the left, and then lift it up. It is not easy, it is attached to the Corder itself with two axles.
Take a good look at the construction before you try this.

Now the back panel which can be removed.

The back is secured with three screws. These are the same as the first two I unscrewed.

It can still be quite difficult to separate the back from the rest.

Here it becomes a bit more difficult, a lot of parts now have to be removed and taken out.
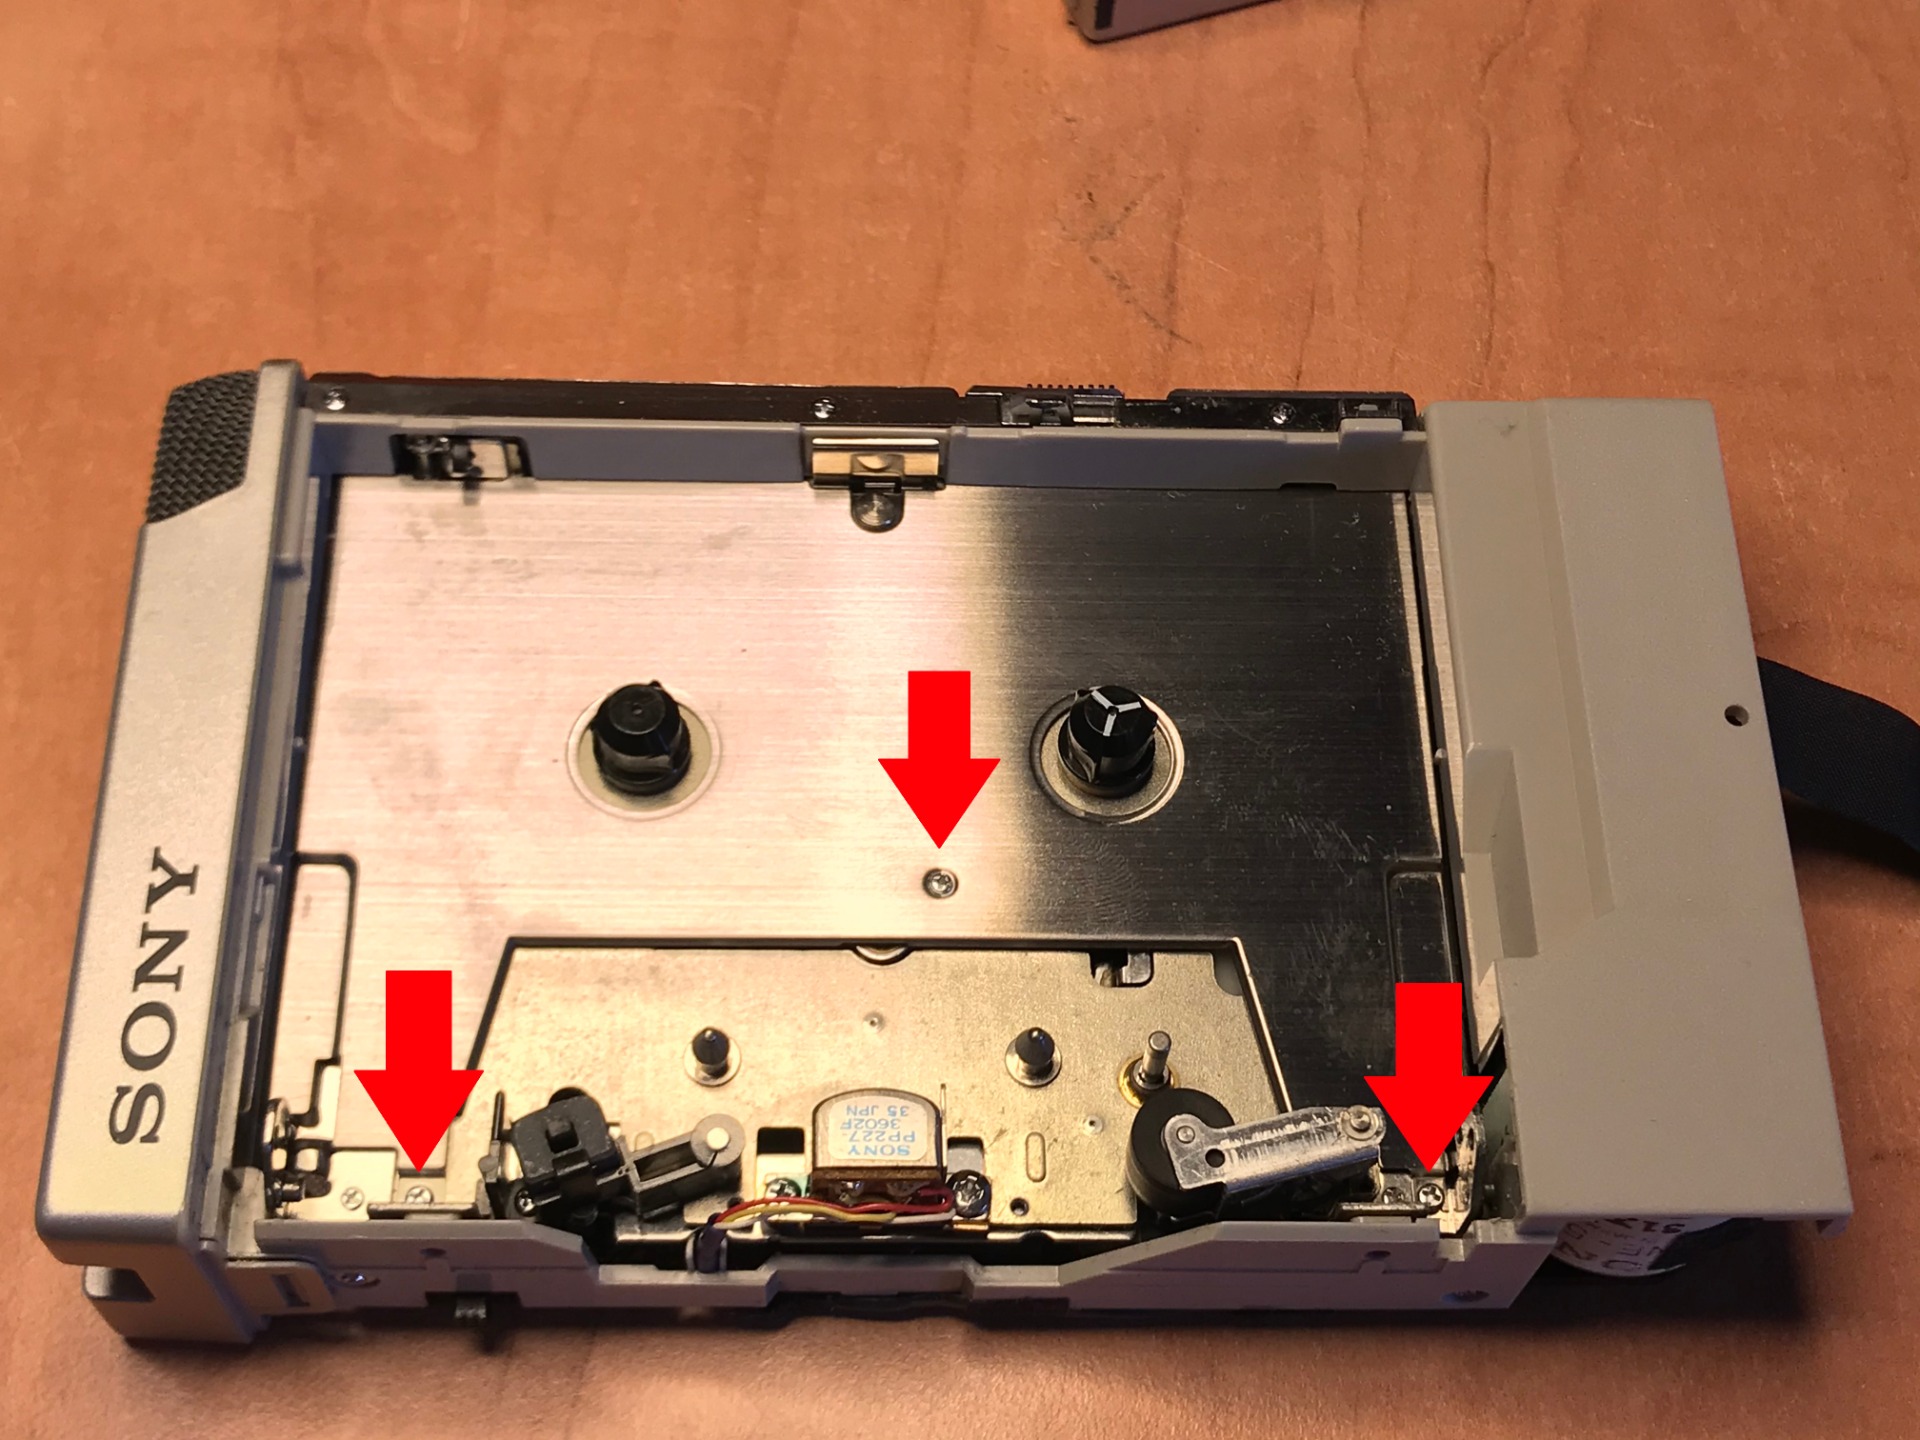

First these three screws are removed, make sure that the middle screw is very small, tweezers are recommended here. The other two screws also differ from the rest.
Keep the three screws separate from the rest.
Now the three screws above the control panel.

Followed by the screw on the other side of the circuit board.


Carefully and with some effort the control panel comes out in its entirety, make sure that there is a small spring in it that can spring loose. Put the panel away where you won't bump into it.

A very small part (the Detector knob) also appears from under the control panel. Don't lose it, it says extra on the manual.

The screws differ a lot and are very small, it is wise to stick them so that it is easier to put them back later.

The inner wall can be lifted out.

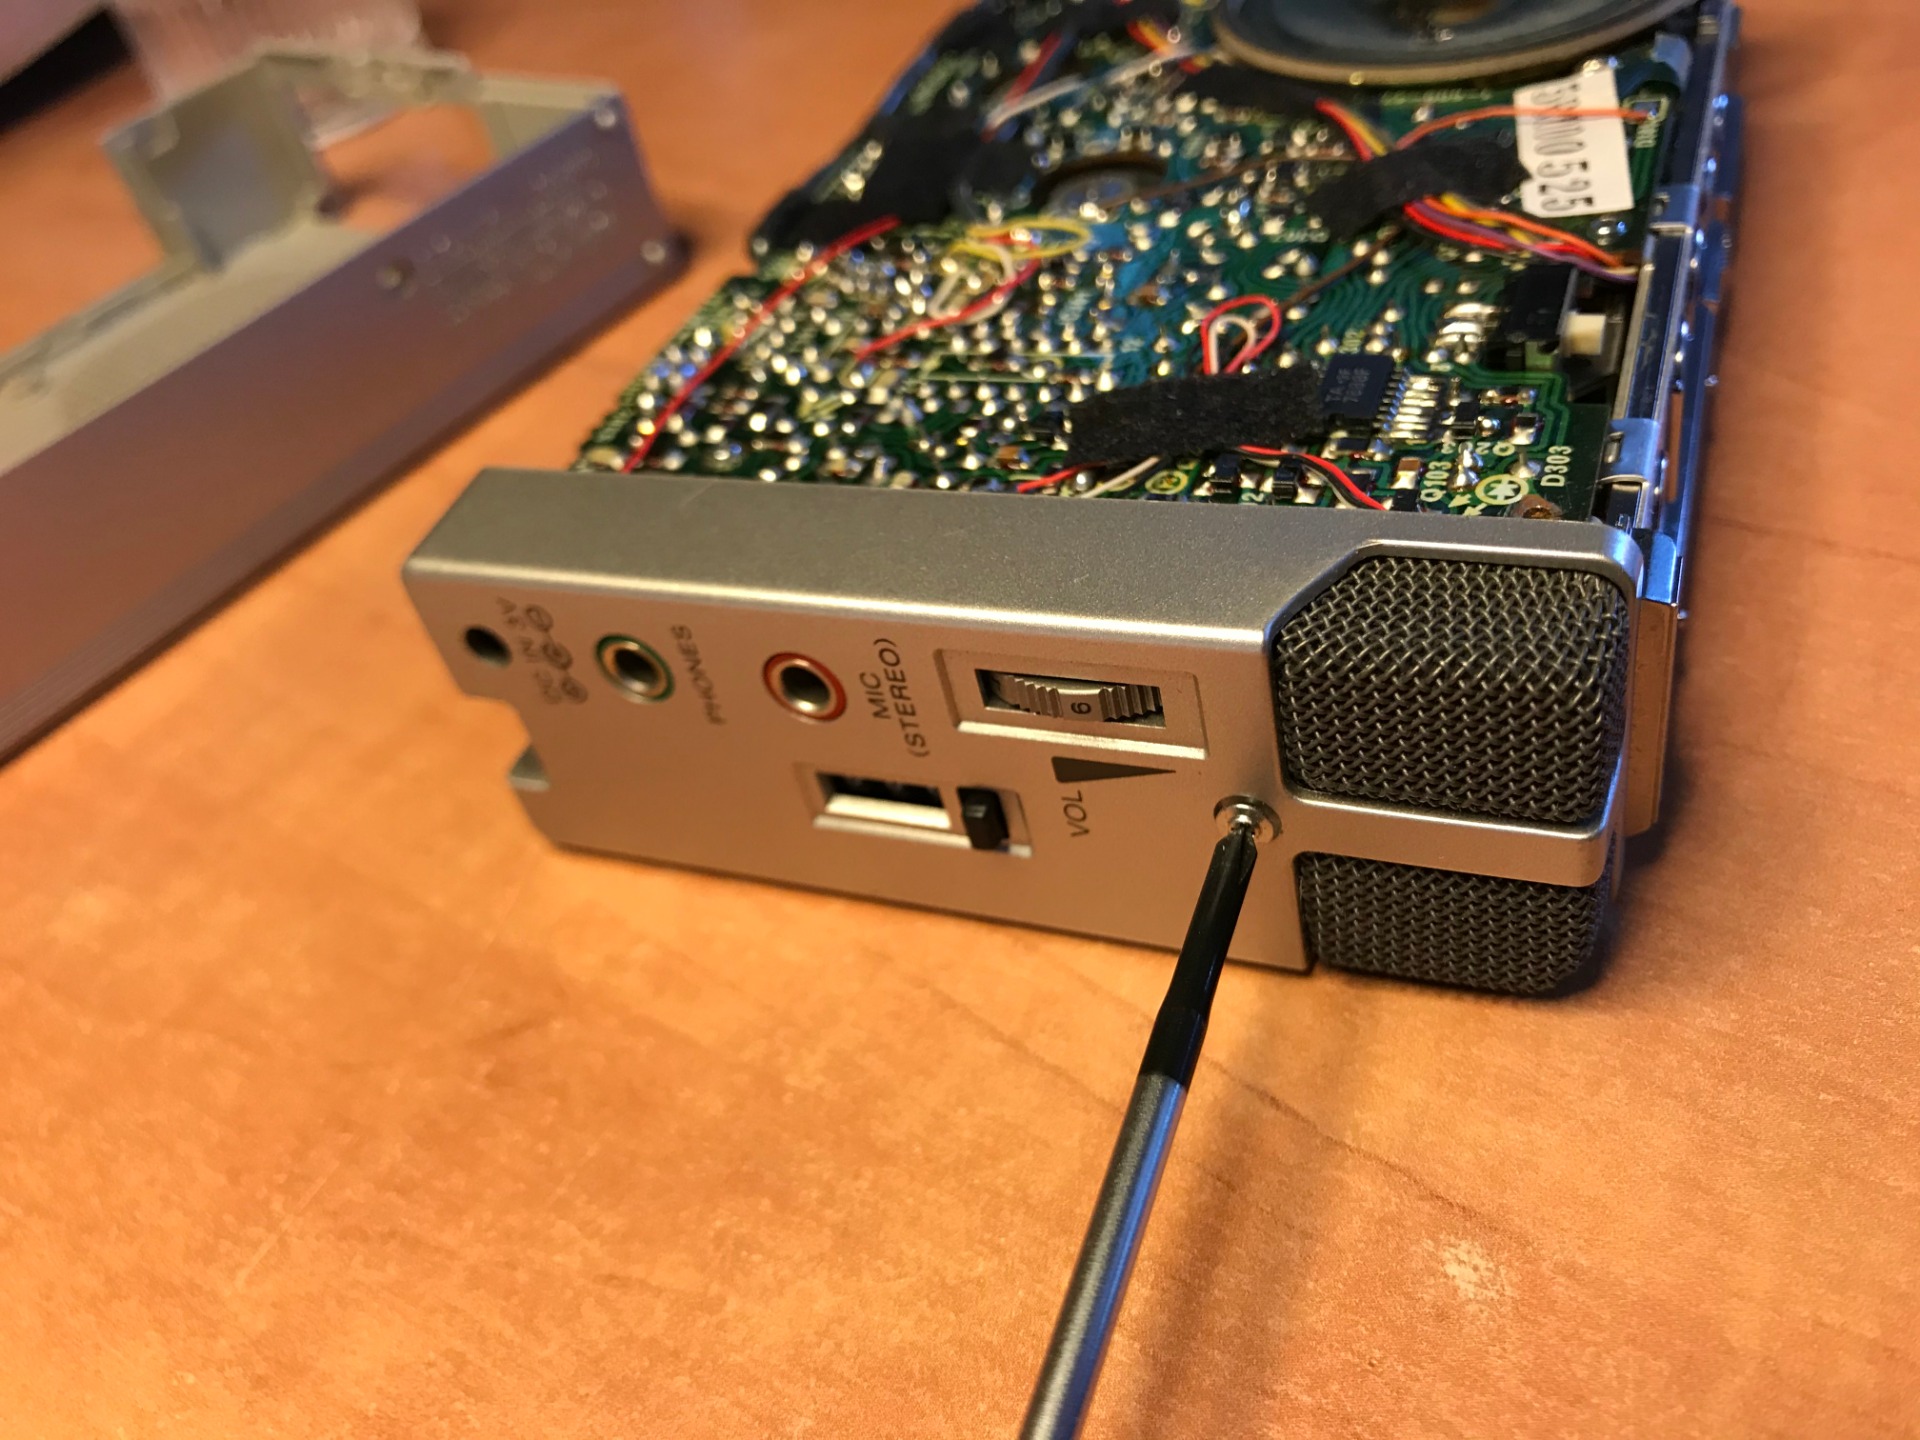
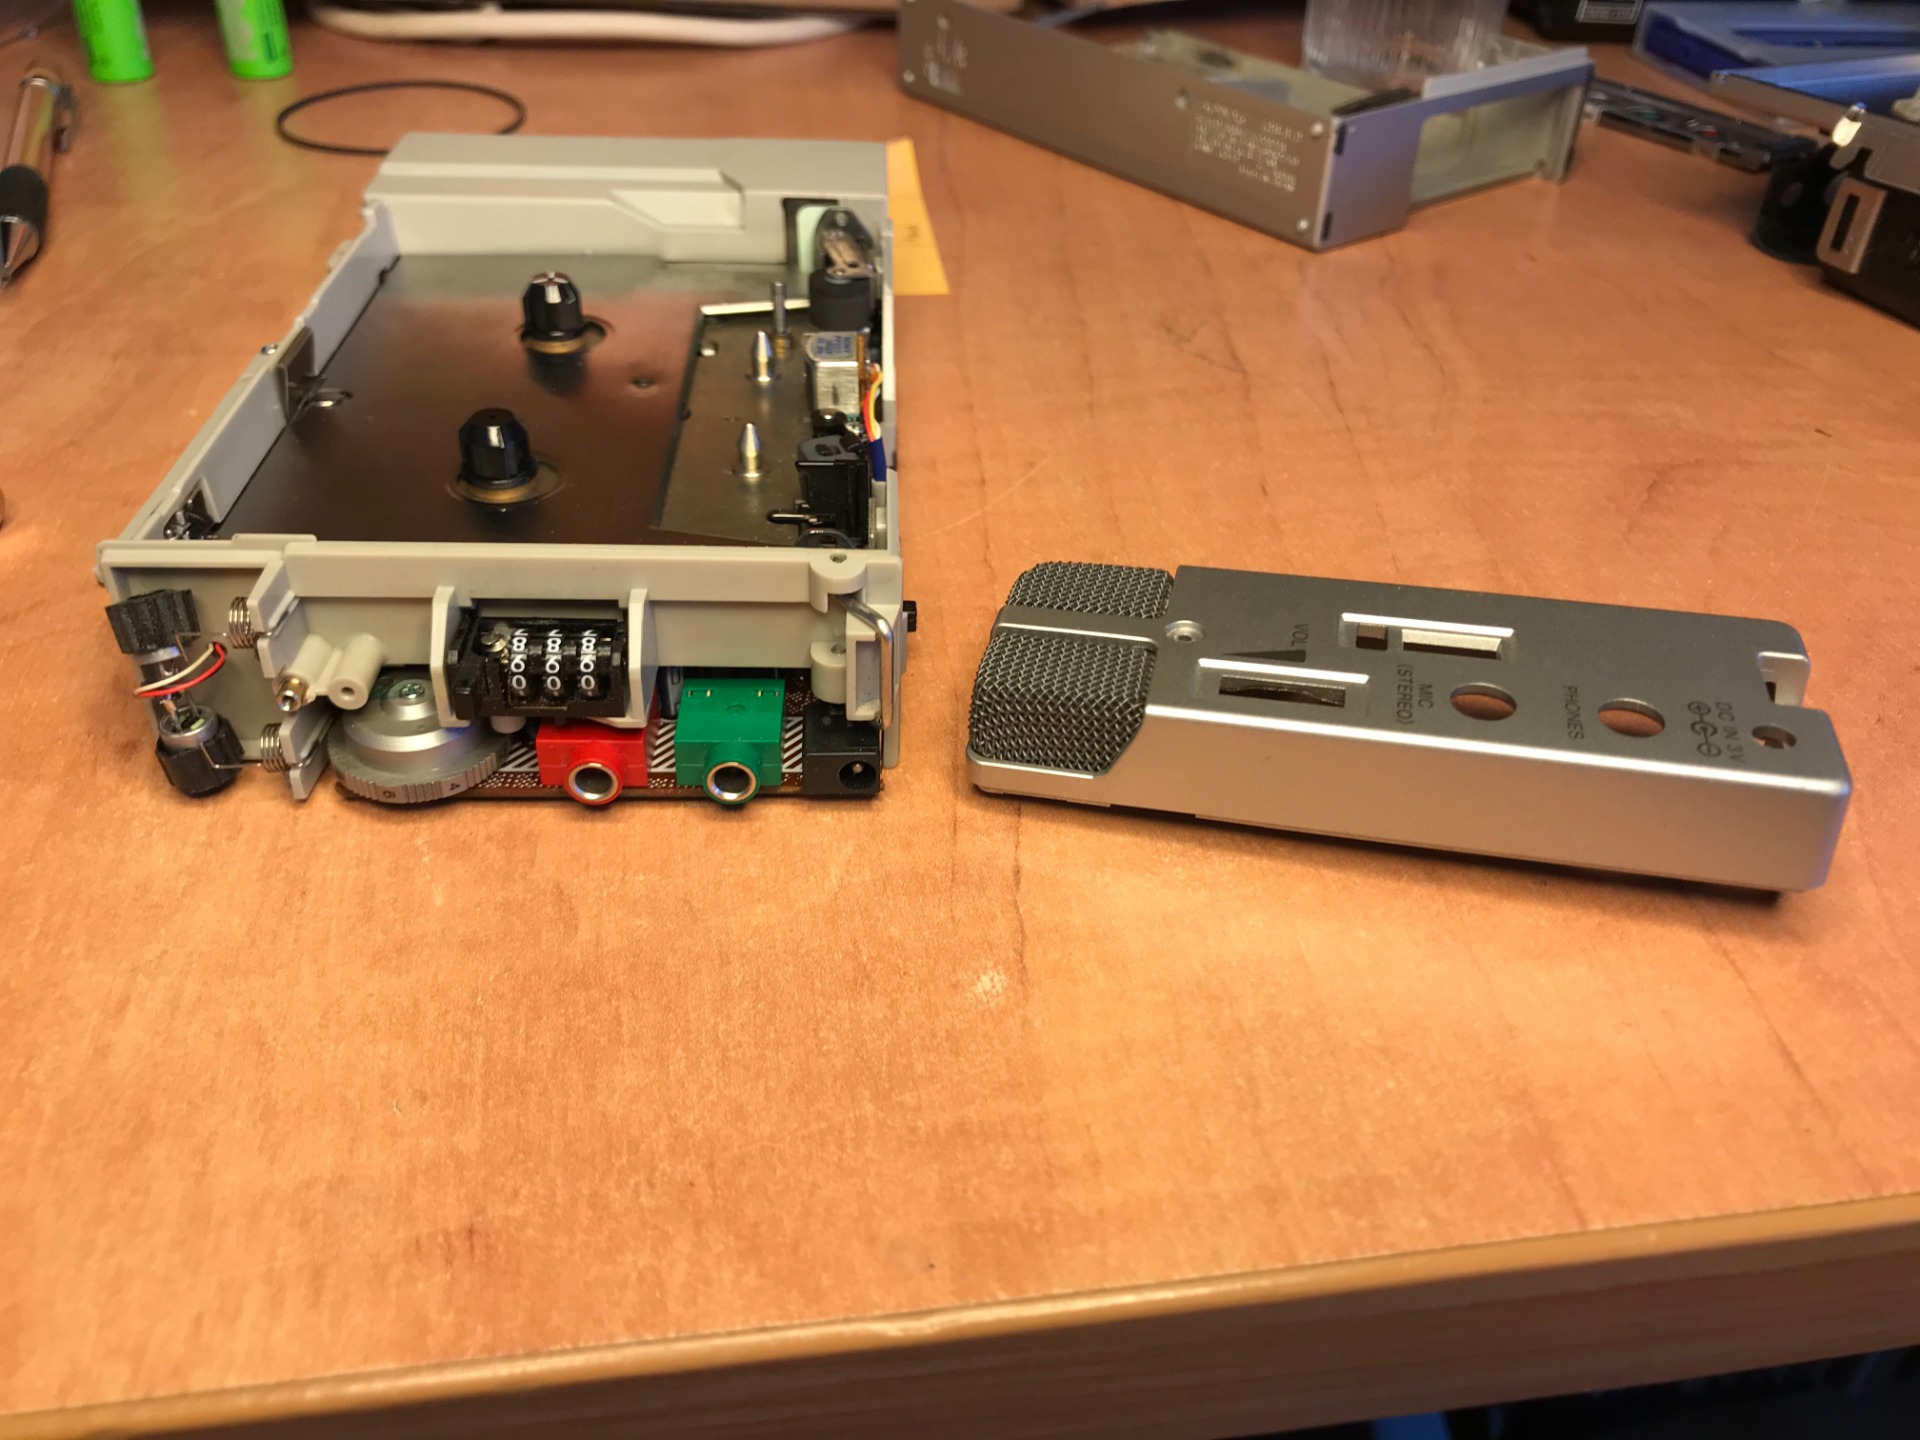

The panel with the microphone comes off easily, a single screw and a clip keep this panel in place.

The speaker can be lifted out of the housing with little effort, but is attached to the circuit board with wires.

A small screw still needs to be removed from the circuit board before it can be lifted up.

You will have to loosen some stickers before the print really comes off.

I can't lift the circuit board high, so I hold it upright with tweezers to look at the inside. The printed circuit board must be treated with care, the small wires can be easily broken.

Here's a part of the running gear, with the belt in question that I'm going to replace.

Let's compare, the old belt is clearly out of decency and has seen better days. The new one is correct in size so can be put in.

Also here is the belt of the tick counter, it is very small, but still works well.
I have replaced the belt of the running gear, the device can be reassembled.

First the microphone panel goes back on and screw it back on.

Before I put the control panel back on, I put the detection button back as it should.

Replace the control panel with the Corder upside down (circuit board facing up). Once the panel is on, turn the whole thing over. If all is well, the detection button should stick out here. also test the slider underneath.

The screws can now be put back in.

don't forget to put the screw on the circuit board back!


The flap at the back can now be put back on, just check whether the slides are in the correct position. Preferably, you slide the Equalizer's position to Metal/Cr02. Then the housing is just that little bit easier.
Make sure that no wires protrude when putting it back! The lid should snap back into place with little effort.


Make sure that the ribbon for the batteries is in place, after which the cover can be screwed back on.

Now the inner wall can be fixed again.

Replacing the hinge under the cover is not easy, slide it on from above and push the hinge a bit to the left by hand. Then gently push it further down, the same goes for the other side.

There is also a hinge on the cover itself, which disappears into the slot that is between the housing and the other hinge that I have just replaced.

You can slide it in like that, but it also has to get stuck to the hinge itself.
The flap must be slid to the hinge below on both the left and right. This should be done at the same time as you slide the flap into the Corder. It can be quite difficult to get this done.

Now just put in the batteries and it's ready for the big test!
He doesn't play perfectly yet, but suspect that this is purely due to a long standstill, with some help he will still get going. Time will tell if this problem will resolve itself or if I should check it again.
While recording, I forgot that there was still a speaker built in...
August 12, 2020
August 14, 2020
The Corder has now been able to run a test for a day or two. Something that struck me right from the start is how dull the music sounded. The sound was also not in balance, the left was clearer than the right.
But I looked at it for a while and indeed, these problems quickly subsided. The sound is now clear and the stereo is balanced. Sometimes it helps to just wait a while before you decide to tinker with it again. Many of these machines have stood still for years and need to be reinstated. The same applies to the TCS-370.
Now that he is playing well, I take a look at a small defect that I noticed.

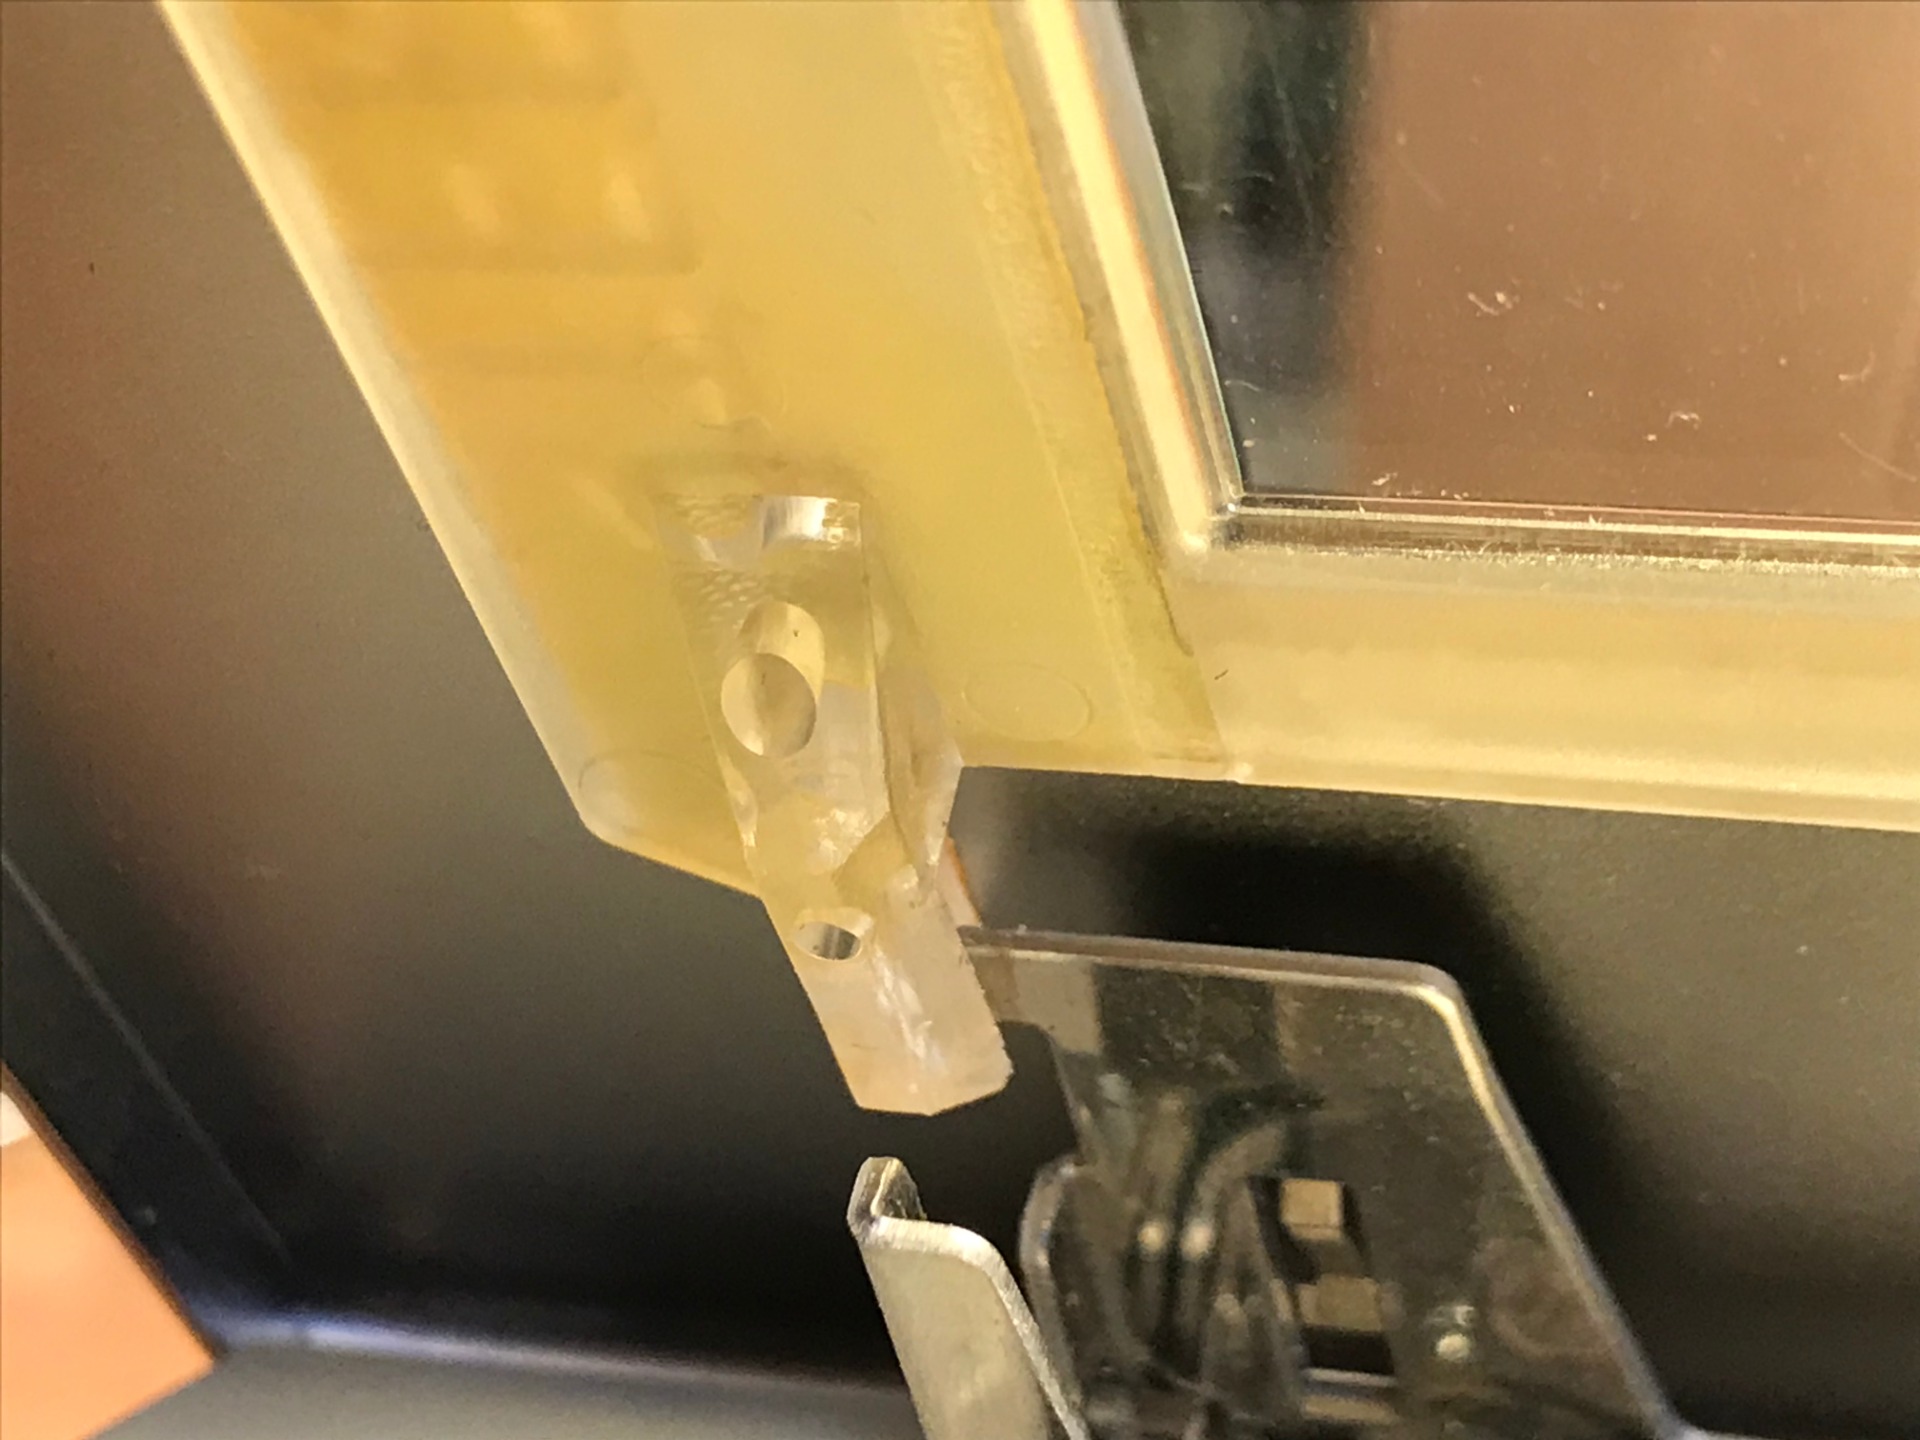
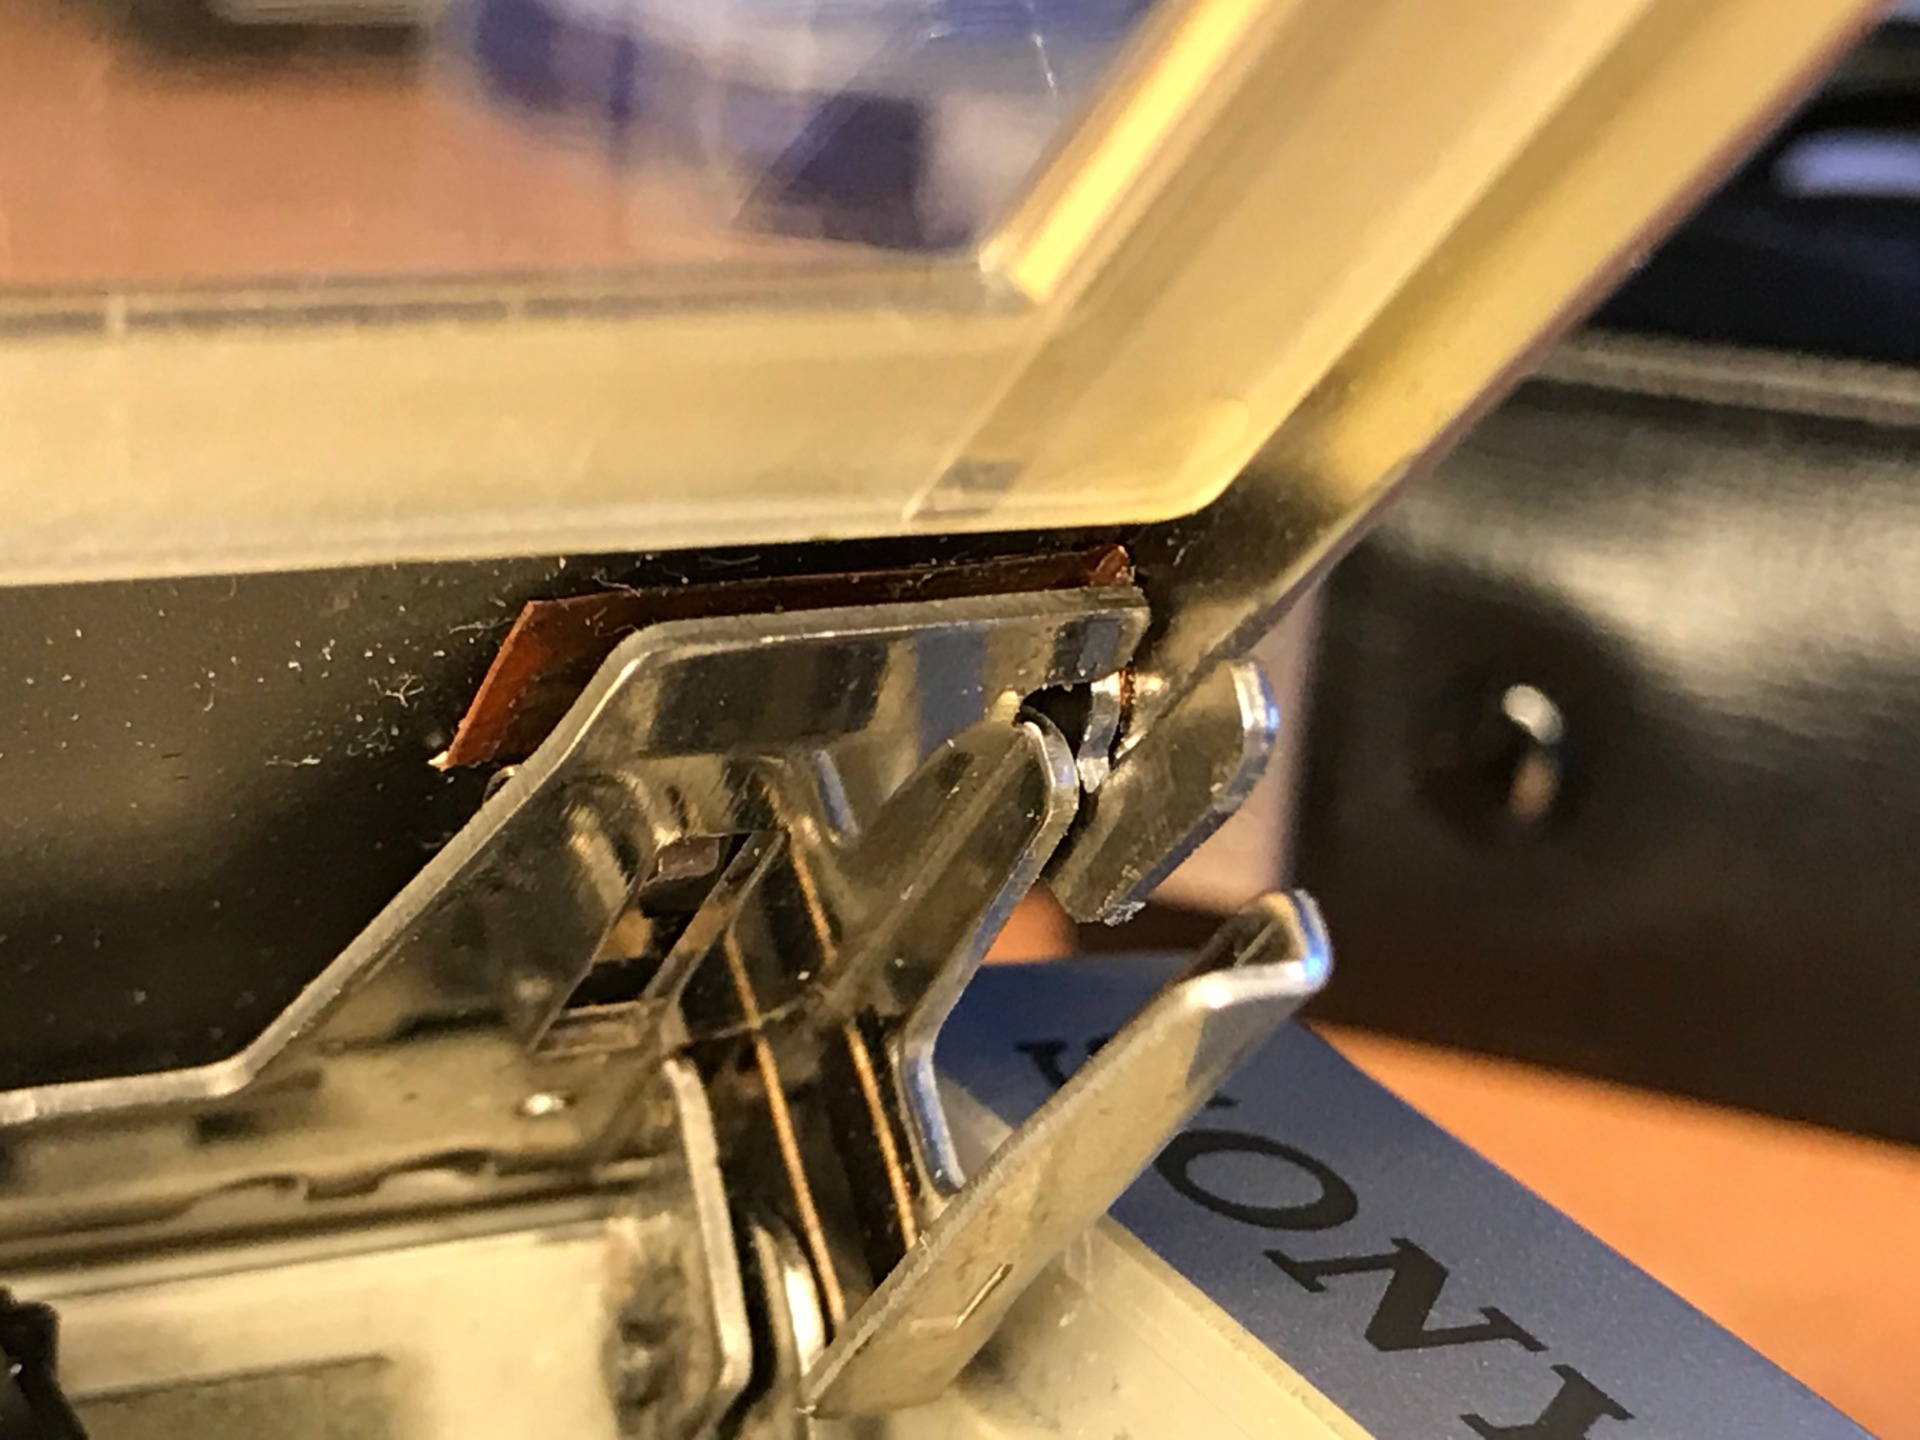
The window in the lid is loose on one side, I put some force on it and the whole window comes loose from the lid.


It wasn't so tight anymore, but it's not a big problem, the window is still intact so it can easily be reattached to the valve.


Superglue is a nice answer to this. Of course, be careful not to put too much on it. It affects the transparency of plastic and can reach places where it should not be, a thin layer around is enough. I carefully put the window back, press it down and let it dry.

Also with me something ends up on the window, with some alcohol I manage to get this off, then I immediately wipe the entire Corder with a damp cloth.

After this I clean the head and other elements with 96% alcohol.


There's one more thing I'm missing, a handy clip to hang it on your pants. There are two eyes on the case, which come in handy here.
First I measure the whole thing and make a sketch, then I cut it out to see if the measurements are correct.


If the sizes are right I can start, it has a somewhat unusual shape and it is not really easy to get everything to fit.


But the end result is worth talking about! The brace fits perfectly and does not fall off by itself.
This makes the Sony TCS-370 ready for use!
August 15, 2020
Related pages:
Sony TCM-6 Walkman Repair
Sony WM-DD30 Walkman Repair
Realistic SCP-7 Repair
Compact Cassette Information
Compact Cassette Repair
New old tapes! blog
Compact Cassette Gallery